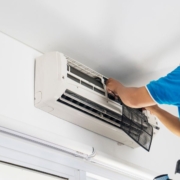
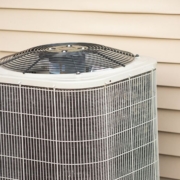
How Many Amps Does a Window AC Use

How Many Amps Does a Window AC Use

Understanding the electrical requirements of a window air conditioner (AC) is essential for safe operation and proper installation. The amperage rating determines the current drawn from the circuit, which affects breaker sizing, wiring, and overall safety. Knowing how many amps a window AC uses helps homeowners avoid tripped breakers, overheating wires, and electrical hazards.

Factors Affecting Amperage

The amperage drawn by a window AC depends on several factors. Cooling capacity, measured in BTUs (British Thermal Units), directly influences current. Small units, such as 5,000–6,000 BTU models, typically use 4–6 amps. Larger units, ranging from 10,000–12,000 BTU, can draw 10–12 amps or more.

The energy efficiency rating, or EER, also affects current draw. High-efficiency models use less electricity for the same cooling output. Older units or models with lower efficiency may draw higher amperage for equivalent cooling.

Voltage is another factor. Most residential window AC units operate on 120 volts, but some larger units require 220–240 volts. Amperage will vary depending on the voltage supply and unit specifications. Electrical codes and manufacturer guidelines should always be followed.

How to Determine Amps

Amps can be found on the manufacturer’s nameplate or user manual. The label lists voltage, wattage, and sometimes amperage. For units that provide wattage but not amps, amperage can be calculated using the formula:

Amps = Watts ÷ Volts

For example, a 1,200-watt AC operating at 120 volts draws 10 amps (1,200 ÷ 120 = 10). This calculation helps verify that the circuit can handle the load.

Using a clamp meter is another method for measuring current draw directly. This tool measures the amperage while the unit is running, providing real-time data. It is useful for checking older units or confirming manufacturer specifications.

Circuit Requirements

Window AC units require a dedicated circuit to prevent overload. Small units under 8 amps can operate safely on a standard 15-amp household circuit. Units drawing 10–12 amps may require a 20-amp breaker to handle startup surges.

Wiring should match the amperage requirements. Standard 14-gauge wire is suitable for 15-amp circuits, while 12-gauge wire is required for 20-amp circuits. Proper wiring reduces the risk of overheating and fire hazards.

Common Issues Related to Amperage

Incorrect amperage can cause several problems. If the AC draws more current than the circuit rating, breakers may trip frequently. Low-voltage situations can reduce cooling performance and damage the compressor.

High amperage can also indicate mechanical or electrical issues, such as a failing motor, dirty coils, or blocked airflow. Regular maintenance, including cleaning filters and coils, helps maintain proper current draw and efficiency.

Tips for Safe Operation

Always check the nameplate for voltage and amperage specifications before installation. Ensure the circuit can handle both continuous and startup current. Avoid using extension cords, as they may not support the required amperage and can overheat.

Install the unit on a properly grounded outlet to prevent electrical hazards. Monitor breaker performance and replace worn or outdated wiring. If the AC trips the breaker repeatedly, inspect the system for mechanical issues or consult a licensed electrician.

FAQ

Do all window AC units use the same amps?
No. Amperage varies with BTU size, efficiency, and voltage. Small units may use 4–6 amps, while larger units can draw 10–12 amps or more.

Can I plug a large window AC into a standard outlet?
Only if the outlet and circuit can handle the unit’s amperage, typically up to 12 amps for 120-volt circuits. Larger units may require a 20-amp breaker or 220-volt supply.

What happens if the AC draws too many amps?
The circuit breaker may trip, wiring can overheat, and electrical components may be damaged, posing a safety risk.

How can I measure my AC’s amps?
Use a clamp meter on the power cord or consult the manufacturer’s nameplate. Amps can also be calculated by dividing wattage by voltage.

Does higher efficiency reduce amperage?
Yes. High-efficiency models often draw less current while providing the same cooling output, reducing energy consumption and strain on the circuit.

Conclusion

The amperage usage of a window AC varies based on cooling capacity, efficiency, and voltage. Small units typically draw 4–6 amps, while larger units can reach 10–12 amps or more. Correct amperage ensures safe operation, proper circuit sizing, and prevents electrical hazards. Checking the manufacturer’s specifications, using a clamp meter, and providing dedicated circuits with appropriate wiring are essential for reliable performance. Maintaining clean filters, clear airflow, and routine inspections helps keep current draw within safe limits, protecting both the AC and household electrical system. Understanding how many amps a window AC uses ensures efficient and safe cooling for your home.

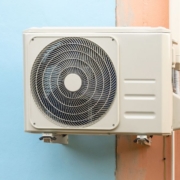
How to Use AC Pro

How to Use AC Pro

AC Pro is a commonly used refrigerant and AC performance product designed to recharge and maintain automotive air conditioning systems. It helps restore cooling efficiency in vehicles experiencing low refrigerant levels. Understanding the proper use of AC Pro ensures safe operation, effective cooling, and protection of system components.

What Is AC Pro

AC Pro is a R-134a refrigerant combined with a trace of lubricant for the compressor. It is formulated for automotive AC systems and comes in pressurized cans with a hose and gauge for application. The product allows vehicle owners to recharge the AC system without specialized equipment.

AC Pro is suitable for vehicles manufactured after 1994 that use R-134a refrigerant. The product does not replace professional service for major leaks or system damage, but it is effective for minor refrigerant top-ups and maintaining AC performance.

Tools and Safety Equipment

Using AC Pro requires proper tools and safety measures. A typical AC Pro kit includes a gauge, hose, and pressure indicator. The gauge helps monitor the high and low side pressures during charging.

Safety equipment is essential. Gloves and goggles protect against refrigerant contact, which can cause frostbite or eye injury. Ensure the vehicle is parked in a well-ventilated area and the engine is off during setup. Avoid inhaling refrigerant vapors, which can be harmful.

Steps to Use AC Pro

Begin by checking the vehicle’s AC system for leaks. Leaks can prevent proper cooling and waste refrigerant. Inspect hoses, connections, and the compressor for visible damage.

Locate the low-pressure service port, usually on the larger suction line between the evaporator and compressor. Do not connect to the high-pressure side, as this can be dangerous.

Attach the AC Pro hose to the low-pressure port. Shake the can well to mix refrigerant and lubricant. Start the engine and turn the AC system to maximum cooling with fan at high speed.

Slowly open the valve on the AC Pro can. Monitor the pressure gauge and listen for changes in AC performance. The goal is to reach the recommended low-pressure reading, usually 25 to 45 PSI depending on ambient temperature. Do not overfill, as excessive pressure can damage the system.

After reaching the desired pressure, close the can valve and remove the hose. Check for consistent cold air from the vents. Let the system run for several minutes and verify proper operation.

Maintenance Tips

AC Pro is a temporary solution for low refrigerant levels. If the AC loses cooling frequently, a professional leak inspection and service is recommended. Avoid repeated overcharging, which can strain the compressor and valves.

Store unopened cans in a cool, dry place away from direct sunlight. Do not puncture or expose cans to high temperatures. Regularly check the AC filter and clean the condenser to maintain airflow and efficiency.

FAQ

Can AC Pro fix a leaking AC system?
No. AC Pro replenishes refrigerant but does not seal leaks. A professional repair is required for leaks.

Is AC Pro safe for all vehicles?
AC Pro is safe for vehicles using R-134a refrigerant manufactured after 1994. Older vehicles using R-12 require a different product.

How much AC Pro should I use?
The amount depends on the vehicle’s system capacity, typically 12 to 32 ounces. Use the gauge to prevent overfilling.

Can I use AC Pro if my AC is not cooling at all?
If the system produces no cold air, the issue may involve the compressor, electrical components, or a major leak. AC Pro will not solve these problems.

How often can I use AC Pro?
It can be used as needed to maintain refrigerant levels, but repeated top-ups indicate a possible leak or system problem that requires professional inspection.

Conclusion

AC Pro is an effective tool for recharging and maintaining automotive air conditioning systems. Proper use involves connecting to the low-pressure port, monitoring pressure with the included gauge, and adding refrigerant slowly to avoid overcharging. Safety precautions, such as wearing gloves and goggles and working in a well-ventilated area, are essential. While AC Pro restores cooling efficiency for minor refrigerant loss, persistent issues indicate leaks or mechanical problems requiring professional repair. Regular AC maintenance, including filter cleaning, coil inspection, and refrigerant monitoring, ensures long-lasting performance, energy efficiency, and reliable comfort in your vehicle.

Why Does My AC Keep Turning Off

Why Does My AC Keep Turning Off

An air conditioning system that cycles on and off frequently, a condition known as short cycling, can reduce comfort, increase energy bills, and cause system wear. Understanding the causes and solutions for an AC that keeps turning off helps maintain efficient and reliable cooling.

Common Causes of an AC Turning Off

One frequent cause is thermostat issues. If the thermostat is faulty, miscalibrated, or placed near heat sources, it may send incorrect temperature signals, causing the AC to shut off prematurely. Modern digital thermostats can display error codes indicating wiring or sensor problems.

Electrical problems are another common factor. Tripped breakers, blown fuses, or loose wiring can interrupt power to the system. Overloaded circuits or voltage fluctuations may trigger safety mechanisms that shut the AC down to prevent damage.

Dirty air filters or restricted airflow can also cause frequent shutdowns. When airflow is blocked, the evaporator coil may freeze, activating a low-pressure safety switch that turns the system off. Clean filters, proper ductwork, and unobstructed vents are essential for smooth operation.

Refrigerant issues are a critical factor. Low refrigerant levels can cause the low-pressure switch to stop the compressor to prevent damage. Conversely, overcharging the system can increase pressure, triggering high-pressure cutoffs. Both conditions result in frequent AC shutdowns.

Mechanical problems, including a failing compressor, condenser fan, or blower motor, can also cause intermittent operation. If a component overheats or malfunctions, the system may shut down to prevent further damage. Ice formation on the evaporator coil due to low refrigerant or poor airflow is another mechanical cause.

Troubleshooting an AC That Keeps Turning Off

Start with simple checks. Ensure the thermostat is set to the correct mode and temperature. Inspect the breaker panel for tripped circuits or blown fuses. Check the air filter for dirt or clogging and replace it if needed.

Observe the AC system while operating. Listen for unusual noises from the compressor or fan. Inspect the evaporator and condenser coils for ice or debris. Ensure that vents and ducts are unobstructed.

Refrigerant levels should be checked with a manifold gauge set by a certified technician. Low or high refrigerant can trigger pressure switches that stop the system. Electrical components, including the contactor, capacitor, and wiring, should be inspected for wear or damage.

Regular maintenance prevents many of these issues. Cleaning coils, replacing filters every 30 to 90 days, checking refrigerant levels, and inspecting electrical connections reduce the likelihood of frequent shutdowns.

Preventive Measures

Position the thermostat away from heat sources, direct sunlight, or vents to avoid false readings. Ensure proper airflow by sealing ducts and keeping vents clear. Maintain recommended refrigerant levels and schedule annual professional inspections.

Checking capacitor health, blower motors, and condenser fans during routine service helps prevent overheating or mechanical failure. Ice formation on evaporator coils can be avoided by monitoring airflow and refrigerant levels. These measures extend system life and improve efficiency.

FAQ

Why does my AC turn off before reaching the set temperature?
This may indicate a faulty thermostat, low refrigerant, blocked airflow, or a tripped safety switch.

Can a dirty air filter cause the AC to turn off?
Yes. Restricted airflow can cause the evaporator coil to freeze, triggering safety mechanisms that shut down the system.

Is short cycling harmful to my AC?
Frequent on-off cycles increase wear on the compressor and fan motor, reduce efficiency, and may shorten the system’s lifespan.

How do I know if refrigerant is the issue?
A certified technician can measure pressure levels using a manifold gauge set. Low or high readings indicate undercharging or overcharging.

When should I call a professional?
If the AC continues to short cycle after checking filters, thermostat, and breakers, a licensed HVAC technician should inspect electrical, refrigerant, and mechanical components.

Conclusion

An AC that keeps turning off can be caused by thermostat issues, electrical problems, restricted airflow, refrigerant imbalances, or mechanical failures. Troubleshooting involves checking the thermostat, breakers, air filters, and system components while monitoring for unusual noises or ice formation. Maintaining clean filters, proper airflow, and correct refrigerant levels prevents frequent shutdowns. Regular professional inspections help detect and correct issues early, ensuring reliable operation, energy efficiency, and extended system life. Addressing the root cause of frequent AC shutdowns maintains comfort and protects the system from damage.

How to Check Refrigerant Level in AC

How to Check Refrigerant Level in AC

Refrigerant is a critical component of an air conditioning system. It absorbs heat from indoor air and releases it outside, enabling the cooling process. Maintaining the correct refrigerant level ensures efficient operation, prevents system damage, and extends the lifespan of the AC. Understanding how to check refrigerant levels helps identify leaks and maintain performance.

Understanding Refrigerant in AC

Most modern AC systems use R-410A or R-22 refrigerant, though R-22 is being phased out due to environmental regulations. Refrigerant is stored under pressure and circulates through the compressor, evaporator coil, and condenser coil. The correct amount of refrigerant is essential; too little reduces cooling efficiency, and too much can damage the compressor.

The system also includes a low-pressure switch and high-pressure switch that monitor refrigerant levels and prevent operation if levels are unsafe. Low refrigerant can cause the evaporator coil to freeze, while overcharging may trigger high-pressure cutoffs.

Tools Required for Checking Refrigerant

Checking refrigerant levels requires specialized tools. A manifold gauge set measures high and low side pressures. Digital gauges provide precise readings in PSI or kPa. Some technicians use thermometers to measure line temperatures for a basic performance check.

Safety equipment is essential. Gloves, goggles, and protective clothing protect against refrigerant exposure, which can cause frostbite or eye irritation. Working with refrigerant also requires certification under EPA Section 608 for handling certain types.

Steps to Check Refrigerant Level

Start by turning off the AC power at the breaker. Connect the manifold gauge hoses to the low and high side service ports. The low side port is usually on the larger suction line, while the high side is on the smaller liquid line.

Turn on the AC and allow it to run for 5–10 minutes. Observe the pressure readings. For R-410A, typical low-side pressure ranges between 110 and 140 PSI, and high-side pressure ranges between 320 and 410 PSI, depending on ambient temperature. R-22 systems have different pressure ranges, typically lower than R-410A.

Compare the measured pressures with manufacturer specifications. If readings are below the recommended range, the system may be undercharged, often due to leaks. Overcharged readings indicate excessive refrigerant, which can strain the compressor.

Some systems allow refrigerant charging using a refrigerant cylinder and the manifold gauge set. This should only be done by certified technicians to avoid overcharging, undercharging, or environmental hazards.

Signs of Incorrect Refrigerant Levels

Low refrigerant often causes reduced cooling performance, longer run times, or frozen evaporator coils. High refrigerant levels can increase compressor pressure, trigger safety cutoffs, and reduce system efficiency.

Visible leaks can occur at fittings, coils, or service valves. Using leak detection tools, such as electronic sensors or fluorescent dyes, helps pinpoint refrigerant loss. Regular inspection prevents costly repairs and maintains consistent cooling.

FAQ

Can I check refrigerant level without a gauge?
Visual or temperature checks can indicate a problem, but accurate measurement requires a manifold gauge set or digital refrigerant gauge.

Is it safe to add refrigerant myself?
Adding refrigerant requires proper training and EPA certification. Incorrect charging can damage the AC and violate regulations.

How often should refrigerant be checked?
Annual maintenance is recommended. Checking pressures during routine AC service ensures optimal performance.

What happens if refrigerant is low?
Low refrigerant reduces cooling efficiency, may cause the evaporator coil to freeze, and can overwork the compressor.

Can overcharging refrigerant harm the AC?
Yes. Excess refrigerant increases pressure in the system, strains the compressor, and may trigger safety cutoffs.

Conclusion

Checking refrigerant levels in an AC system is essential for efficient and reliable cooling. Proper levels allow the evaporator coil and condenser to operate effectively, maintain energy efficiency, and protect system components. Accurate measurement requires a manifold gauge set and knowledge of manufacturer specifications. Low or high refrigerant levels can cause poor performance, frozen coils, or compressor damage. Regular inspection and maintenance help identify leaks, maintain correct pressures, and ensure the air conditioning system operates safely and efficiently. Handling refrigerant should only be done by trained and certified professionals to comply with safety and environmental regulations.

What Is Central AC

What Is Central AC

Central air conditioning (AC) is a system designed to cool an entire building from a single, centralized location. Unlike window units or portable air conditioners, central AC provides consistent temperature control throughout multiple rooms or floors. Understanding its components, operation, and benefits helps homeowners make informed decisions for efficient cooling.

How Central AC Works

Central AC systems use a network of ducts to distribute cooled air. The system has two main components: the evaporator coil inside the air handler or furnace and the condenser unit located outside the building. The evaporator coil absorbs heat from indoor air, while the condenser releases heat outside.

Refrigerant circulates between these components. It evaporates in the indoor coil, absorbing heat, and condenses in the outdoor unit, releasing it. A blower fan moves air over the evaporator coil and through the ductwork, delivering cooled air to each room. The thermostat regulates the system by maintaining the desired indoor temperature.

Central AC systems require proper duct design and insulation for efficient operation. Leaky or poorly insulated ducts reduce cooling performance and increase energy consumption. Installing dampers in the ductwork allows for balancing airflow between rooms.

Components of Central AC

The major components of central AC include the compressor, condenser coil, evaporator coil, expansion valve, and ductwork. The compressor, located in the outdoor unit, pressurizes and circulates refrigerant. The condenser coil dissipates heat from the refrigerant to the outside air.

The evaporator coil absorbs heat from indoor air, and the expansion valve controls refrigerant flow into the evaporator. The ductwork channels conditioned air to rooms and returns warm air to the air handler for cooling. The thermostat monitors temperature and communicates with the system to maintain consistent comfort.

Filters are also an important component, trapping dust, pollen, and other particles. Clean filters improve air quality and reduce strain on the system, enhancing energy efficiency and prolonging the lifespan of central AC components.

Advantages of Central AC

Central AC provides uniform cooling throughout the building, eliminating hot spots common with window or portable units. It is quieter because the compressor and condenser are located outside, reducing indoor noise levels.

Energy efficiency is another advantage. Modern systems have SEER (Seasonal Energy Efficiency Ratio) ratings ranging from 14 to 22. Higher SEER ratings indicate better energy efficiency, reducing monthly electricity costs. Central AC also improves indoor air quality through filtration and humidity control, creating a more comfortable living environment.

Proper maintenance, including cleaning coils, replacing filters, and inspecting ductwork, ensures reliable performance and extends system life. Routine service prevents refrigerant leaks, electrical issues, and mechanical wear that could lead to expensive repairs.

Installation Considerations

Installing central AC requires professional design and installation. Factors include home size, insulation, window exposure, and climate. Sizing the system correctly is critical. An undersized system may struggle to cool, while an oversized system cycles frequently, wasting energy and reducing humidity control.

Duct placement and insulation are important for minimizing energy loss. The outdoor condenser unit should be installed on a level surface with adequate clearance for airflow. Electrical connections must comply with local codes and provide proper voltage and amperage for the system.

FAQ

How does central AC differ from a window unit?
Central AC cools multiple rooms through ductwork, while window units cool a single room. Central AC provides uniform temperature control and quieter operation.

What is SEER rating in central AC?
SEER (Seasonal Energy Efficiency Ratio) measures energy efficiency. Higher SEER ratings, such as 16 or above, indicate lower energy use for the same cooling output.

How often should central AC be serviced?
Annual maintenance is recommended, including coil cleaning, filter replacement, and duct inspection. Proper service ensures efficient operation and prevents breakdowns.

Can central AC improve indoor air quality?
Yes. Filters trap dust, pollen, and particles. Some systems include UV lights or additional filtration to reduce allergens and bacteria.

How long does a central AC system last?
With proper maintenance, central AC systems typically last 12 to 20 years. Lifespan depends on usage, maintenance, and climate conditions.

Conclusion

Central AC is a comprehensive cooling system designed to maintain consistent comfort throughout a building. It uses a combination of evaporator and condenser coils, a compressor, and ductwork to deliver cooled air efficiently. Proper installation, correct system sizing, and regular maintenance ensure energy efficiency, improved indoor air quality, and long-term reliability. Central AC offers quiet operation, uniform cooling, and humidity control, making it an effective solution for year-round indoor comfort. Understanding its components, operation, and advantages helps homeowners optimize performance and reduce energy costs while maintaining a comfortable living environment.

Why Is My AC Not Turning On

Why Is My AC Not Turning On

An air conditioning system that fails to turn on can disrupt comfort and may indicate a range of underlying issues. Understanding common causes, electrical and mechanical components involved, and troubleshooting methods helps homeowners identify problems and restore proper operation efficiently.

Common Causes of an AC Not Turning On

One of the primary reasons an AC fails to start is an electrical issue. Tripped breakers, blown fuses, or disconnected wiring can interrupt power to the system. Circuit breakers rated between 15 to 30 amps often protect residential AC units. If the breaker trips repeatedly, it may indicate an overload or short circuit.

Thermostat problems are another frequent cause. A thermostat that is set incorrectly, has dead batteries, or contains faulty internal circuits may not signal the AC to start. Digital thermostats with LCD displays may show error codes, which can indicate wiring issues or sensor malfunctions.

The capacitor is an essential component that provides a startup boost to the compressor and fan motors. A weak or failed capacitor can prevent the AC from starting, producing a humming sound without motor movement. Similarly, the contactor, which controls power flow to the compressor and condenser fan, may wear out over time, blocking current and preventing operation.

Mechanical issues can also prevent an AC from turning on. A seized compressor or fan motor, refrigerant problems, or ice formation on the evaporator coil may trigger safety devices like pressure switches that shut down the system. Low refrigerant levels can activate the low-pressure switch, preventing the compressor from running.

Troubleshooting an AC That Won’t Turn On

Start with basic checks. Confirm that the AC is receiving power and the breaker or fuse is functional. Inspect the thermostat settings and replace batteries if necessary. Ensure the thermostat is set to cool mode with a temperature lower than the current room temperature.

Next, inspect the AC components visually. Look for obvious signs of damage, burnt wires, or loose connections. Check the capacitor for bulging or leakage, which indicates failure. Listen for unusual noises from the compressor or fan motor, such as humming, clicking, or rattling.

For more advanced diagnostics, use a multimeter to measure voltage at the capacitor, contactor, and thermostat terminals. Ensure the AC is disconnected from power before performing any electrical tests. If the multimeter readings are outside the manufacturer’s specifications, the component may need replacement.

Professional HVAC technicians can safely diagnose and repair electrical or mechanical failures, including replacing capacitors, contactors, or motors. Handling refrigerants and complex electrical components requires training and certification.

Preventive Measures

Regular maintenance reduces the risk of an AC not turning on. This includes cleaning or replacing air filters every 30 to 90 days, inspecting wiring and electrical components, and checking refrigerant levels annually. Cleaning the evaporator and condenser coils maintains airflow and prevents ice formation.

Lubricating motors, checking capacitor ratings, and ensuring the contactor is free of corrosion are preventive steps that extend system lifespan. Monitoring the system for unusual noises or performance changes allows early intervention before complete failure.

FAQ

Why won’t my AC turn on but the fan works?
This usually indicates a compressor or capacitor issue. The fan may run, but the compressor is not starting, often due to a weak capacitor or faulty contactor.

Can a tripped breaker cause the AC to not turn on?
Yes. A tripped breaker cuts power to the AC. Resetting the breaker may restore operation, but repeated trips suggest an underlying electrical problem.

Could the thermostat prevent my AC from turning on?
Yes. Faulty settings, dead batteries, or damaged wiring can prevent the thermostat from signaling the AC to start.

How do I know if the capacitor is bad?
Signs include humming without fan or compressor movement, bulging, or leakage. Testing with a multimeter in capacitance mode confirms its condition.

Is it safe to attempt repairs myself?
Simple checks like verifying breakers or thermostat settings are safe. Electrical or refrigerant-related repairs should be performed by a licensed HVAC technician.

Conclusion

An AC that does not turn on may have electrical, thermostat, capacitor, contactor, or mechanical issues. Common causes include tripped breakers, faulty thermostat signals, weak capacitors, or seized motors. Troubleshooting begins with checking power, thermostat settings, and visual inspection of components. Advanced diagnostics may require multimeter testing and professional intervention. Regular maintenance, including air filter replacement, coil cleaning, and component inspection, helps prevent startup failures and prolongs the system’s lifespan. Addressing issues promptly ensures reliable cooling, safe operation, and energy-efficient performance for the air conditioning system.

Where to Run AC Condensate Drain Line

Where to Run AC Condensate Drain Line

An air conditioning system removes heat and moisture from indoor air, producing condensate water as a byproduct. Properly managing this water is essential to prevent damage to the home and maintain system efficiency. The AC condensate drain line carries water away from the evaporator coil to a safe discharge point. Understanding where and how to run the drain line ensures reliable operation and prevents water-related issues.

Understanding the Condensate Drain Line

The condensate drain line is typically a PVC or flexible plastic pipe connected to the air handler or evaporator coil. It carries water that forms as the warm indoor air passes over the cold evaporator coil. If the water is not removed properly, it can overflow, leading to water damage, mold growth, or corrosion of AC components.

Most residential systems include a primary drain line and often a secondary or emergency drain line. The primary line handles normal water flow, while the secondary line provides backup in case the primary line clogs. The secondary line is usually routed to a visible location for easy monitoring.

Ideal Locations for Running the Drain Line

The AC condensate drain line should slope downward at approximately ¼ inch per foot to allow gravity to carry water effectively. It can be routed through walls, ceilings, or attics, avoiding long horizontal runs without slope.

Common discharge locations include outside the building, a floor drain, a sump pump, or a condensate pump if the system is below grade. Outdoor discharge points should be located away from foundations, walkways, or landscaping to prevent damage and avoid creating slippery surfaces.

In multi-story buildings, the drain line may need to connect to plumbing systems using a condensate pump to lift water to a suitable outlet. The line should never connect directly to a sewer line without proper air gaps, as this could allow sewer gases to enter the home.

Considerations for Running the Drain Line

Preventing clogs is essential. Installing a cleanout access point near the air handler allows periodic inspection and maintenance. Some systems use PVC piping with a slight slope or flexible tubing with a built-in trap to maintain flow and prevent backflow.

Insulating the drain line in unconditioned spaces prevents condensation from forming on the outside of the pipe. Using white PVC or UV-resistant tubing for outdoor sections increases durability and reduces exposure damage.

For homes in cold climates, ensure the line does not freeze. Drains in attics or exterior walls may need insulation or heat tape to prevent blockage during winter. Maintaining proper slope and avoiding sagging or dips in the line minimizes the risk of standing water that can cause clogs or overflow.

Common Issues with Improper Drain Line Installation

Improperly routed drain lines can lead to water leaks inside the home. Horizontal runs without adequate slope, blocked pipes, or disconnected sections can cause the AC pan to overflow. Mold and algae growth inside the drain line is common when the line is stagnant or poorly maintained.

Inadequate discharge locations can also lead to foundation damage if water pools near the building. Condensate water should always be directed to a safe, approved outlet. Regular maintenance, including cleaning the drain line and checking for blockages, reduces the risk of water damage and ensures efficient AC operation.

FAQ

Can the AC condensate drain line run into the sewer?
No. Direct connection to the sewer is not recommended. Condensate is clean water, and plumbing codes require proper air gaps to prevent sewer gases from entering the home.

Where is the best place to discharge the drain line outside?
Discharge at least 3 to 5 feet away from the foundation, on a slope that directs water away from the house. Avoid walkways or areas where water may pool.

Do I need a condensate pump?
A pump is required if the air handler is located below the drain point, such as in a basement or crawl space. The pump lifts water to the proper outlet.

How often should I clean the drain line?
Cleaning once a year is recommended, or sooner if algae, mold, or slow drainage is observed. Adding a small amount of bleach or vinegar periodically helps prevent growth inside the line.

Can the drain line freeze?
Yes. Drain lines in unheated spaces may freeze in winter. Insulation or heat tape can prevent freezing and blockages.

Conclusion

Running the AC condensate drain line correctly is essential for safe and efficient system operation. The drain line carries water from the evaporator coil to an approved discharge point, preventing overflow, mold, and structural damage. Proper slope, accessible cleanouts, and insulation in unconditioned areas ensure reliable flow. Outdoor discharge points should direct water away from the foundation and walkways, while condensate pumps may be necessary in low installations. Regular inspection and maintenance of the drain line, including cleaning and monitoring for clogs, prevents water-related problems and extends the lifespan of the air conditioning system. Proper installation and care maintain efficient cooling and protect the home from potential water damage.

How to Test an AC Capacitor with a Multimeter

How to Test an AC Capacitor with a Multimeter

The capacitor is a critical component in an air conditioning system. It stores and releases electrical energy to help start and run the compressor and fan motors. A failing capacitor can cause the AC to struggle, make unusual noises, or fail to operate entirely. Testing an AC capacitor with a multimeter allows homeowners and technicians to determine whether the component is functioning correctly.

Understanding AC Capacitors

AC systems typically use two types of capacitors: start capacitors and run capacitors. Start capacitors provide a short burst of energy to help motors start, while run capacitors supply continuous energy to maintain efficient operation. Capacitors are rated in microfarads (µF), and this rating indicates their storage capacity. They also have voltage ratings, such as 370V or 440V, to match the system requirements.

A faulty capacitor can prevent the AC motor from starting, cause the unit to overheat, or lead to repeated tripping of breakers. Common signs include humming noises, slow fan operation, or the system failing to cool. Testing the capacitor can confirm whether replacement is necessary.

Preparing to Test a Capacitor

Safety is crucial because capacitors store high voltage even when the system is powered off. Before testing, turn off the AC at the breaker and disconnect the capacitor from the circuit. Use an insulated screwdriver to discharge the capacitor by bridging its terminals. Proper discharge prevents electric shock during testing.

Select a digital multimeter with a capacitance testing function. If the multimeter does not have capacitance mode, it may be possible to test resistance to check for a shorted capacitor, but this method is less accurate. Ensure the multimeter is rated for the capacitor’s voltage range.

Steps to Test an AC Capacitor

Identify the capacitor terminals, usually labeled C (common), HERM (compressor), and FAN. Remove the wires carefully and note their positions for reconnection. Set the multimeter to the capacitance mode and connect the probes to the capacitor terminals.

For a dual-run capacitor, test between C and HERM and then C and FAN. The measured capacitance should match the rating printed on the capacitor, typically within ±6% tolerance. If the reading is significantly lower or higher than the rated value, the capacitor is faulty.

Another method is the resistance test for non-capacitance multimeters. Connect the probes to the terminals and observe the meter. A healthy capacitor shows a rising resistance as it charges. If the reading stays at zero or infinity, the capacitor is defective.

After testing, discharge the capacitor again if necessary and reconnect it according to the wiring diagram. Proper installation ensures the AC operates efficiently and safely.

Common Issues with AC Capacitors

Capacitors can fail due to age, heat, voltage spikes, or electrical stress. Signs of failure include bulging, leaking fluid, or visible burn marks. Even if the capacitor appears intact, it can still fail internally and affect system performance. Regular inspection and testing can prevent unexpected AC breakdowns.

Replacing a capacitor is usually cost-effective compared to repairing other components damaged by a failed capacitor. Ensuring the replacement matches the µF rating and voltage is essential for system compatibility.

FAQ

Can I test an AC capacitor without removing it?
No. The capacitor must be disconnected from the circuit to prevent inaccurate readings and ensure safety.

What capacitance reading indicates a bad capacitor?
A reading more than ±6% from the rated microfarads or a reading of zero or infinity typically indicates a faulty capacitor.

Is it safe to test a capacitor with the power on?
No. Capacitors store high voltage. Always turn off power and discharge the capacitor before testing.

How often should AC capacitors be tested?
Capacitors should be inspected and tested during annual AC maintenance or when experiencing startup or cooling issues.

Can a failing capacitor damage other AC components?
Yes. A malfunctioning capacitor can overwork the compressor or fan motor, potentially causing electrical or mechanical damage.

Conclusion

Testing an AC capacitor with a multimeter is a reliable way to determine if the component is functioning correctly. The capacitor provides critical energy to start and run compressor and fan motors. Testing requires turning off power, discharging the capacitor, and using the multimeter in capacitance mode to measure its microfarad rating. Readings outside the ±6% tolerance indicate a faulty capacitor. Regular inspection and testing prevent further damage to the AC system and maintain efficient operation. Replacing a defective capacitor with the correct rating ensures reliable performance and extends the lifespan of the air conditioning system.

How to Replace AC Compressor

How to Replace AC Compressor

The AC compressor is a vital component of an air conditioning system. It circulates refrigerant through the system, enabling heat exchange and cooling. When the compressor fails, the AC cannot cool properly, and replacement becomes necessary. Understanding the process, safety considerations, and potential costs helps homeowners manage repairs effectively.

Signs a Compressor Needs Replacement

Several indicators suggest a failing AC compressor. The unit may produce warm air despite running continuously. Unusual noises such as clanking, rattling, or humming can indicate mechanical failure. The compressor may also trip the circuit breaker frequently due to electrical issues.

Another sign is refrigerant leaks near the compressor. Corrosion or oil stains on the unit may indicate that the internal components are damaged. If the system repeatedly cycles on and off without cooling effectively, the compressor could be at fault. Timely replacement prevents further damage to the AC system.

Preparing for Compressor Replacement

Before starting the replacement, the AC system must be powered off at the breaker. It is essential to recover the refrigerant using certified recovery equipment to comply with environmental regulations. Handling refrigerants without certification is illegal and hazardous.

Identify the correct replacement compressor based on the make, model, and refrigerant type of the AC system. Compressors are designed for specific systems, and incorrect units may cause inefficiency or damage. Check voltage, phase type, and mounting style to ensure compatibility.

Steps to Replace the AC Compressor

The process begins by disconnecting electrical wiring from the old compressor. Marking the connections helps ensure proper reconnection. Next, remove refrigerant lines and mounting bolts. The compressor may be heavy, so using proper lifting techniques or support is important to prevent injury.

Install the new compressor by positioning it securely and tightening mounting bolts to the manufacturer’s specifications. Reconnect the refrigerant lines using the correct fittings and torque settings. Electrical connections should be restored according to the wiring diagram.

The system must then be evacuated using a vacuum pump to remove moisture and air from the refrigerant lines. Once the system reaches the required vacuum level, recharge with the correct type and amount of refrigerant. Testing the system ensures proper operation, including verifying pressures, temperatures, and electrical performance.

Safety Considerations

Replacing an AC compressor involves handling high-pressure refrigerants, electrical components, and heavy equipment. Improper handling can cause injury or system damage. Only certified HVAC technicians should perform refrigerant recovery, evacuation, and recharge.

Electrical safety is critical. Ensure the breaker is off, and all connections are properly insulated. Avoid bypassing safety devices such as fuses or pressure switches. Proper tools, protective equipment, and adherence to local regulations are necessary for safe replacement.

Maintenance After Replacement

After installing a new compressor, regular maintenance helps prolong its life. Inspect refrigerant levels and recharge if necessary. Clean or replace air filters and ensure condenser coils are free of dirt and debris. Periodically check electrical connections and system pressures to detect potential issues early.

Monitoring the system’s operation during the first few weeks after replacement ensures that the compressor functions efficiently. Addressing minor issues promptly prevents future failures and maintains optimal cooling performance.

FAQ

How long does it take to replace an AC compressor?
Replacement typically requires 4 to 6 hours, depending on system complexity, accessibility, and refrigerant handling.

Can I replace the compressor myself?
Due to refrigerant handling, electrical work, and system evacuation, it is recommended to hire a certified HVAC technician for safe and legal replacement.

What is the cost of replacing an AC compressor?
Costs vary based on compressor type, system size, and labor. Residential replacements often range from $800 to $1,500, including parts and labor.

How do I know if my compressor is failing?
Common signs include warm air, unusual noises, frequent cycling, and visible refrigerant leaks near the compressor.

Can I use a different compressor model?
No. Compressors must match the system’s specifications, including voltage, phase, refrigerant type, and mounting style, to operate correctly.

Conclusion

Replacing an AC compressor is a complex but essential process for restoring proper cooling. Signs of failure include warm air, strange noises, and electrical issues. The replacement requires powering off the system, recovering refrigerant, removing the old compressor, installing a compatible new unit, and properly recharging the system. Safety considerations, including handling refrigerants and electrical components, are critical. Post-replacement maintenance ensures efficient operation and prolongs compressor life. Hiring a certified HVAC technician guarantees compliance with safety standards and local regulations while ensuring the AC system functions reliably.

Lights Dim When AC Turns On

Experiencing dimming lights when an air conditioner starts is a common issue in homes. This usually occurs when the AC draws a high amount of electrical current during startup. Understanding the causes, potential risks, and solutions helps homeowners maintain safe and efficient operation of both lighting and cooling systems.

Why Lights Dim When AC Starts

Air conditioners have compressors and motors that require a large surge of electricity at startup, known as inrush current. This temporary surge can cause voltage drops in the home’s electrical system, resulting in dimming lights. The effect is usually brief, lasting only a few seconds while the AC motor stabilizes.

Older homes with outdated wiring or lower capacity electrical panels may experience more noticeable dimming. High-resistance connections, undersized wires, or shared circuits with other appliances can exacerbate the voltage drop. Homes with multiple large appliances running simultaneously may also see a more significant effect.

Electrical Factors That Contribute to Dimming

The size and condition of the home’s electrical service panel play a key role. Most modern homes have 100 to 200 amp panels, which can handle multiple high-power appliances. Smaller panels or overloaded circuits may struggle when an AC unit starts, causing noticeable light dimming.

Loose or corroded connections at the panel, outlets, or junction boxes increase resistance, which amplifies voltage fluctuations. Poorly balanced circuits, where multiple high-load appliances are connected to the same breaker, also contribute to dimming.

The type of lighting can influence perception. Traditional incandescent bulbs are more sensitive to voltage drops and may visibly dim. LEDs and compact fluorescent bulbs are less affected but can still flicker if voltage fluctuation is significant.

Solutions to Reduce Dimming

One solution is to ensure that the AC is on a dedicated circuit. A dedicated line prevents other appliances from sharing the startup load, reducing voltage drop. Installing a larger service panel or upgrading wiring may be necessary in older homes to handle modern electrical loads.

Adding a soft starter or hard start kit to the AC compressor reduces inrush current during startup, minimizing the impact on household voltage. Regular maintenance, including checking for loose or corroded connections in the panel and at outlets, ensures the system operates efficiently.

Balancing electrical loads across different circuits also helps. Avoid running multiple high-power devices on the same line as the AC, especially during hot summer months when the AC cycles frequently.

Safety Considerations

While brief dimming is usually not dangerous, persistent or severe dimming may indicate an overloaded or faulty electrical system. Overloaded circuits can lead to overheating, tripped breakers, or electrical fires. Consult a licensed electrician to assess wiring, panel capacity, and circuit loads.

Do not ignore repeated dimming or flickering lights, as this can indicate potential hazards. Ensuring that the electrical system meets current codes and can handle the home’s appliances is essential for safety and reliability.

FAQ

Why do lights dim when my AC turns on?
The AC motor requires a large surge of electricity at startup, causing a temporary voltage drop and dimming lights.

Is this dangerous?
Short, mild dimming is usually safe. Persistent or severe dimming may indicate wiring or panel issues that require professional inspection.

Will upgrading my panel help?
Yes. A higher-capacity panel and dedicated circuits can reduce or eliminate dimming by handling high electrical loads more efficiently.

Can I reduce dimming without electrical upgrades?
Installing a soft starter for the AC or balancing appliance loads across circuits can reduce the inrush current impact and minimize dimming.

Do LED lights dim as much as incandescent bulbs?
LEDs and compact fluorescent lights are less sensitive to voltage drops and generally dim less, but significant voltage fluctuations can still cause flickering.

Conclusion

Lights dimming when an AC turns on is typically caused by the inrush current drawn by the compressor and fan motors. Temporary dimming is common, especially in older homes with smaller electrical panels or shared circuits. Addressing the issue may involve installing a dedicated AC circuit, upgrading the electrical panel, or adding a soft starter to the system. Regular maintenance and inspection of wiring connections help prevent excessive voltage drops. Persistent or severe dimming should be evaluated by a licensed electrician to ensure safety and prevent potential hazards. Proper electrical capacity and balanced loads maintain reliable AC operation and consistent lighting throughout the home.