How to Clean Window AC Unit Without Removing

How to Clean Window AC Unit Without Removing

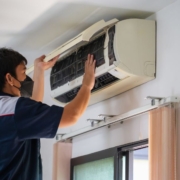
Maintaining a window air conditioner (AC) is essential to ensure efficient cooling, energy savings, and indoor air quality. Cleaning the unit without removing it from the window is possible if proper steps and precautions are followed. Regular cleaning prevents dust buildup, mold growth, and reduced airflow, which can affect performance.

Understanding the Importance of Cleaning

A window AC unit draws air from outside, passing it over coils and filters before circulating it indoors. Over time, dust, pollen, and debris accumulate on the filter, evaporator coil, and condenser. This buildup reduces airflow, increases energy consumption, and can lead to unpleasant odors. Mold and mildew may form if moisture collects in the unit, potentially causing respiratory issues.

Cleaning without removing the AC helps maintain performance and reduces the risk of damaging the unit or disrupting the installation. Homeowners should plan quarterly or biannual cleaning, especially before and after the cooling season.

Step-by-Step Cleaning Process

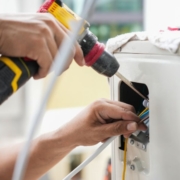
Start by turning off the AC unit and unplugging it from the electrical outlet. Safety is critical to avoid electric shock while cleaning internal components.

Begin with the front grille and filter. Many window AC units have a removable grille that allows access to the filter. If the filter cannot be removed, use a vacuum cleaner with a brush attachment to remove dust and debris. For washable filters, rinse under lukewarm water and let them dry completely before reinstalling.

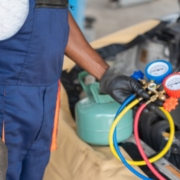
Next, address the evaporator coil located behind the filter. A soft brush or compressed air can remove dust without dislodging the coil fins. Avoid using excessive water directly on the coil, as it may damage electrical components. Some homeowners use coil cleaning sprays designed for AC units. Follow the manufacturer instructions and allow time for the cleaner to work.

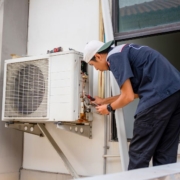
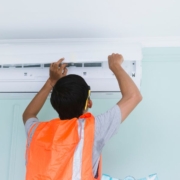
The condenser coil on the exterior part of the unit can also accumulate dust and dirt. Clean it with a soft brush or a vacuum while the AC is off. Ensure that the fins are not bent or damaged during cleaning. If accessible, a gentle spray from a garden hose can rinse debris, but avoid high water pressure to protect delicate components.

For general maintenance, wipe the outer casing with a damp cloth. Remove any dirt, leaves, or debris blocking the vents. This improves airflow and prevents the AC from overheating.

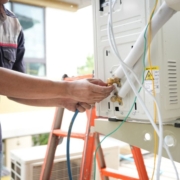
After cleaning, allow all components to dry completely before turning the unit back on. Inspect for loose screws or connections, and tighten them if necessary. Regular cleaning improves cooling efficiency and prolongs the AC’s lifespan.

Common Issues Addressed by Cleaning

Cleaning a window AC unit without removing it can resolve several common problems. Dust and debris in the filter and coils often cause reduced cooling efficiency, high energy consumption, and unusual noises. Mold growth in the evaporator coil may lead to musty odors.

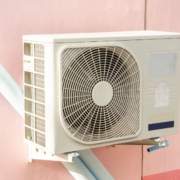
Clogged condenser fins reduce heat dissipation, causing the unit to overheat or cycle frequently. Cleaning ensures unobstructed airflow, maintaining the manufacturer-rated cooling capacity, typically measured in BTUs per hour.

Regular cleaning also prevents water leakage inside the home due to blocked drainage channels. Moisture trapped in the unit can damage walls and window frames if not addressed.

FAQ

How often should I clean my window AC unit without removing it?
Cleaning should be done at least every three months during heavy usage, with a thorough seasonal cleaning before and after summer.

Can I use water to clean the coils without removing the unit?
Use minimal water or a light spray to avoid damaging electrical components. Prefer coil cleaning sprays or compressed air when possible.

What tools do I need for cleaning?
Basic tools include a vacuum cleaner with brush attachment, soft brush, damp cloth, coil cleaning spray, and compressed air. No specialized tools are required.

Will cleaning improve energy efficiency?
Yes. Removing dust and debris ensures the unit runs efficiently, which can reduce electricity consumption by 5 to 15 percent.

Can mold grow if I don’t clean the unit?
Yes. Moisture accumulation combined with dust encourages mold and mildew growth, leading to unpleasant odors and potential health issues.

Conclusion

Cleaning a window AC unit without removing it is a practical method to maintain cooling efficiency, reduce energy costs, and prevent odors. Regular maintenance includes vacuuming filters, brushing coils, cleaning the casing, and ensuring proper airflow. Homeowners should schedule cleaning at least quarterly and inspect for signs of dust, mold, or debris. Proper care enhances the lifespan and performance of the AC unit, ensuring a comfortable indoor environment throughout the cooling season.

How to Get Your Home Warranty to Replace AC Unit

How to Get Your Home Warranty to Replace AC Unit

A home warranty can help cover the repair or replacement of major home systems, including the air conditioning (AC) unit. Understanding the process, requirements, and coverage limitations is essential to ensure the warranty fulfills its purpose.

Understanding Home Warranty Coverage for AC Units

Most home warranty plans include coverage for central air conditioning systems, but coverage can vary. Typically, a standard plan covers mechanical breakdowns, electrical failures, and component malfunctions, while optional or premium plans may include full replacement coverage. Policies often exclude pre-existing conditions, improper maintenance, or cosmetic damage. Reviewing the terms and conditions is crucial before filing a claim.

Coverage usually applies to residential central AC units that are installed according to manufacturer specifications. Older units, usually over 10 to 15 years, may have limited coverage or require additional documentation to confirm eligibility for replacement.

Steps to File a Claim for AC Replacement

The first step is to contact your home warranty provider. Most companies allow claims via phone, online portal, or mobile app. Provide the property details, AC unit age, and description of the problem. Include any error codes, unusual noises, or visible damage.

The home warranty provider will typically schedule a licensed contractor to inspect the unit. The inspection confirms whether the AC unit is eligible for repair or replacement under the policy. Contractors assess the unit’s condition, installation, and maintenance history. Documentation such as receipts for previous maintenance or repairs may be required.

Once the inspection is complete, the provider evaluates the claim. If the unit is deemed inoperable and unrepairable, and the policy covers replacement, the warranty company approves the replacement process. Some policies provide a specific dollar limit for replacement. Homeowners may need to cover costs exceeding this limit.

Preparing for the AC Replacement

Before replacement, confirm the approved specifications with the home warranty provider. Policies may require the replacement unit to meet certain efficiency ratings or brand standards. Scheduling the installation with the contractor should be done promptly to minimize downtime, especially during hot summer months.

Homeowners should also prepare the area around the AC unit for replacement. Ensure that outdoor units are accessible, and indoor vents or electrical panels are clear. This preparation helps contractors complete the work efficiently and safely.

Common Challenges and How to Address Them

Some homeowners face challenges when requesting AC replacement under a home warranty. Older units may not qualify for full replacement, and coverage limits can result in out-of-pocket expenses. Understanding the policy limits in advance helps avoid unexpected costs.

Documentation gaps can delay claims. Keep records of maintenance, prior repairs, and installation dates to demonstrate that the unit was properly maintained and eligible for coverage.

Disagreements with the warranty provider may occur if the unit’s failure is attributed to improper installation, neglect, or pre-existing issues. In such cases, review the policy carefully, provide supporting evidence, and consider requesting a second contractor inspection if allowed by the warranty.

Tips to Maximize Home Warranty Benefits

Maintaining your AC unit according to manufacturer guidelines increases the likelihood of coverage. Annual inspections, filter changes, and coil cleaning demonstrate responsible ownership.

Filing claims promptly when issues arise also improves outcomes. Delaying action can lead to further damage, which may be classified as neglect and reduce coverage eligibility.

Understand the financial limits of your policy. Some warranties cover up to $5,000 to $7,500 for major system replacement. Knowing the cap allows homeowners to budget for any additional costs.

FAQ

Will a home warranty replace my AC unit if it’s old?
Coverage depends on the policy terms and unit condition. Older units, especially over 15 years, may have limited coverage or require proof of maintenance.

How long does it take for a warranty company to approve AC replacement?
Typically, the process takes 1 to 3 weeks, including inspection, evaluation, and scheduling, but times can vary depending on contractor availability and seasonal demand.

Do I need to pay a service fee?
Most home warranties require a service call fee, usually between $50 and $125, even if the AC unit is approved for replacement.

Can I choose my own AC contractor?
Home warranty policies usually require using a licensed contractor approved by the company, though some providers allow recommendations or exceptions.

What if my AC unit fails due to lack of maintenance?
Improper maintenance may result in denied coverage. Keeping maintenance records is essential for claim approval.

Conclusion

Getting your home warranty to replace an AC unit involves understanding policy coverage, filing a detailed claim, and cooperating with a licensed contractor. Ensuring proper maintenance records and documentation increases the likelihood of approval. Homeowners should also be aware of replacement limits and service fees. Regular upkeep, prompt reporting of issues, and clear communication with the warranty provider help secure a timely and effective AC replacement, ensuring your home remains comfortable and efficiently cooled.

Why Does My Car AC Smell

Why Does My Car AC Smell

A car air conditioning (AC) system provides comfort by cooling the cabin air. When a bad smell develops, it can make driving uncomfortable and indicate underlying issues. Understanding the causes of AC odors and how to address them helps maintain a healthy and efficient system.

Common Causes of Car AC Smell

One of the most frequent causes of car AC odors is mold and mildew growth in the system. Moisture accumulates on the evaporator coil, especially when the AC is used frequently. Warm, damp conditions create an ideal environment for fungi and bacteria, which produce a musty or moldy smell.

Another common source is clogged or dirty cabin air filters. These filters trap dust, pollen, and debris, but over time, they can become saturated with moisture and organic matter, leading to unpleasant odors. Cabin air filters typically need replacement every 12,000 to 15,000 miles, depending on driving conditions and air quality.

Debris in the AC system can also cause bad smells. Leaves, twigs, or dirt can enter the air intake vents, especially when parked under trees or in dusty areas. This material can trap moisture and decompose, producing a foul odor when the AC is running.

Refrigerant leaks are another possible reason. Low refrigerant can lead to insufficient cooling, causing moisture buildup and promoting bacterial growth. While refrigerant itself is odorless, the consequences of a leak may indirectly contribute to AC smells. A certified technician should handle refrigerant inspection and refill.

Bacterial growth in the condensate drain line can also cause odors. Condensate forms as the AC cools the air, and it is typically drained outside the vehicle. If the drain line is clogged, water can accumulate in the system, creating an environment for bacteria and producing a sour or damp smell.

How to Identify the Type of AC Smell

The type of odor can indicate the underlying issue. A musty or moldy smell usually points to mold on the evaporator coil or cabin filter. A sweet or chemical smell may indicate a refrigerant leak, while a burning smell can suggest electrical issues such as a worn-out blower motor or shorted wires. Identifying the smell type helps determine the appropriate corrective action.

Steps to Eliminate AC Smell

First, inspect and replace the cabin air filter if it appears dirty or damp. Cleaning or replacing the filter can significantly improve air quality.

Next, clean the evaporator coil and AC vents. Commercial AC cleaners are available to remove mold, bacteria, and debris safely. Some products are sprayed directly into the air intake vent to sanitize the system.

Ensure the condensate drain line is clear. A clogged drain can be cleaned with compressed air or a flexible wire to allow water to flow outside the vehicle. This reduces moisture buildup and prevents bacterial growth.

Running the AC with maximum fan speed for a few minutes before shutting off the vehicle can help dry the evaporator coil and minimize moisture accumulation. This simple practice reduces the likelihood of mold and mildew growth.

For suspected refrigerant leaks, it is essential to consult a certified automotive technician. The technician can inspect for leaks, recharge the refrigerant, and ensure the system operates efficiently.

Preventive Measures

Regular maintenance is key to preventing AC odors. Replace the cabin air filter every 12,000 to 15,000 miles or as recommended by the vehicle manufacturer. Clean the air intake vents periodically to remove debris, and keep the evaporator coil dry by running the fan for a few minutes before turning off the car.

Parking in sunny, dry areas can reduce moisture buildup in the system. Avoid leaving leaves and debris on the windshield and around the air intake, as these can enter the AC system and contribute to odor formation.

FAQ

Why does my car AC smell musty?
A musty smell usually results from mold or mildew on the evaporator coil or in the cabin filter. Moist conditions inside the system allow fungi to grow.

Can a dirty cabin air filter cause AC smell?
Yes. A clogged or damp filter traps dust, pollen, and moisture, leading to unpleasant odors.

Why does my AC smell sweet or chemical?
A sweet or chemical smell may indicate a refrigerant leak. This requires professional inspection to prevent system damage.

How often should I replace the cabin air filter?
Typically, every 12,000 to 15,000 miles, but this depends on driving conditions and air quality.

Can I clean the AC vents myself?
Yes, using commercial AC cleaning sprays or mild disinfectants, but care must be taken to avoid damaging components.

Conclusion

A car AC may emit unpleasant odors due to mold and mildew, dirty cabin filters, debris, refrigerant issues, or clogged drain lines. Identifying the type of smell helps determine the cause and corrective measures. Cleaning the evaporator coil, vents, and drain line, replacing the cabin filter, and consulting a technician for refrigerant concerns can restore air quality. Regular maintenance, such as filter replacement, vent cleaning, and drying the system, prevents odors and ensures the AC operates efficiently, providing clean, comfortable air inside the vehicle.

Why Isn't My AC Working

Why Isn’t My AC Working

An air conditioner (AC) is essential for maintaining comfortable indoor temperatures, especially during hot seasons. When the system fails, it can disrupt daily activities and create discomfort. Understanding the common causes of AC malfunction and how to address them helps identify problems quickly and maintain system efficiency.

Common Causes of AC Not Working

Several factors can prevent an AC unit from functioning properly. One of the most frequent issues is power supply problems. If the circuit breaker trips or a fuse blows, the AC may not receive electricity. Checking the breaker panel and ensuring the system is plugged in can resolve this issue in many cases.

Another common cause is a dirty or clogged air filter. Filters trap dust, pollen, and debris, but when they become clogged, airflow is restricted. Reduced airflow can prevent the unit from cooling effectively and may cause the system to shut down to avoid damage. Filters should be inspected monthly and replaced every 30 to 90 days, depending on usage.

Thermostat issues also affect AC performance. A malfunctioning thermostat or incorrect temperature settings can prevent the system from activating. Ensuring the thermostat is set to cool mode and the temperature is lower than the room temperature is essential. Calibration problems may require professional service.

The refrigerant level is another critical factor. Low refrigerant prevents the AC from removing heat efficiently. Signs of low refrigerant include warm air from vents, ice on the coils, or unusual hissing sounds. Only a licensed technician should recharge or repair refrigerant leaks, as improper handling can damage the system and violate regulations.

Frozen coils can also stop an AC from working. This usually occurs due to low refrigerant, restricted airflow, or dirty coils. Ice buildup blocks the transfer of heat, reducing cooling capacity. Turning off the system and allowing the coils to thaw often resolves the immediate problem, but the underlying cause should be corrected.

Mechanical issues such as a failed compressor, blower motor, or capacitor can also prevent operation. The compressor pumps refrigerant through the system, and the blower circulates cooled air. Malfunctions in these components require professional inspection and replacement.

Steps to Diagnose an AC Problem

Start by checking the power supply and circuit breakers. If the system has power, inspect the air filter for dirt or blockage. Clean or replace it as necessary. Ensure the thermostat is functioning correctly, and set it to cool mode with an appropriate temperature.

Listen for unusual noises, such as humming, rattling, or clicking, which may indicate mechanical problems. Check the outdoor unit for obstructions like leaves, debris, or blocked coils, which can impair airflow.

If the AC still does not work after these checks, it may be necessary to inspect the refrigerant lines, compressor, and electrical components. Handling refrigerants or electrical repairs should only be done by licensed technicians to prevent injury, system damage, or regulatory violations.

Preventive Maintenance

Regular maintenance can prevent many AC problems. Inspect and replace air filters every one to three months, clean evaporator and condenser coils annually, and ensure drain lines are clear. Schedule professional service at least once a year, typically before the cooling season, to check refrigerant levels, electrical connections, and mechanical components.

Maintaining proper airflow, keeping the system clean, and monitoring thermostat settings help prolong the life of the AC unit and maintain energy efficiency. Homes with pets or high dust levels may require more frequent maintenance.

FAQ

Why is my AC blowing warm air?
Warm air can result from low refrigerant, a frozen coil, or a malfunctioning compressor. Inspect airflow and temperature settings before calling a technician.

Can a dirty air filter stop my AC completely?
Yes. A heavily clogged filter restricts airflow, causing the system to overheat or shut down to prevent damage.

How do I know if the compressor is bad?
Signs include loud humming, lack of cooling, or the outdoor unit not running. Compressor issues require professional service.

Is low refrigerant dangerous?
Low refrigerant does not pose immediate health risks, but it can damage the AC system and reduce efficiency. Only licensed technicians should handle refrigerants.

How often should I schedule maintenance?
Annual professional maintenance is recommended, with air filter checks every 30 to 90 days depending on usage and environment.

Conclusion

An AC unit may stop working due to power issues, clogged filters, thermostat problems, low refrigerant, frozen coils, or mechanical failures. Initial troubleshooting includes checking the power supply, filter, and thermostat, and ensuring the outdoor unit is clear of debris. Persistent issues typically require professional inspection, especially for refrigerant and mechanical components. Regular preventive maintenance, including filter replacement, coil cleaning, and annual service, ensures efficient performance, prolonged system life, and consistent indoor comfort. Understanding the potential causes and maintenance requirements allows homeowners to address problems quickly and maintain a reliable cooling system.

How to Change AC Filter

How to Change AC Filter

The air conditioning (AC) filter is a vital component of any cooling system. It traps dust, pollen, and other airborne particles, preventing them from circulating through the air and accumulating in the system. A clogged or dirty filter can reduce airflow, decrease efficiency, and strain the AC system, leading to higher energy bills and potential mechanical issues. Changing the AC filter regularly ensures clean air, proper system performance, and energy efficiency.

Understanding AC Filters

AC filters are typically made from fiberglass, pleated paper, or synthetic materials. They are designed to capture particles of various sizes, including dust, pet dander, and mold spores. The filter’s MERV rating (Minimum Efficiency Reporting Value) indicates its effectiveness. Higher MERV ratings capture smaller particles but may restrict airflow more than lower-rated filters.

Residential AC systems commonly use filters sized 16×20 inches or 20×25 inches, but sizes vary depending on the unit. Filters can be disposable or reusable. Disposable filters are replaced entirely, while reusable filters require cleaning and reinstallation.

Signs That an AC Filter Needs Replacement

A filter should be replaced when it becomes visibly dirty, clogged, or dusty. Reduced airflow from vents, unusual odors, or increased energy consumption may also indicate a clogged filter. For most residential systems, replacing the filter every 30 to 90 days is recommended, but frequency may vary depending on system usage, household size, and presence of pets.

How to Change an AC Filter

Begin by turning off the AC system to prevent unfiltered air from circulating during the replacement process. Locate the filter compartment, usually in the return air duct or the air handler unit. Carefully remove the old filter, noting the direction of airflow indicated by an arrow on the filter frame.

Select a replacement filter that matches the size and MERV rating of the original. Insert the new filter with the airflow arrow pointing in the correct direction, usually toward the blower fan. Ensure the filter fits snugly without gaps around the edges. Close the filter compartment or door securely and turn the system back on.

For reusable filters, remove the filter and clean it with warm water or a vacuum according to the manufacturer’s instructions. Allow it to dry completely before reinstalling it. Regular cleaning prevents dust buildup and maintains system efficiency.

Safety and Maintenance Tips

Always ensure the AC system is powered off before removing or replacing the filter. Avoid forcing the filter into a compartment, as this can damage the frame or unit. Keeping spare filters on hand helps maintain a consistent replacement schedule.

Routine maintenance of the AC system, including checking coils, drains, and blower components, complements filter replacement. Inspecting the filter monthly during heavy use periods ensures optimal air quality and energy efficiency.

FAQ

How often should I change my AC filter?
Typically every 30 to 90 days, depending on usage, household environment, and presence of pets.

Can a dirty filter damage my AC system?
Yes. A clogged filter reduces airflow, causing the system to work harder, which can strain the compressor, blower motor, and other components.

Can I use a higher MERV filter than recommended?
Higher MERV filters capture smaller particles but may restrict airflow. Check your AC system specifications before upgrading.

Are reusable filters effective?
Yes, if cleaned regularly according to the manufacturer’s instructions. They provide long-term savings and reduce waste.

What should I do if my AC still blows weak air after changing the filter?
Check for blocked vents, dirty coils, or issues with the blower motor. Persistent problems may require a professional inspection.

Conclusion

Changing the AC filter is a simple yet crucial task for maintaining air quality, system efficiency, and energy savings. Filters capture dust, pollen, and other particles, preventing them from circulating and clogging the system. Regular replacement, typically every 30 to 90 days, helps maintain optimal airflow and cooling performance. Understanding filter types, sizes, and MERV ratings ensures the correct choice for your AC unit. Whether using disposable or reusable filters, proper installation and routine maintenance contribute to a longer-lasting and more efficient air conditioning system.

What is the Difference Between Pepcid and Pepcid AC

What is the Difference Between Pepcid and Pepcid AC

Pepcid and Pepcid AC are widely used medications for managing acid-related digestive conditions. Both contain the active ingredient famotidine, which belongs to the class of H2 receptor antagonists. These medications reduce the production of stomach acid, helping relieve symptoms such as heartburn, acid reflux, and indigestion. While they share similarities, there are key differences in dosage, strength, and recommended use.

Understanding Pepcid

Pepcid is available in various forms, including tablets, chewable tablets, and oral suspension. It is typically prescribed to treat gastroesophageal reflux disease (GERD), Zollinger-Ellison syndrome, and peptic ulcers. The standard adult dosage for treating heartburn is usually 20 mg taken once or twice daily, depending on the severity of symptoms.

Pepcid works by blocking histamine H2 receptors in the stomach lining. This action decreases acid production, which helps prevent irritation of the esophagus and stomach lining. It can take 30 to 60 minutes to start relieving symptoms, and the effects may last up to 12 hours depending on the dose.

Understanding Pepcid AC

Pepcid AC is primarily marketed as an over-the-counter (OTC) option for treating occasional heartburn. The “AC” stands for “acid control”. It is generally available in 10 mg or 20 mg tablets and is intended for short-term relief of heartburn associated with acid ingestion.

Pepcid AC works similarly to prescription Pepcid by blocking H2 receptors and reducing stomach acid production. However, it is often recommended for mild, intermittent symptoms rather than chronic conditions. It can provide relief within an hour and is suitable for use up to twice daily, with a maximum daily dose of 40 mg for adults.

Key Differences Between Pepcid and Pepcid AC

The main difference lies in strength, intended use, and availability. Prescription Pepcid may be prescribed in higher doses for chronic conditions such as GERD or ulcers, while Pepcid AC is designed for occasional, mild heartburn.

Pepcid can be obtained only with a doctor’s prescription when used for serious gastrointestinal conditions, whereas Pepcid AC is available OTC, making it more convenient for quick relief. Additionally, Pepcid AC tablets are often chewable, allowing faster absorption, whereas prescription Pepcid may come in standard tablets or liquid forms for precise dosing.

The duration of use also differs. Pepcid AC is generally intended for short-term, occasional use, while prescription Pepcid may be taken daily for several weeks or longer under medical supervision. The dosing schedule may also vary based on the condition being treated and the patient’s response.

Safety and Precautions

Both Pepcid and Pepcid AC are generally well-tolerated. Common side effects include headache, dizziness, and mild gastrointestinal disturbances. Patients with kidney impairment may require dosage adjustments.

It is important to consult a healthcare provider before using Pepcid or Pepcid AC if you have a history of liver disease, kidney disease, or gastrointestinal bleeding. Avoid exceeding the recommended dosage, as excessive use may lead to side effects or reduced effectiveness.

Pregnant or breastfeeding individuals should consult a healthcare professional before use. Both medications may interact with certain drugs, including antifungals, HIV medications, and warfarin, so monitoring is advised.

FAQ

Can Pepcid and Pepcid AC be used interchangeably?
They contain the same active ingredient, but Pepcid AC is intended for occasional use, while prescription Pepcid may be used for chronic conditions at higher doses.

How long does it take for Pepcid AC to work?
Typically, it takes 30 to 60 minutes to relieve heartburn symptoms.

Is Pepcid AC safe for daily use?
Occasional use is safe, but daily or long-term use should be supervised by a healthcare provider.

Can children use Pepcid or Pepcid AC?
Dosage and safety vary by age. Always consult a pediatrician before giving these medications to children.

Are there any major side effects?
Most side effects are mild, including headache or dizziness. Severe allergic reactions are rare but require immediate medical attention.

Conclusion

Pepcid and Pepcid AC are effective for managing acid-related digestive issues by reducing stomach acid through H2 receptor blockade. The primary differences include strength, duration of use, and intended purpose. Pepcid AC is suitable for short-term, occasional heartburn, while prescription Pepcid is designed for chronic conditions like GERD, ulcers, or Zollinger-Ellison syndrome. Both medications are generally safe when used as directed, but consulting a healthcare provider ensures proper dosage, safety, and effective symptom relief. Understanding these differences helps patients choose the appropriate medication for their specific digestive health needs.

How to Test AC Compressor

How to Test AC Compressor

The air conditioning (AC) compressor is a critical component of any cooling system. It pressurizes the refrigerant and circulates it through the system, enabling the AC to cool the interior effectively. A malfunctioning compressor can result in reduced cooling performance, strange noises, or complete system failure. Testing the AC compressor ensures the system operates efficiently and helps identify potential issues before they cause damage.

Understanding the AC Compressor

The AC compressor is typically located in the engine bay for car systems or near the condenser unit for home or commercial systems. It has electrical and mechanical components, including a clutch, pulley, and internal valves. The compressor relies on proper refrigerant levels and electrical signals to function correctly.

Common signs of a failing compressor include warm air from vents, strange noises, tripped circuit breakers, and visible leaks around the unit. Testing the compressor can help confirm whether these symptoms are caused by the compressor itself or other components in the system.

Preparing to Test the AC Compressor

Before testing, ensure the system is powered off and safe to access. For automotive compressors, disconnect the battery to prevent accidental electrical shocks. For home AC systems, switch off the main power supply at the circuit breaker.

Gather the necessary tools, including a multimeter, manifold gauge set, and protective gloves. Ensure refrigerant pressures are within recommended levels, as low refrigerant can give false readings during testing.

Testing the AC Compressor with a Multimeter

A multimeter helps test the electrical continuity and resistance of the compressor. Locate the compressor clutch terminals or electrical connector. Set the multimeter to the ohms setting and measure the resistance across the terminals.

A typical reading for most compressors ranges between 3 and 5 ohms. Readings significantly higher or lower indicate a damaged coil or internal fault. Additionally, check for continuity between the terminals and the compressor housing. If continuity exists, this signals a short circuit, and the compressor may need replacement.

Checking Compressor Operation

After verifying electrical integrity, test the compressor operation. Reconnect the system and power it on. For automotive systems, engage the AC and observe if the compressor clutch engages. The clutch should spin smoothly without hesitation or unusual noise.

For home AC units, monitor the compressor while the system runs. Ensure the high and low-side pressures measured with a manifold gauge are within manufacturer specifications. A compressor that runs but does not achieve proper pressures may have internal mechanical issues.

Safety Precautions During Testing

Testing an AC compressor involves both electrical and high-pressure components. Always wear protective gloves and eyewear. Never attempt to test or disassemble a running compressor without proper training, as moving parts and refrigerant can cause injury. Avoid using incorrect refrigerants or overcharging the system, which may damage the compressor or other components.

Maintenance Tips to Avoid Compressor Failure

Regular maintenance can extend the life of an AC compressor. Inspect refrigerant levels, electrical connections, and condenser coils periodically. Clean air filters and remove debris around the compressor to prevent overheating and mechanical strain. Detecting leaks early and maintaining proper system pressure helps avoid costly compressor replacement.

FAQ

Can I test the AC compressor myself?
Yes, basic electrical testing using a multimeter and observing clutch operation can be done by a knowledgeable person. High-pressure tests or repairs should be handled by a professional.

What are normal resistance readings for an AC compressor?
Typical resistance ranges between 3 and 5 ohms. Readings outside this range may indicate an internal fault.

Why does the compressor run but the AC doesn’t cool?
This may occur due to low refrigerant levels, blocked coils, or internal compressor issues. Testing pressure levels helps identify the cause.

How often should AC compressors be tested?
Compressor testing is recommended when cooling issues arise or during routine system maintenance every 12 to 24 months.

Can a faulty compressor damage other AC components?
Yes. A malfunctioning compressor can increase system pressure, damage valves, expanders, or the condenser, and may contaminate the system with metal debris.

Conclusion

Testing an AC compressor is essential for ensuring efficient cooling and identifying potential failures. Use a multimeter to check electrical resistance, observe clutch engagement, and monitor system pressures to evaluate compressor performance. Proper precautions, including disconnecting power and wearing protective gear, prevent injuries during testing. Regular maintenance, such as checking refrigerant levels, cleaning coils, and inspecting electrical connections, reduces the risk of compressor failure. Understanding how to test an AC compressor ensures a reliable, safe, and effective air conditioning system, whether for vehicles or home cooling systems.

How to Reset AC Unit

How to Reset AC Unit

Resetting an air conditioning unit can resolve minor operational issues, electrical glitches, or system errors. AC units have safety features that may shut down the system to prevent damage. Understanding the correct reset procedures ensures that the unit operates efficiently without causing harm to the electrical system or internal components.

Reasons to Reset an AC Unit

AC units may need a reset for several reasons. Power surges or outages can cause the system to stop functioning properly. Some units have internal circuits that shut down automatically when overheating or detecting irregular voltage.

Other causes include tripped circuit breakers, clogged filters, or frozen coils. In many cases, a reset restores normal operation without the need for professional repair. However, recurring issues may indicate a more serious problem that requires inspection by a certified technician.

How to Reset a Central AC Unit

For central air conditioning systems, resetting the unit involves several steps. First, turn off the thermostat and set it to the off position. Next, switch off the main power supply at the circuit breaker or disconnect the AC unit’s power switch.

Wait approximately 30 seconds to one minute before restoring power. This allows the system’s internal components to discharge and reset. Turn the power back on, and set the thermostat to the desired temperature. The AC should begin normal operation within a few minutes.

Some central AC systems have a reset button on the outdoor condenser unit. This button can be pressed after turning off the unit’s power supply. Hold it for a few seconds and release it. Once the system is powered back on, the AC should function normally if the issue was minor.

How to Reset a Window or Portable AC Unit

Window and portable AC units often include a reset button or power cycle procedure. Begin by turning off the unit and unplugging it from the electrical outlet. Wait at least five minutes to allow internal components to reset.

Press the reset button if available. Some models may require holding the button for three to ten seconds. Plug the unit back in and turn it on. Check for proper cooling operation and ensure that the fan and compressor are running smoothly.

Regular maintenance, such as cleaning the air filters and vents, can prevent the unit from requiring frequent resets. Clogged filters and blocked airflow can cause the system to overheat and trigger safety shutdowns.

Precautions When Resetting an AC Unit

Safety is critical when working with electrical systems. Always turn off the power supply before pressing reset buttons or unplugging the unit. Avoid touching internal components inside the AC, as capacitors may retain electrical charge even after power is disconnected.

Do not reset the unit repeatedly if it does not start. Recurrent shutdowns may indicate a mechanical or electrical fault, such as a failing compressor, low refrigerant levels, or a damaged thermostat. In such cases, professional inspection is necessary to prevent further damage.

FAQ

How long does it take for an AC unit to reset?
Typically, 30 seconds to five minutes is sufficient for the internal components to reset. Window units may require slightly longer waiting periods.

Can resetting my AC unit fix all problems?
No. Resetting addresses minor electrical glitches or tripped safety features. Mechanical failures or refrigerant issues require professional repair.

Is it safe to reset the AC during a power surge?
No. Wait until the power supply stabilizes. Frequent power fluctuations can damage electrical components.

Do all AC units have a reset button?
Not all. Many central AC systems rely on power cycling via the circuit breaker. Window and portable units often include a dedicated reset button.

Should I reset the thermostat as well?
Yes. Turning off the thermostat and setting it back to the desired temperature ensures that the unit receives proper operational signals after a reset.

Conclusion

Resetting an AC unit can resolve minor malfunctions, electrical errors, or tripped safety features, restoring normal operation. The process varies depending on whether the unit is central, window, or portable. Essential steps include turning off the power supply, pressing the reset button if available, and waiting for internal components to reset. Precautions such as disconnecting power and avoiding repeated resets prevent damage to the system. Regular maintenance, including cleaning filters and vents, reduces the need for frequent resets. Understanding the correct reset procedures ensures a safe, efficient, and effective cooling system, extending the life of the air conditioning unit and maintaining comfort inside the home.

How to Remove Smell from Car AC

How to Remove Smell from Car AC

A smelly car air conditioning system can make driving uncomfortable and affect air quality inside the vehicle. Odors often originate from mold, mildew, bacteria, and accumulated debris in the AC system, especially on the evaporator coils and air ducts. Understanding the causes and proper cleaning methods ensures a fresh-smelling and hygienic environment inside the car.

Common Causes of Car AC Smell

The primary source of unpleasant odors in car AC systems is moisture accumulation. The evaporator coil inside the AC absorbs heat from the cabin, producing condensation. This moisture can become a breeding ground for mold and bacteria, which release a musty smell when air passes through the system.

Other causes include dust, pollen, leaves, and debris trapped in air vents, cabin filters, and ductwork. Spilled food, pet hair, or smoking inside the car can also contribute to persistent odors. Lack of regular maintenance allows these contaminants to accumulate, intensifying the smell over time.

Cleaning the Cabin Air Filter

The cabin air filter traps dust, pollen, and airborne particles before air enters the cabin. Over time, the filter can harbor bacteria and mold, producing foul odors. Replacing or cleaning the cabin air filter every 12,000 to 15,000 miles ensures that fresh air circulates inside the vehicle.

Filters are usually accessible behind the glove compartment or under the dashboard. Remove the old filter and inspect it for dirt, mold, or dampness. A replacement filter with anti-microbial properties can reduce the risk of odors returning.

Cleaning the AC Vents and Ducts

Cleaning the air vents and ducts eliminates residual dust and mold. Use a soft brush or compressed air to remove debris from vent openings. Special AC cleaning sprays or foams can be applied directly into the vents. These products often contain disinfectants that kill bacteria and neutralize odors.

Ensure the product reaches the evaporator coils, which are located inside the HVAC housing. Running the AC on high fan speed for a few minutes distributes the cleaner throughout the ductwork, helping eliminate trapped contaminants.

Using Disinfectants and Odor Neutralizers

Specialized AC disinfectant sprays are effective at removing bacteria and mold from the system. These sprays often contain chemical agents that eliminate microorganisms and deodorize the air. Use according to the manufacturer’s instructions, typically spraying into the intake vents or cabin filter area.

For persistent odors, placing activated charcoal bags or baking soda inside the car can absorb residual smells. These methods do not clean the system but reduce odor while additional maintenance is performed.

Regular Maintenance to Prevent Odors

Preventing AC odors requires routine maintenance. Running the AC on recirculation mode intermittently allows moisture to evaporate. Leaving the AC on fan-only mode for a few minutes before turning off the engine helps dry the evaporator coil, reducing mold growth.

Keep the car interior clean and free of food particles or trash. Regularly inspect and replace cabin air filters, and ensure drains in the HVAC system are not blocked. These preventive steps maintain a fresh and odor-free environment.

FAQ

Can I use household cleaners in my car AC?
No. Household cleaners may damage the evaporator or ductwork. Use products designed specifically for car AC systems.

Why does my car AC smell musty only when turned on?
This occurs because moisture on the evaporator coil fosters mold and bacteria growth. The smell is released when air passes through the wet coil.

How often should I replace the cabin air filter?
Typically every 12,000 to 15,000 miles, or according to the car manufacturer’s recommendation. High-pollen areas may require more frequent replacement.

Can odors return after cleaning?
Yes. If mold or debris remain inside the ducts or evaporator, odors can reappear. Thorough cleaning and regular maintenance prevent recurrence.

Is it necessary to visit a professional?
For persistent odors or blocked evaporator drains, a professional HVAC cleaning ensures deep cleaning and prevents damage to the system.

Conclusion

Removing smell from a car AC involves cleaning the cabin air filter, vents, and ducts, using disinfectants, and maintaining proper airflow. Moisture accumulation, mold growth, and trapped debris are the primary causes of unpleasant odors. Regular maintenance, including periodic filter replacement, using AC disinfectant sprays, and drying the evaporator coil, keeps the system fresh. Preventive measures such as keeping the interior clean, monitoring the AC drain, and running the fan after driving reduce the likelihood of odors returning. Following these steps ensures that your car’s AC system provides clean, fresh air for a comfortable driving experience.

How to Cool House Without AC

How to Cool House Without AC

Cooling a house without an air conditioner is possible using a combination of passive cooling, airflow management, and heat reduction strategies. Understanding the factors that contribute to indoor heat and applying practical methods can maintain a comfortable environment even during hot weather.

Use Natural Ventilation

Natural ventilation relies on air movement through windows, doors, and vents. Opening windows on opposite sides of the house creates cross-ventilation, allowing hot air to escape and cooler air to enter. Using vents near the floor and ceiling enhances airflow, as warm air rises and exits through higher openings while cooler air enters below.

Ceiling fans, floor fans, and window fans can amplify natural airflow. Fans create a wind-chill effect, making occupants feel cooler even if the indoor temperature remains the same. Strategically positioning fans near open windows can draw in cooler outdoor air at night or push hot indoor air outside during the day.

Block Heat From Entering

Preventing heat from entering the home reduces the need for active cooling. Curtains, blinds, and reflective window films can block direct sunlight. Using light-colored or heat-reflective shades minimizes solar heat gain through windows.

Insulating the attic, walls, and roof decreases heat transfer from the outside. Weatherstripping and sealing gaps around doors and windows prevent warm air infiltration. Planting shade trees or installing awnings outside windows further reduces direct sunlight and keeps the interior cooler.

Optimize Indoor Humidity

High indoor humidity increases the perception of heat. Using dehumidifiers lowers moisture levels, making the air feel cooler and more comfortable. Simple methods like placing buckets of ice in front of fans or using evaporative cooling trays can also reduce indoor heat through moisture evaporation.

Proper ventilation in kitchens and bathrooms removes excess humidity produced by cooking, showering, or laundry. Exhaust fans and open windows help expel warm, moist air quickly.

Create Cool Zones

Designating areas of the house as cool zones allows residents to stay comfortable without cooling the entire home. Lower floors are usually cooler because heat rises. Bedrooms and living areas can be prioritized by using fans or natural ventilation in these spaces.

Sleeping in lightweight, breathable fabrics such as cotton or linen enhances comfort. Using cooling mats or gel pillows provides localized relief from heat during hot nights.

Night Cooling

Outdoor temperatures are often lower at night. Opening windows and doors after sunset can flush out accumulated heat from the day. Closing windows early in the morning helps trap cooler air inside before the outdoor temperature rises.

Ceiling and floor fans can be used to circulate nighttime cool air throughout the house. Combining night ventilation with curtains or blinds during the day maintains cooler indoor temperatures for longer periods.

FAQ

Can I cool my house without electricity?
Yes. Natural ventilation, shading, insulation, and night cooling strategies can reduce indoor temperatures without using electricity.

Do fans really cool a house?
Fans do not lower temperature but increase airflow, creating a wind-chill effect that makes people feel cooler.

Are reflective window films effective?
Yes. Reflective films can block up to 80% of solar heat, reducing indoor temperatures significantly during peak sunlight hours.

Can plants help cool my house?
Yes. Trees, shrubs, and climbing plants provide shade and evapotranspiration, lowering outdoor and indoor temperatures.

Is it safe to sleep with windows open at night?
Yes, if security is considered. Using screens and limiting openings to upper floors or secured areas enhances safety while allowing airflow.

Conclusion

Cooling a house without air conditioning requires managing heat gain, enhancing airflow, and controlling indoor humidity. Using natural ventilation, fans, shading, insulation, and night cooling strategies can significantly reduce indoor temperatures. Creating cool zones, optimizing fabrics and bedding, and implementing simple evaporative methods provide additional comfort. Integrating multiple techniques ensures a cooler living environment while reducing energy consumption and maintaining indoor comfort even during hot weather. Proper planning, strategic airflow, and passive cooling methods make it possible to stay comfortable without relying on mechanical air conditioning.