How to Replace AC Compressor

How to Replace AC Compressor

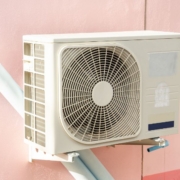
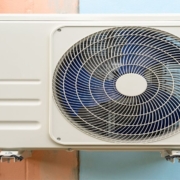
The AC compressor is a vital component of an air conditioning system. It circulates refrigerant through the system, enabling heat exchange and cooling. When the compressor fails, the AC cannot cool properly, and replacement becomes necessary. Understanding the process, safety considerations, and potential costs helps homeowners manage repairs effectively.

Signs a Compressor Needs Replacement

Several indicators suggest a failing AC compressor. The unit may produce warm air despite running continuously. Unusual noises such as clanking, rattling, or humming can indicate mechanical failure. The compressor may also trip the circuit breaker frequently due to electrical issues.

Another sign is refrigerant leaks near the compressor. Corrosion or oil stains on the unit may indicate that the internal components are damaged. If the system repeatedly cycles on and off without cooling effectively, the compressor could be at fault. Timely replacement prevents further damage to the AC system.

Preparing for Compressor Replacement

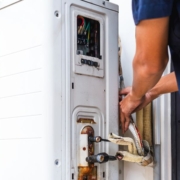
Before starting the replacement, the AC system must be powered off at the breaker. It is essential to recover the refrigerant using certified recovery equipment to comply with environmental regulations. Handling refrigerants without certification is illegal and hazardous.

Identify the correct replacement compressor based on the make, model, and refrigerant type of the AC system. Compressors are designed for specific systems, and incorrect units may cause inefficiency or damage. Check voltage, phase type, and mounting style to ensure compatibility.

Steps to Replace the AC Compressor

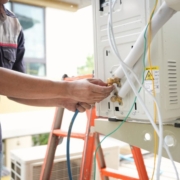
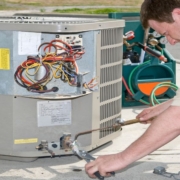
The process begins by disconnecting electrical wiring from the old compressor. Marking the connections helps ensure proper reconnection. Next, remove refrigerant lines and mounting bolts. The compressor may be heavy, so using proper lifting techniques or support is important to prevent injury.

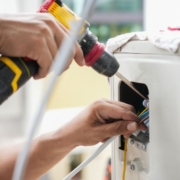
Install the new compressor by positioning it securely and tightening mounting bolts to the manufacturer’s specifications. Reconnect the refrigerant lines using the correct fittings and torque settings. Electrical connections should be restored according to the wiring diagram.

The system must then be evacuated using a vacuum pump to remove moisture and air from the refrigerant lines. Once the system reaches the required vacuum level, recharge with the correct type and amount of refrigerant. Testing the system ensures proper operation, including verifying pressures, temperatures, and electrical performance.

Safety Considerations

Replacing an AC compressor involves handling high-pressure refrigerants, electrical components, and heavy equipment. Improper handling can cause injury or system damage. Only certified HVAC technicians should perform refrigerant recovery, evacuation, and recharge.

Electrical safety is critical. Ensure the breaker is off, and all connections are properly insulated. Avoid bypassing safety devices such as fuses or pressure switches. Proper tools, protective equipment, and adherence to local regulations are necessary for safe replacement.

Maintenance After Replacement

After installing a new compressor, regular maintenance helps prolong its life. Inspect refrigerant levels and recharge if necessary. Clean or replace air filters and ensure condenser coils are free of dirt and debris. Periodically check electrical connections and system pressures to detect potential issues early.

Monitoring the system’s operation during the first few weeks after replacement ensures that the compressor functions efficiently. Addressing minor issues promptly prevents future failures and maintains optimal cooling performance.

FAQ

How long does it take to replace an AC compressor?
Replacement typically requires 4 to 6 hours, depending on system complexity, accessibility, and refrigerant handling.

Can I replace the compressor myself?
Due to refrigerant handling, electrical work, and system evacuation, it is recommended to hire a certified HVAC technician for safe and legal replacement.

What is the cost of replacing an AC compressor?
Costs vary based on compressor type, system size, and labor. Residential replacements often range from $800 to $1,500, including parts and labor.

How do I know if my compressor is failing?
Common signs include warm air, unusual noises, frequent cycling, and visible refrigerant leaks near the compressor.

Can I use a different compressor model?
No. Compressors must match the system’s specifications, including voltage, phase, refrigerant type, and mounting style, to operate correctly.

Conclusion

Replacing an AC compressor is a complex but essential process for restoring proper cooling. Signs of failure include warm air, strange noises, and electrical issues. The replacement requires powering off the system, recovering refrigerant, removing the old compressor, installing a compatible new unit, and properly recharging the system. Safety considerations, including handling refrigerants and electrical components, are critical. Post-replacement maintenance ensures efficient operation and prolongs compressor life. Hiring a certified HVAC technician guarantees compliance with safety standards and local regulations while ensuring the AC system functions reliably.

Lights Dim When AC Turns On

Experiencing dimming lights when an air conditioner starts is a common issue in homes. This usually occurs when the AC draws a high amount of electrical current during startup. Understanding the causes, potential risks, and solutions helps homeowners maintain safe and efficient operation of both lighting and cooling systems.

Why Lights Dim When AC Starts

Air conditioners have compressors and motors that require a large surge of electricity at startup, known as inrush current. This temporary surge can cause voltage drops in the home’s electrical system, resulting in dimming lights. The effect is usually brief, lasting only a few seconds while the AC motor stabilizes.

Older homes with outdated wiring or lower capacity electrical panels may experience more noticeable dimming. High-resistance connections, undersized wires, or shared circuits with other appliances can exacerbate the voltage drop. Homes with multiple large appliances running simultaneously may also see a more significant effect.

Electrical Factors That Contribute to Dimming

The size and condition of the home’s electrical service panel play a key role. Most modern homes have 100 to 200 amp panels, which can handle multiple high-power appliances. Smaller panels or overloaded circuits may struggle when an AC unit starts, causing noticeable light dimming.

Loose or corroded connections at the panel, outlets, or junction boxes increase resistance, which amplifies voltage fluctuations. Poorly balanced circuits, where multiple high-load appliances are connected to the same breaker, also contribute to dimming.

The type of lighting can influence perception. Traditional incandescent bulbs are more sensitive to voltage drops and may visibly dim. LEDs and compact fluorescent bulbs are less affected but can still flicker if voltage fluctuation is significant.

Solutions to Reduce Dimming

One solution is to ensure that the AC is on a dedicated circuit. A dedicated line prevents other appliances from sharing the startup load, reducing voltage drop. Installing a larger service panel or upgrading wiring may be necessary in older homes to handle modern electrical loads.

Adding a soft starter or hard start kit to the AC compressor reduces inrush current during startup, minimizing the impact on household voltage. Regular maintenance, including checking for loose or corroded connections in the panel and at outlets, ensures the system operates efficiently.

Balancing electrical loads across different circuits also helps. Avoid running multiple high-power devices on the same line as the AC, especially during hot summer months when the AC cycles frequently.

Safety Considerations

While brief dimming is usually not dangerous, persistent or severe dimming may indicate an overloaded or faulty electrical system. Overloaded circuits can lead to overheating, tripped breakers, or electrical fires. Consult a licensed electrician to assess wiring, panel capacity, and circuit loads.

Do not ignore repeated dimming or flickering lights, as this can indicate potential hazards. Ensuring that the electrical system meets current codes and can handle the home’s appliances is essential for safety and reliability.

FAQ

Why do lights dim when my AC turns on?
The AC motor requires a large surge of electricity at startup, causing a temporary voltage drop and dimming lights.

Is this dangerous?
Short, mild dimming is usually safe. Persistent or severe dimming may indicate wiring or panel issues that require professional inspection.

Will upgrading my panel help?
Yes. A higher-capacity panel and dedicated circuits can reduce or eliminate dimming by handling high electrical loads more efficiently.

Can I reduce dimming without electrical upgrades?
Installing a soft starter for the AC or balancing appliance loads across circuits can reduce the inrush current impact and minimize dimming.

Do LED lights dim as much as incandescent bulbs?
LEDs and compact fluorescent lights are less sensitive to voltage drops and generally dim less, but significant voltage fluctuations can still cause flickering.

Conclusion

Lights dimming when an AC turns on is typically caused by the inrush current drawn by the compressor and fan motors. Temporary dimming is common, especially in older homes with smaller electrical panels or shared circuits. Addressing the issue may involve installing a dedicated AC circuit, upgrading the electrical panel, or adding a soft starter to the system. Regular maintenance and inspection of wiring connections help prevent excessive voltage drops. Persistent or severe dimming should be evaluated by a licensed electrician to ensure safety and prevent potential hazards. Proper electrical capacity and balanced loads maintain reliable AC operation and consistent lighting throughout the home.

How to Reset AC Pressure Switch

How to Reset AC Pressure Switch

The pressure switch in an air conditioning system plays a critical role in maintaining safe and efficient operation. It monitors refrigerant pressure and prevents the system from operating under unsafe conditions. If the pressure is too high or too low, the switch may shut down the AC. Resetting the AC pressure switch can restore functionality, but it requires understanding the system, safety precautions, and proper procedures.

Understanding the AC Pressure Switch

The AC pressure switch is a safety device installed in the refrigeration cycle. Its primary function is to monitor high-side and low-side pressure levels. The low-pressure switch ensures the refrigerant level is sufficient to prevent the compressor from running dry, while the high-pressure switch protects against excessive pressure that could damage components.

Pressure switches are commonly found in both residential and commercial systems. They are connected to the electrical control circuit of the AC unit and can interrupt power to the compressor when pressure levels exceed the specified range. Typical cut-in and cut-out pressures vary depending on the system and refrigerant type.

Reasons the Pressure Switch Trips

Several factors can cause the AC pressure switch to trip, preventing the system from operating. Low refrigerant levels due to leaks can trigger the low-pressure switch. High pressure may occur from dirty condenser coils, restricted airflow, or overcharged refrigerant. Electrical issues, such as loose wiring or a faulty switch, can also cause false trips.

A tripped pressure switch indicates an underlying issue that needs attention. Resetting the switch alone without addressing the root cause may result in repeated trips or damage to the compressor.

Steps to Reset the AC Pressure Switch

Before attempting to reset the switch, turn off power to the AC system at the breaker to ensure safety. Identify the location of the pressure switch, usually near the compressor or on the refrigerant lines. Consult the manufacturer’s manual for the exact location and specifications.

Some pressure switches reset automatically after the system cools and pressures normalize. If the switch has a manual reset, press the reset button or toggle the switch according to the manufacturer’s instructions. After resetting, restore power and observe the system to ensure normal operation.

If the pressure switch trips again immediately, it indicates an unresolved issue such as low refrigerant, blocked airflow, or mechanical failure. In this case, professional diagnosis and repair are required.

Safety Considerations

Working with the AC pressure switch involves handling high-pressure refrigerant and electrical components. Improper handling can cause injury or damage to the system. Certified HVAC technicians have the necessary tools, gauges, and knowledge to safely troubleshoot and reset pressure switches.

It is important to never attempt to bypass the pressure switch. Doing so can lead to compressor damage, refrigerant leaks, or system failure. Ensuring all electrical connections are secure and components are intact is essential for safe operation.

Preventive Maintenance

Regular maintenance helps prevent pressure switch trips and prolongs the AC system’s lifespan. Checking refrigerant levels, cleaning condenser coils, and replacing air filters reduce the likelihood of abnormal pressures. Inspecting wiring and electrical components ensures proper communication with the control circuit.

Maintaining proper airflow and ensuring the system is neither undercharged nor overcharged with refrigerant are key preventive measures. These steps reduce unnecessary trips of the pressure switch and maintain consistent cooling performance.

FAQ

What does the AC pressure switch do?
It monitors refrigerant pressure and protects the compressor from operating under unsafe conditions caused by low or high pressure.

Can I reset the pressure switch myself?
Some switches have manual reset buttons, but resetting should only be done after turning off power and ensuring the underlying issue is addressed. Professional assistance is recommended if the switch trips repeatedly.

Why does the AC pressure switch keep tripping?
Frequent trips may result from low refrigerant, blocked airflow, dirty condenser coils, overcharged systems, or electrical faults.

Is it safe to bypass the pressure switch?
No. Bypassing the switch can cause serious damage to the compressor and other components.

How often should pressure switches be checked?
Pressure switches should be inspected during routine AC maintenance, typically once or twice a year, along with refrigerant checks and electrical inspections.

Conclusion

The AC pressure switch is a critical safety component that ensures proper operation and protects the compressor from damage. Trips can occur due to low or high refrigerant, airflow restrictions, or electrical issues. Resetting the pressure switch may restore system operation, but only after identifying and resolving the underlying cause. Proper handling, adherence to safety protocols, and regular maintenance are essential. Certified HVAC technicians can safely reset the switch, test system pressures, and perform necessary repairs to maintain efficient and reliable cooling. Regular inspection and maintenance reduce the risk of future trips and extend the life of the air conditioning system.

Why Won't My AC Turn On

Why Won’t My AC Turn On

Air conditioning systems are essential for maintaining comfortable indoor temperatures. When an AC unit fails to turn on, it can cause discomfort and concern. Several factors can prevent an AC from operating properly. Understanding these issues helps homeowners identify potential problems and take appropriate steps for repair.

Common Causes of AC Not Turning On

One of the most frequent reasons an AC does not start is a tripped circuit breaker. Electrical surges or overloads can cause the breaker to trip, cutting power to the system. Checking the breaker and resetting it can often restore operation.

A blown fuse in the AC’s disconnect box or control panel can also prevent the unit from turning on. Fuses protect the system from electrical damage, and replacement may be required if a fuse has blown.

Thermostat issues are another common cause. If the thermostat is not set correctly, has dead batteries, or is malfunctioning, the AC may not receive the signal to start. Ensuring the thermostat is set to “cool” mode and verifying the temperature setting is lower than the current room temperature is essential.

A faulty capacitor or contactor can prevent the compressor and fan from starting. These electrical components provide the necessary power to the motor. If they fail, the unit may not turn on even if it receives power. Professional diagnosis is usually required.

Low refrigerant levels typically do not prevent the AC from turning on, but extremely low levels due to a leak can cause the system to enter a safety shutdown mode. Regular maintenance and refrigerant checks help prevent such issues.

Mechanical problems, such as a seized compressor or damaged fan motor, can also stop the AC from starting. These issues require professional repair or replacement of parts.

Steps to Troubleshoot AC Power Issues

First, check the power source. Ensure the unit is plugged in and the breaker has not tripped. Inspect the disconnect box near the outdoor unit for blown fuses.

Next, verify the thermostat settings. Replace batteries if needed and confirm the system is in cooling mode. Setting the thermostat a few degrees lower than the current room temperature should signal the AC to start.

If the AC still does not turn on, inspect the electrical components. Capacitors, contactors, and wiring may require professional testing. Attempting repairs without proper knowledge can be dangerous.

Listen for unusual noises or observe the fan and compressor. These signs may indicate mechanical issues requiring professional attention. Regular maintenance, such as cleaning coils, checking refrigerant levels, and lubricating motors, reduces the risk of AC failure.

Preventing AC Power Failures

Preventive measures help ensure reliable operation. Routine maintenance by a certified HVAC technician includes inspecting electrical components, testing capacitors, checking refrigerant, and cleaning filters.

Ensuring proper thermostat function and keeping it free from dust or obstructions helps maintain accurate temperature readings. Surge protectors can prevent damage from power fluctuations. Sealing ducts and maintaining insulation improves airflow and reduces strain on the system.

FAQ

Why won’t my AC turn on but the fan works?
This may indicate a compressor or capacitor issue. The fan can operate independently, while the compressor may be unable to start due to electrical or mechanical problems.

Can a tripped breaker cause the AC not to turn on?
Yes. Breakers protect the system from electrical overload. Resetting the breaker often restores power if this is the cause.

Could a thermostat prevent the AC from starting?
Yes. Incorrect settings, dead batteries, or malfunctioning thermostats can prevent the AC from receiving the signal to turn on.

Is low refrigerant a reason the AC won’t turn on?
Extremely low refrigerant can trigger safety mechanisms that prevent the AC from starting. Checking refrigerant levels and repairing leaks resolves the issue.

Should I attempt to repair the AC myself?
Electrical and mechanical repairs can be dangerous. It is recommended to hire a certified HVAC professional for diagnosis and repair.

Conclusion

An AC unit may fail to turn on due to electrical, thermostat, or mechanical issues. Common causes include tripped breakers, blown fuses, thermostat malfunctions, faulty capacitors, or a seized compressor. Troubleshooting involves checking power sources, verifying thermostat settings, and inspecting electrical components. Regular maintenance, including inspection of electrical parts, refrigerant levels, and mechanical components, reduces the risk of failure. When professional repair is needed, hiring a certified technician ensures safe and effective resolution. Proper care and preventive measures help maintain reliable cooling and prolong the lifespan of the air conditioning system.

Where Can I Buy R22 Freon for My Home AC

Where Can I Buy R22 Freon for My Home AC

R22 refrigerant, also known as Freon, has been widely used in home air conditioning systems for decades. It plays a key role in cooling by absorbing and releasing heat. However, due to environmental regulations, R22 production has been phased out in many countries, including the United States, because it contributes to ozone depletion. Despite this, some homeowners still need R22 to recharge older AC systems. Knowing where to purchase it safely and legally is important for maintaining your home’s air conditioning.

Understanding R22 Refrigerant

R22 is a hydrochlorofluorocarbon (HCFC) used in residential and commercial air conditioning systems. It was popular for its efficiency and compatibility with older units. Most home AC units manufactured before 2010 may use R22. Modern systems use alternatives such as R410A or R32, which are more environmentally friendly and comply with current regulations.

R22 cannot be produced new in large quantities due to the Montreal Protocol, which limits HCFC production. As a result, the supply of R22 is mostly recycled or reclaimed from decommissioned systems. This scarcity has increased the price compared to newer refrigerants.

Where to Buy R22 Freon

Purchasing R22 requires understanding local regulations and safety requirements. In the United States, R22 is considered a controlled substance. Only certified professionals with EPA Section 608 certification can purchase and handle it legally. Homeowners cannot legally buy new R22 in most cases.

However, recycled or reclaimed R22 is available through licensed distributors and HVAC supply stores. Large home improvement stores may sell R22, but typically only for professional use. Online retailers also offer reclaimed R22, but certification and proper handling are necessary.

Another option is to hire a certified HVAC technician. Professionals can purchase the refrigerant, recharge your system safely, and ensure compliance with regulations. This approach reduces the risk of leaks, incorrect charging, and environmental harm.

Safety and Handling Considerations

R22 is a pressurized chemical that can be hazardous if mishandled. Direct contact may cause frostbite, and inhalation can be harmful. Certified technicians use specialized gauges, hoses, and recovery equipment to handle R22 safely. Homeowners attempting to refill AC systems without proper training risk injury and violation of federal laws.

Proper disposal is also required. R22 cannot be released into the atmosphere due to its ozone-depleting properties. Certified professionals must recover and recycle the refrigerant during repairs or system replacement.

Alternative Options

Because of the phase-out, many homeowners consider replacing R22 systems or converting to alternative refrigerants. Options include retrofitting the system for R410A or using a reclaimed R22 substitute compatible with older units. These alternatives may be more cost-effective in the long term, as R22 prices continue to rise due to limited availability.

Regular maintenance of older R22 systems is essential. Leaks should be repaired promptly, and refrigerant levels monitored to ensure the system runs efficiently. Proper maintenance can extend the life of the system while complying with environmental regulations.

FAQ

Can I buy R22 Freon for my home AC?
In most cases, homeowners cannot purchase new R22 due to EPA regulations. Only certified HVAC professionals can legally buy and handle R22.

Where can I legally get R22?
Reclaimed or recycled R22 is available from licensed distributors, HVAC supply stores, or certified technicians. Online options exist, but certification is required.

Is it safe to recharge my AC with R22 myself?
No. Handling R22 without certification is illegal and can be hazardous. A licensed technician should perform any recharging or repairs.

What are alternatives to R22?
Modern AC systems use R410A, R32, or other environmentally friendly refrigerants. Older R22 systems can sometimes be retrofitted to use compatible substitutes.

Why is R22 expensive?
R22 production is largely phased out due to environmental regulations. Most available R22 is reclaimed or recycled, making it more costly than newer refrigerants.

Conclusion

R22 Freon is essential for older home AC systems, but strict regulations govern its purchase and use. Homeowners cannot legally buy new R22 and must rely on certified HVAC professionals or licensed distributors for reclaimed refrigerant. Handling R22 requires proper safety equipment and training to prevent injury and environmental damage. Considering alternatives such as retrofitting to R410A or using compatible substitutes may be a cost-effective long-term solution. Proper maintenance and professional servicing ensure older R22 systems operate efficiently while complying with current regulations.

How Long Should an AC Run to Drop 1 Degree

How Long Should an AC Run to Drop 1 Degree

Air conditioning systems maintain indoor comfort by lowering the temperature and controlling humidity. Homeowners often ask how long an AC should run to reduce the temperature by 1 degree Fahrenheit or Celsius. Understanding this depends on factors such as AC size, room volume, insulation, outdoor temperature, and system efficiency. Knowing this information helps optimize usage, reduce energy costs, and maintain system performance.

Factors Affecting Cooling Speed

The time required for an AC to lower the temperature depends on several variables. The first factor is the unit’s cooling capacity, measured in BTUs (British Thermal Units) per hour. Higher BTU ratings provide faster cooling. For example, a 10,000 BTU window unit cools a 400-square-foot room faster than a 5,000 BTU unit.

Room size and volume are important. Larger rooms or open spaces require more time to drop the temperature than small, enclosed areas. Ceiling height also affects cooling; rooms with 10-foot ceilings need more cooling than standard 8-foot ceilings.

Insulation quality influences cooling speed. Well-insulated rooms retain cool air and prevent heat gain from outside. Poor insulation or large windows exposed to direct sunlight increase the time needed for a 1-degree drop. Other factors include the number of occupants, heat-producing appliances, and humidity levels. High humidity makes cooling slower because the AC must also remove moisture from the air.

Typical Cooling Time

For a standard home room of approximately 400 to 500 square feet, a typical AC can lower the temperature by 1 degree in about 10 to 15 minutes. Central air systems with higher capacities may achieve the same result faster, often within 5 to 10 minutes for each degree.

Window or portable units may take longer depending on BTU capacity and room conditions. For example, a 5,000 BTU window AC in a 300-square-foot room may require 15 to 20 minutes to reduce the temperature by 1 degree. High outdoor temperatures and direct sunlight can extend this time further.

Improving AC Efficiency

Several strategies can help an AC lower the temperature faster. Ensuring the unit is properly sized for the room is crucial. Oversized units cool quickly but may cycle off before removing humidity, while undersized units run longer and consume more energy.

Cleaning or replacing the AC filter improves airflow and efficiency. Dirty filters reduce cooling speed and increase energy usage. Properly sealing windows and doors prevents cool air from escaping and hot air from entering, reducing cooling time. Using blinds or shades to block direct sunlight can lower the heat load on the system. Ceiling fans or portable fans help distribute cooled air, allowing the AC to reach the desired temperature more efficiently.

Regular maintenance, including checking refrigerant levels and cleaning coils, ensures the system operates at peak efficiency. Well-maintained units cool rooms faster and maintain temperature consistency.

Energy Considerations

AC runtime affects electricity consumption. Running the unit continuously to lower the temperature quickly increases energy use. Efficient operation involves setting the thermostat at a moderate temperature and allowing gradual cooling. Each degree of temperature reduction requires additional energy, so understanding the time needed for a 1-degree drop helps balance comfort and electricity costs.

Units with higher SEER (Seasonal Energy Efficiency Ratio) ratings provide faster cooling with lower energy consumption. For instance, a SEER 20 unit uses about 20% less energy to achieve the same cooling effect as a SEER 16 unit.

FAQ

How long does it take for an AC to drop 1 degree?
It typically takes 10 to 15 minutes for a standard AC to reduce the temperature by 1 degree in a 400 to 500-square-foot room.

Does room size affect cooling speed?
Yes. Larger rooms or rooms with high ceilings take longer to drop 1 degree compared to smaller, enclosed spaces.

Can poor insulation slow cooling?
Yes. Heat gain through walls, windows, and doors increases cooling time. Well-insulated rooms cool faster and maintain temperature.

Do AC filters affect cooling speed?
Yes. Clogged or dirty filters reduce airflow, making it take longer to lower the temperature.

Does high outdoor temperature affect AC runtime?
Yes. Hotter outdoor conditions increase the system’s workload, extending the time required to achieve a 1-degree drop.

Conclusion

The time an AC needs to lower the temperature by 1 degree depends on factors such as unit capacity, room size, insulation, outdoor temperature, and humidity. For a typical room of 400 to 500 square feet, it usually takes 10 to 15 minutes per degree. Properly sized units, clean filters, sealed windows, and shaded rooms improve efficiency and reduce runtime. Understanding these variables allows homeowners to optimize AC use, save energy, and maintain comfortable indoor conditions consistently. Regular maintenance ensures the system cools effectively while extending its lifespan.

What Size AC Do I Need

What Size AC Do I Need

Choosing the correct air conditioner size is crucial for efficient cooling and comfort. An AC that is too small will struggle to cool the space, while an oversized unit will cycle on and off frequently, wasting energy. Understanding how to calculate the required size ensures proper performance, lower energy bills, and longer system lifespan.

Understanding AC Size

AC size is measured in BTUs (British Thermal Units) per hour. This indicates the system’s cooling capacity. Higher BTU ratings provide more cooling power. Residential air conditioners typically range from 5,000 to 24,000 BTUs. Larger central air systems are rated in tons, with 1 ton equal to 12,000 BTUs.

The required size depends on the area to be cooled, ceiling height, insulation quality, number of windows, and local climate. Other factors such as the number of occupants and heat-generating appliances also affect cooling needs. Proper sizing ensures the AC maintains the desired indoor temperature without overworking the system.

Calculating AC Size

The first step in selecting an AC unit is measuring the square footage of the space. For standard residential spaces with 8-foot ceilings, a common guideline is approximately 20 BTUs per square foot. For example, a 500-square-foot room would need a unit with around 10,000 BTUs.

Adjustments may be necessary based on specific conditions. Rooms with high ceilings, large windows, or poor insulation require more cooling capacity. Spaces exposed to direct sunlight or located on the top floor of a building may also need additional BTUs. Conversely, shaded rooms or those with excellent insulation may require slightly less.

For central air systems, a professional load calculation called a Manual J calculation provides the most accurate sizing. This method considers insulation, window type, orientation, climate, and occupancy to recommend the correct AC tonnage.

Common AC Sizes and Applications

Window and portable AC units are available in smaller sizes, typically 5,000 to 12,000 BTUs, suitable for single rooms. Small bedrooms or offices require units around 5,000 to 8,000 BTUs, while living rooms or large kitchens may need 10,000 to 12,000 BTUs.

Split and central AC systems have larger capacities, ranging from 1 to 5 tons (12,000 to 60,000 BTUs). Homes with multiple rooms generally require central systems sized between 2 and 4 tons, depending on total square footage. Multi-zone systems allow individual control for different areas, optimizing comfort and energy use.

Effects of Incorrect Sizing

An undersized AC cannot cool the space efficiently, causing continuous operation, high energy bills, and strain on components such as the compressor. Over time, this may lead to system failure.

An oversized AC cools the room quickly but cycles on and off frequently. Short cycles prevent proper dehumidification, leaving the indoor air feeling humid and uncomfortable. Frequent cycling also increases wear on the system, leading to higher maintenance costs.

Energy Efficiency Considerations

Selecting the right size AC affects energy efficiency. Units with high SEER (Seasonal Energy Efficiency Ratio) ratings use less electricity to provide the same cooling. A properly sized AC consumes less power and maintains a more consistent temperature, reducing stress on electrical systems.

Thermostat settings, insulation, and shading also influence energy consumption. A combination of correct sizing, efficient operation, and home improvements can reduce cooling costs by 10% to 30% annually.

FAQ

How do I determine the AC size for a single room?
Measure the room’s square footage and multiply by approximately 20 BTUs per square foot. Adjust for high ceilings, windows, and sunlight exposure.

Is bigger AC better than smaller?
No. Oversized units cool quickly but do not remove humidity effectively and increase wear. Properly sized units provide consistent comfort and efficiency.

What AC size do I need for a 1,000-square-foot home?
A 1,000-square-foot home typically requires a central AC system around 2 tons (24,000 BTUs). Actual requirements may vary based on insulation, windows, and climate.

Do ceiling height and insulation affect AC size?
Yes. Higher ceilings and poor insulation increase cooling needs. Adjust the BTU calculation to account for these factors.

Can I use a professional load calculation for accuracy?
Yes. A Manual J calculation is the most precise method for determining AC size for your home, considering all variables such as orientation, windows, insulation, and occupancy.

Conclusion

Selecting the correct AC size is essential for comfort, efficiency, and system longevity. Factors including square footage, ceiling height, insulation, windows, sunlight exposure, and local climate determine the required BTU capacity. Undersized units struggle to cool, while oversized units waste energy and reduce humidity control. Using standard sizing guidelines or professional load calculations ensures optimal performance. Properly sized air conditioners maintain consistent temperatures, reduce energy costs, and prolong the life of the system.

How Much Does It Cost to Run AC for a Month

How Much Does It Cost to Run AC for a Month

Air conditioning is essential for maintaining comfortable indoor temperatures, especially during hot months. However, running an AC unit continuously can significantly impact electricity bills. Understanding the cost to run an AC for a month depends on factors such as energy consumption, electricity rates, unit efficiency, and usage patterns. This information helps homeowners budget and make informed decisions about energy management.

Factors Affecting AC Monthly Costs

The cost of running an air conditioner is influenced by multiple factors. First, the type and size of the AC unit determine energy consumption. Central air conditioning systems generally use more power than window or portable units. A typical central AC consumes between 2,000 and 4,000 watts per hour, while a window unit may use 500 to 1,500 watts per hour.

The efficiency of the unit, measured as the SEER (Seasonal Energy Efficiency Ratio) rating, also affects cost. Higher SEER ratings indicate more energy-efficient units, which reduce electricity usage. For example, a SEER 20 unit uses nearly 25% less energy than a SEER 16 unit to achieve the same cooling effect.

Other factors include local electricity rates, which vary by region. The national average in the United States is around $0.15 per kilowatt-hour, but this can range from $0.10 to $0.30 per kWh. The number of hours the AC runs per day also significantly affects monthly costs. Running the unit 8 hours daily costs less than running it continuously for 24 hours.

Calculating Monthly AC Costs

To estimate the monthly cost, multiply the AC unit’s power consumption by the number of hours it operates and the electricity rate. For example, a 3,000-watt central AC running 8 hours daily uses 24 kWh per day. At $0.15 per kWh, the daily cost is $3.60, resulting in a monthly cost of approximately $108.

A smaller window unit consuming 1,000 watts running 12 hours daily uses 12 kWh per day. At the same electricity rate, the daily cost is $1.80, and the monthly cost is around $54. These examples demonstrate that unit size, usage time, and local rates directly impact total expenses.

Ways to Reduce AC Running Costs

Maintaining and optimizing the AC unit helps reduce monthly electricity costs. Ensuring the filter is clean improves airflow and efficiency. Proper insulation of windows and doors prevents cool air from escaping. Setting the thermostat to a moderate temperature, such as 24°C (75°F), reduces energy consumption compared to lower temperatures.

Using programmable thermostats can control AC operation based on occupancy and schedule. For example, reducing operation during daytime hours when the home is empty can save up to 15% on monthly energy costs. Additionally, using ceiling fans or portable fans can help distribute cooled air, reducing the workload on the AC system.

Regular maintenance is another cost-saving measure. Cleaning condenser coils, checking refrigerant levels, and servicing the system improve efficiency and prevent costly repairs. Well-maintained units consume less energy to provide the same cooling effect.

FAQ

How much does it cost to run a central AC per month?
A central AC can cost between $100 and $300 per month, depending on unit size, efficiency, usage, and electricity rates.

How much does it cost to run a window AC per month?
A window unit may cost between $40 and $100 per month, based on power consumption and daily usage hours.

Does running AC continuously increase electricity bills?
Yes. Continuous operation increases total kilowatt-hours consumed, leading to higher monthly costs.

Can I reduce costs by adjusting the thermostat?
Yes. Raising the thermostat by 2–3°C reduces energy consumption by 5–10%. Moderate temperature settings are more cost-effective.

Does maintenance affect running costs?
Yes. A clean and well-maintained AC runs efficiently, consuming less electricity and reducing monthly costs.

Conclusion

The monthly cost of running an AC unit depends on its size, energy efficiency, usage patterns, and local electricity rates. Central AC units typically cost $100 to $300 per month, while window units range from $40 to $100 per month. Optimizing thermostat settings, maintaining the system, and using insulation or fans can reduce costs. Understanding these factors allows homeowners to manage energy use effectively, maintain comfort, and lower electricity bills. Proper care and smart operation ensure that the AC system works efficiently throughout the year.

How to Replace AC Filter

How to Replace AC Filter

Air conditioning systems rely on filters to maintain clean airflow and efficient operation. The AC filter traps dust, dirt, pollen, and other airborne particles, preventing them from circulating inside the home or office. Over time, the filter becomes clogged, reducing airflow and cooling efficiency. Replacing the AC filter regularly ensures better air quality, lower energy consumption, and a longer system lifespan.

Understanding AC Filters

AC filters vary in size, material, and filtration capacity. Common types include fiberglass, pleated, HEPA, and electrostatic filters. Fiberglass filters are inexpensive and capture large particles, but they have lower efficiency. Pleated filters have higher surface area and can trap smaller particles. HEPA filters remove up to 99.97% of particles as small as 0.3 microns, making them suitable for homes with allergies. Electrostatic filters use static electricity to attract dust and can be washed and reused.

The filter is usually located near the return air duct or inside the air handler unit. Identifying the correct type and size is essential for proper replacement. Using an incorrect filter can reduce airflow, strain the system, and compromise air quality.

Signs That the AC Filter Needs Replacement

Clogged or dirty filters affect system performance. Common signs include reduced airflow, uneven cooling, higher energy bills, unusual odors, and visible dust around vents. In HVAC systems, dirty filters can also cause the evaporator coil to freeze, which may lead to costly repairs. Most manufacturers recommend checking filters every 30 to 90 days, depending on usage and air quality conditions. Homes with pets or high dust levels may require more frequent replacements.

Steps to Replace an AC Filter

Replacing an AC filter is a simple task that improves system efficiency. The steps include:

  1. Turn off the AC unit at the thermostat or breaker to ensure safety.
  2. Locate the air filter. This is usually behind the return air vent or inside the air handler.
  3. Remove the old filter carefully to avoid spreading dust and debris.
  4. Check the dimensions and type of the existing filter to ensure proper replacement.
  5. Insert the new filter, making sure the airflow arrow points toward the AC system.
  6. Close the filter slot or grille and restore power to the unit.

Proper installation ensures that all air passes through the filter, trapping particles effectively.

Benefits of Replacing AC Filters Regularly

Regular filter replacement provides multiple benefits. It maintains airflow, allowing the system to cool or heat efficiently. Clean filters reduce strain on the blower motor, lowering energy consumption. They also improve indoor air quality by removing dust, pollen, and other allergens. In addition, replacing filters prevents dirt buildup on coils and ducts, which can prolong the life of the AC unit.

FAQ

How often should I replace my AC filter?
Most filters should be replaced every 30 to 90 days, depending on usage, air quality, and presence of pets. High-efficiency filters may last longer, up to 6 months.

Can I wash and reuse my AC filter?
Some electrostatic and washable filters can be rinsed and reused. Disposable fiberglass and pleated filters should be replaced entirely.

What happens if I don’t replace the AC filter?
A clogged filter reduces airflow, increases energy bills, causes uneven cooling, and may damage the system over time.

How do I know the correct filter size?
The filter dimensions are usually printed on the side of the old filter. Always match the size and type recommended by the manufacturer.

Does a dirty filter affect health?
Yes. Dirty filters allow dust, pollen, and allergens to circulate indoors, which can aggravate respiratory conditions and allergies.

Conclusion

Replacing the AC filter is a simple but crucial task that ensures efficient cooling, cleaner air, and longer system life. Filters trap airborne particles, protect internal components, and maintain proper airflow. Regular inspection and timely replacement every 30 to 90 days prevent reduced efficiency, higher energy costs, and potential damage to the AC unit. Using the correct type and size of filter is essential for optimal performance. Proper maintenance of AC filters helps maintain a comfortable, healthy, and energy-efficient indoor environment.

How Much to Fix Car AC

How Much to Fix Car AC

A car’s air conditioning system is essential for comfort, especially during hot weather. When it stops working, it can make driving difficult and unpleasant. One of the first questions drivers ask is how much it costs to fix car AC. The answer depends on the problem, the vehicle type, and the repair shop. Understanding the common issues and costs helps drivers plan better and avoid unexpected expenses.

Common Problems That Affect Car AC

Several components work together to cool the cabin. If any of them fail, the system may stop working or lose efficiency. Common issues include refrigerant leaks, compressor failure, clogged condenser, faulty blower motor, and electrical problems. Each repair has a different cost depending on parts and labor.

Average Cost to Fix Car AC

The cost of fixing a car AC can range from $150 to over $2,000. Minor issues like recharging refrigerant are on the lower end, while replacing a compressor or condenser is more expensive. On average, many drivers spend between $500 and $1,200 for common repairs. Luxury vehicles and newer models may cost more because of complex systems and specialized parts.

Cost Breakdown for Different Repairs

Refrigerant Recharge

Recharging the refrigerant is one of the simplest fixes. This service usually costs $150 to $300. It restores cooling when the AC is blowing warm air due to low refrigerant levels.

Leak Repair

If the refrigerant is leaking, the mechanic must first find the leak, repair it, and then recharge the system. This can cost between $200 and $1,000, depending on the severity and location of the leak.

Compressor Replacement

The compressor is the most expensive part of the system. It circulates refrigerant and is vital for cooling. Replacing a failed compressor can cost $800 to $2,500 with parts and labor included.

Condenser Replacement

The condenser releases heat from the refrigerant. A damaged or clogged condenser affects cooling performance. Replacement costs are usually between $600 and $1,200.

Blower Motor Repair

If the AC fan does not blow air, the blower motor may be defective. Repair or replacement typically costs $300 to $700.

Electrical System Issues

Wiring problems, blown fuses, or faulty sensors can also cause AC failure. Electrical repairs range from $150 to $500, depending on complexity.

Factors That Influence Repair Costs

Several factors affect how much it costs to fix car AC:

  • Vehicle make and model: Luxury cars and imported vehicles often require more expensive parts.
  • Age of the vehicle: Older cars may need more extensive repairs due to wear and tear.
  • Location: Labor rates vary. Repairs in large cities usually cost more than in smaller towns.
  • Extent of damage: A simple recharge is less costly than replacing major components.

Signs That Car AC Needs Repair

Recognizing early warning signs can help reduce costs. Common indicators include warm air from vents, unusual noises when AC is running, weak airflow, bad odors, and moisture inside the cabin. Addressing these signs early can prevent bigger and more expensive problems.

FAQ

How much does it cost to fix car AC on average?
The average cost ranges from $500 to $1,200, depending on the issue. Minor fixes may cost less, while major repairs like compressor replacement cost more.

Is it cheaper to recharge AC instead of repairing it?
Yes. A recharge costs about $150 to $300, but if there is a leak, the system will lose refrigerant again. In that case, repair is necessary.

Can I drive with a broken AC?
Yes, but it affects comfort and may reduce visibility if defogging does not work properly. It is best to repair the AC to maintain safety and comfort.

Why is car AC repair so expensive?
Car AC systems are complex and require specialized parts. Labor costs are also high because many components are located deep inside the engine bay.

How often should car AC be serviced?
Most experts recommend servicing every 1 to 2 years to check refrigerant levels, clean components, and prevent failures.

Conclusion

The cost to fix a car AC varies widely, from $150 for simple recharges to over $2,000 for major repairs like compressor replacement. Factors such as vehicle type, repair complexity, and labor rates influence the final price. Paying attention to early signs of AC trouble and scheduling regular maintenance can help avoid costly repairs. A well-functioning AC system ensures comfort, safety, and efficiency for every drive.