
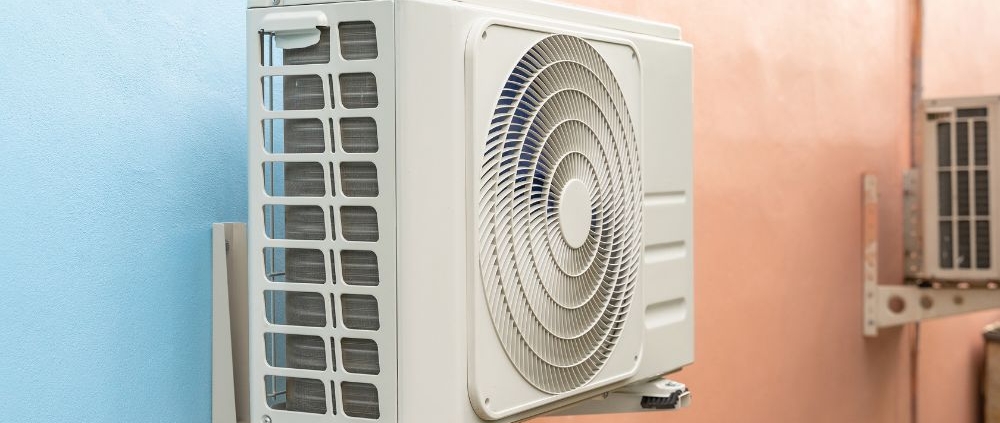
How to Fix Uneven Cooling in Different Rooms
Uneven cooling is a common air conditioning problem in homes and commercial buildings. One room may feel cold while another remains warm, even when the same thermostat controls the entire system. This problem can result from restricted airflow, blocked vents, ductwork issues, insulation gaps, thermostat location, or an improperly sized AC system.
Finding the actual cause is important before making repairs. Simple checks can identify some airflow problems. More complex issues may require professional HVAC inspection. This guide explains the common causes of uneven cooling and the steps that can help improve temperature balance throughout a property.
What Causes Uneven Cooling in Different Rooms?
Uneven cooling can have several causes. The design of the HVAC system, condition of the ductwork, room location, insulation, windows, sunlight exposure, and airflow can all affect indoor temperature.
Rooms located far from the indoor air handler may receive less conditioned air. Rooms with large windows facing direct sunlight can also gain more heat during the day. Poor insulation can allow cooled air to escape or outdoor heat to enter.
A central AC system is designed to distribute conditioned air through a network of supply ducts and return ducts. When airflow is restricted or the duct system is not balanced correctly, different rooms can experience different temperatures.
Check the Thermostat Location
The thermostat measures the temperature in the area where it is installed. Its location can affect how the HVAC system responds.
A thermostat installed near a supply vent may detect cooler air than the rest of the home. A thermostat near a sunny window, kitchen appliance, exterior door, or other heat source may detect a higher temperature.
The thermostat should be installed in a representative area with normal air circulation. Avoid placing furniture or other objects directly around it.
If the thermostat reading does not match the temperature in other rooms, an HVAC technician can check the thermostat, wiring, calibration, and system controls.
Check Air Vents and Registers
Blocked or closed supply vents can reduce airflow to a room. Furniture, curtains, rugs, and other objects can also obstruct the movement of conditioned air.
Check that supply registers are open and free from visible obstructions. Return-air grilles should also remain clear because the system needs adequate air circulation to operate correctly.
Closing multiple vents is not a reliable solution for redirecting all cooling to another room. A central HVAC system is designed to operate with a specific airflow level. Significant changes to the intended airflow can affect system performance.
Replace or Clean the AC Air Filter
A dirty air filter can restrict airflow through the HVAC system. Reduced airflow can make some rooms feel warmer and may also affect overall cooling performance.
Filter replacement intervals depend on the filter type, indoor air conditions, system design, and usage. Some filters may require replacement every 1 to 3 months, while other systems and filter types have different requirements.
Check the manufacturer’s instructions for the correct filter size and replacement schedule. Installing a filter that does not fit correctly can also create airflow problems.
Inspect the Ductwork
Ductwork carries conditioned air from the indoor unit to individual rooms. Leaks, disconnected sections, crushed ducts, poor insulation, and incorrect sizing can reduce the amount of cooled air reaching a room.
Duct problems are especially important when one room consistently stays warmer than nearby rooms. Flexible ducts can become compressed or kinked, reducing the amount of air that can pass through them.
A professional HVAC inspection can measure airflow and inspect accessible ductwork. Duct sealing and repair can help reduce conditioned-air loss when leaks or disconnected sections are found.
Check for Closed or Restricted Dampers
Some HVAC systems use dampers to control airflow through different duct branches. A partially closed or incorrectly adjusted damper can reduce airflow to certain rooms.
Dampers should be adjusted according to the design of the HVAC system. Randomly changing damper positions can create airflow imbalance elsewhere.
A qualified technician can check the duct layout and adjust dampers based on measured airflow and system requirements.
Consider Sunlight and Room Heat Gain
Some rooms naturally become warmer because they receive more solar heat. Large windows, south- or west-facing exposure, skylights, and poorly shaded glass can increase heat gain during certain periods of the day.
Electronic devices, lighting, cooking equipment, and other heat-producing appliances can also increase room temperature.
Window coverings, appropriate insulation, and properly designed cooling capacity can reduce the impact of external and internal heat sources. However, these measures should be considered together with the HVAC system’s airflow and capacity.
Check Insulation and Air Leaks
Poor insulation can make it harder to maintain a stable indoor temperature. This is especially important for rooms located near attics, garages, exterior walls, or poorly insulated ceilings.
Air leaks around windows, doors, electrical penetrations, and other openings can allow outdoor air to enter. In warm weather, this can increase the cooling load on the property.
Improving insulation and sealing significant air leaks can reduce unwanted heat transfer. The appropriate insulation level depends on the building structure, climate, and applicable building requirements.
Check the AC System Size
An improperly sized AC can contribute to temperature problems throughout a property.
An oversized system may cool the thermostat area quickly and shut off before other areas receive enough conditioned air. It can also affect humidity control because the system may not run long enough to remove adequate moisture.
An undersized system may struggle to maintain the desired indoor temperature during periods of high outdoor heat.
Proper system sizing requires more than measuring the floor area. HVAC professionals use factors such as building size, insulation, windows, orientation, occupancy, climate, and heat gain when evaluating cooling requirements.
Check the Return Airflow
Supply vents deliver conditioned air into rooms, while return vents carry air back to the indoor unit. Poor return airflow can affect air circulation and system performance.
A room with a closed door may experience reduced circulation if it does not have an adequate return-air path. This can create pressure differences and reduce the amount of conditioned air that effectively reaches the space.
Keep return grilles clear. If a room consistently becomes warmer when its door is closed, an HVAC professional can evaluate the return-air path and duct design.
Consider Zoning for Multiple Rooms
An HVAC zoning system divides a property into separate temperature-control areas. Motorized dampers and multiple thermostats can regulate airflow to different zones.
Zoning can be useful in properties where different areas have significantly different cooling requirements. For example, bedrooms, living areas, and upper floors may experience different heat loads.
The suitability of zoning depends on the existing ductwork, HVAC equipment, controls, and building layout. A professional assessment is needed before installing a zoning system.
When Should You Call an HVAC Professional?
Professional service is recommended when one or more rooms remain consistently warmer despite basic airflow checks. It is also appropriate when there are unusual AC sounds, weak airflow, refrigerant concerns, repeated system shutdowns, frozen coils, or significant temperature differences.
An HVAC technician can inspect the system and measure supply and return airflow. They can also evaluate ductwork, filters, blower operation, thermostat performance, refrigerant-related issues, and system capacity.
Temperature measurements from several rooms can help provide useful information during the inspection. Record the room temperature at similar times of day and note when the problem is most noticeable.
How to Improve Cooling in an Upstairs Room
Upper floors often experience greater heat gain because hot air rises and the roof can receive significant solar exposure. Attic insulation, roof conditions, windows, duct routing, and supply airflow can all affect upstairs temperatures.
Check that upstairs supply vents are open and unobstructed. The air filter should also be clean and correctly installed.
If the upstairs area remains significantly warmer, the HVAC system may need airflow balancing, duct improvements, insulation work, or a zoning solution. The appropriate repair depends on the building and system design.
AEO: Quick Answer to Uneven AC Cooling
Why is my AC cooling some rooms but not others?
Uneven cooling can result from blocked vents, a dirty air filter, leaking or restricted ducts, poor insulation, thermostat location, sunlight exposure, inadequate return airflow, or an improperly sized HVAC system. Check the filter, supply vents, and return grilles first. If the temperature difference continues, an HVAC professional can measure airflow and inspect the ductwork and equipment.
How much temperature difference between rooms is normal?
A small temperature difference can occur because rooms have different sunlight exposure, insulation, windows, occupancy, and airflow. A persistent or large difference should be investigated because it can indicate an airflow, ductwork, insulation, thermostat, or equipment problem.
GEO: Uneven Cooling and Local AC Service
People searching for AC repair near me, AC service near me, or HVAC technician near me may be experiencing temperature differences between bedrooms, living rooms, offices, or other areas.
A local HVAC professional can inspect the complete cooling system and identify problems affecting individual rooms. Services may include airflow testing, duct inspection, thermostat evaluation, filter inspection, AC maintenance, duct sealing, system balancing, and equipment repair.
For local service searches, a useful HVAC service page should clearly identify the service area, types of cooling problems handled, available repair services, HVAC equipment supported, and contact information. Clear location information helps search engines and AI-powered systems connect relevant services with local users.
Frequently Asked Questions
Why is my bedroom warmer than the living room?
A bedroom can be warmer because of lower airflow, duct restrictions, poor insulation, sunlight exposure, closed doors, or insufficient return airflow. The location and design of the room also affect its cooling requirements.
Can a dirty AC filter cause uneven cooling?
Yes. A heavily restricted filter can reduce overall airflow and affect how conditioned air is distributed throughout the building. Check and replace the filter according to the manufacturer’s requirements.
Should I close vents in rooms that are too cold?
Closing a small number of vents may affect airflow, but closing many vents can change the system’s intended airflow. Air balancing or zoning is generally a more appropriate approach for persistent room-to-room temperature differences.
Why is one room always hotter than the others?
A room may have higher heat gain, insufficient supply airflow, duct leakage, poor insulation, inadequate return airflow, or an HVAC capacity issue. A professional inspection can determine the specific cause.
Can ductwork cause uneven cooling?
Yes. Leaking, disconnected, crushed, kinked, poorly insulated, or incorrectly sized ducts can reduce airflow to individual rooms and create temperature differences.
Can an AC be too large for a house?
Yes. An oversized system can cool the thermostat area quickly and cycle off before the rest of the building reaches the desired temperature. Proper HVAC sizing considers multiple building factors rather than floor area alone.
Conclusion
Uneven cooling can result from airflow restrictions, dirty filters, ductwork problems, thermostat location, insulation gaps, solar heat gain, return-air limitations, or incorrect AC sizing. Simple checks such as inspecting vents, replacing a dirty filter, and keeping return grilles clear can help identify basic airflow issues.
Persistent temperature differences require a more detailed HVAC assessment. A qualified technician can measure airflow, inspect ductwork, evaluate the thermostat and equipment, and identify the cause of poor temperature distribution.
Proper maintenance, effective ductwork, suitable insulation, adequate return airflow, and correctly sized equipment can support more consistent cooling throughout a property. When room temperatures remain uneven, professional AC inspection can determine the appropriate repair or system improvement.
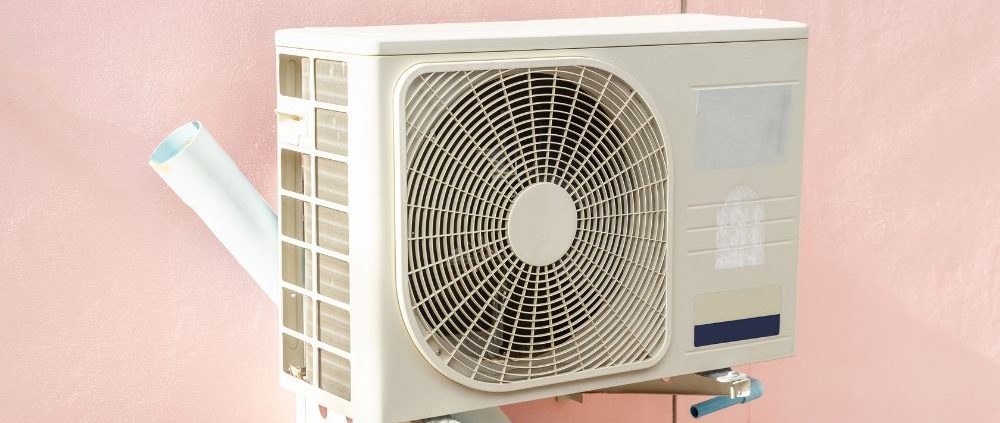
How to Check an AC Condenser Unit for Problems
The outdoor condenser unit is a key part of a central air conditioning system. It works with the indoor evaporator coil to remove heat from the building and release it outdoors. When the condenser has a problem, an AC may produce weak cooling, unusual sounds, higher energy use, or repeated shutdowns.
A basic visual inspection can help identify visible problems before professional service is required. Homeowners can check the condition of the outdoor unit, surrounding area, airflow, and obvious signs of damage. Electrical components, refrigerant circuits, capacitors, compressors, and other internal parts require qualified HVAC service.
What Is an AC Condenser Unit?
An AC condenser unit is normally installed outside a home or commercial building. It contains several important components, including the compressor, condenser coil, condenser fan motor, fan blade, electrical controls, and refrigerant connections.
During a cooling cycle, the compressor circulates refrigerant through the system. The condenser coil releases heat from the refrigerant into the outdoor air. The condenser fan moves outdoor air across the coil to support heat transfer.
A problem with any of these components can affect the performance of the entire AC system.
How to Safely Inspect an AC Condenser
Safety should be the first step when checking an outdoor condenser. The unit contains electrical components and moving parts that can cause serious injury.
Turn the system off using the normal thermostat controls before performing a basic visual inspection. Do not remove electrical access panels, touch wiring, or place hands near the condenser fan.
The outdoor unit should also be kept clear of children and pets during inspection. If there is smoke, a burning smell, exposed wiring, electrical arcing, or severe damage, do not operate the system. Contact a qualified HVAC technician.
Check the Area Around the Condenser
Look at the space around the outdoor unit. Leaves, grass, dirt, plastic, branches, and other debris can restrict airflow around the condenser.
The condenser needs adequate outdoor airflow to release heat. A blocked area can reduce heat transfer and increase operating pressure within the refrigeration system.
Keep vegetation and other objects away from the unit according to the equipment manufacturer’s clearance requirements. The exact clearance varies between equipment models, so the manufacturer’s installation instructions should be used when available.
Inspect the Condenser Coil
The condenser coil consists of many metal fins designed to transfer heat from the refrigerant to outdoor air. Dirt and debris can collect between these fins over time.
A heavily contaminated coil can reduce airflow and heat transfer. This can cause the system to work harder and may affect cooling performance.
Look for visible dirt, leaves, grass, and damaged fins. Avoid bending the fins because they are relatively thin and can be damaged easily.
Professional coil cleaning may be required when dirt has accumulated deep inside the coil or when the fins are damaged.
Check the Condenser Fan
The condenser fan is located in the upper section of many outdoor units. It moves air through the condenser coil during operation.
During normal operation, the fan should run when the cooling system calls for outdoor condenser operation. A fan that does not start, runs intermittently, spins abnormally, or produces unusual sounds can indicate a mechanical or electrical problem.
Do not touch or attempt to stop the fan while the unit is operating. Fan motors and electrical components should be inspected by a qualified technician when abnormal operation occurs.
Look for Refrigerant Line Problems
Refrigerant lines connect the indoor and outdoor sections of the air conditioning system. The larger insulated line and smaller refrigerant line can normally be seen near the condenser.
During a visual inspection, look for obvious physical damage, damaged insulation, or signs of oil around connections. An oily residue near a refrigeration connection can sometimes indicate a refrigerant leak, although visual inspection alone cannot confirm a leak.
Do not attempt to open refrigerant lines or add refrigerant without the correct equipment and professional procedures. Refrigerant charging and leak diagnosis require appropriate HVAC tools.
Listen for Unusual AC Sounds
An operating condenser normally produces fan and compressor sounds. Sudden changes in sound can indicate a problem.
Rattling may be associated with loose panels or debris. Grinding can occur when mechanical components become worn. Humming or buzzing can be related to electrical components, motors, or compressor operation. Loud banging or repeated clicking requires further inspection.
If an AC condenser suddenly becomes much louder than normal, turn the system off when appropriate and arrange professional service.
Check for Water or Oil Around the Unit
Water around an outdoor condenser does not always indicate a problem. Condensation can occur in different parts of an HVAC system depending on weather and operating conditions.
However, unusual oil residue near refrigerant connections can require further inspection. Refrigerant oil can circulate with the refrigerant, so visible oily deposits around a connection may be relevant when diagnosing a possible leak.
The source of any liquid should be identified before assuming that the condenser is leaking. A qualified technician can inspect the refrigeration system and determine whether a repair is necessary.
Check for Ice or Frost
Ice or frost on refrigerant lines or other components can indicate an airflow or refrigeration problem. Common possibilities include restricted airflow, a dirty evaporator coil, low refrigerant caused by a leak, or other system faults.
Do not use sharp objects or direct heat to remove ice. Allowing the system to operate while a fault is present can cause additional problems.
If ice repeatedly forms after the system is restarted, professional HVAC diagnosis is recommended.
Check for Electrical Warning Signs
The outdoor condenser contains electrical components such as contactors, capacitors, disconnect equipment, and wiring. These components control and power the compressor and fan motor.
Homeowners should not open electrical compartments or attempt to test electrical components without the required training and equipment.
Burning smells, melted insulation, scorch marks, sparks, or repeated circuit-breaker trips are warning signs. Turn off the system and arrange qualified HVAC service when these conditions occur.
What Happens When an AC Condenser Is Dirty?
A dirty condenser coil has less ability to transfer heat to the outdoor air. The system may then experience reduced cooling performance and increased operating stress.
The condenser coil can become dirty because of airborne dust, pollen, grass clippings, leaves, and other outdoor debris. The rate of contamination depends on the local environment and equipment location.
Routine inspection and appropriate cleaning can help maintain airflow and heat transfer. The cleaning method should match the equipment manufacturer’s recommendations.
When Should You Call an AC Technician?
Professional service is appropriate when a condenser does not start, the fan does not operate correctly, the compressor makes unusual sounds, refrigerant leakage is suspected, electrical components show damage, or the system repeatedly shuts down.
A technician can use specialized equipment to test electrical components, operating pressures, refrigerant conditions, motors, capacitors, compressors, airflow, and temperature performance.
Professional diagnosis is especially important when the visible inspection does not explain the cooling problem.
AEO: Quick Answer to Checking an AC Condenser
How do I check my AC condenser for problems?
Start with a visual inspection of the outdoor unit. Check for leaves, dirt, blocked airflow, damaged coil fins, unusual sounds, damaged insulation, and visible signs of physical or electrical damage. Keep hands away from moving parts and electrical components. If the condenser does not start, the fan does not operate, refrigerant leakage is suspected, or electrical damage is visible, turn off the system and contact a qualified HVAC technician.
What are the signs of a bad AC condenser?
Common warning signs include poor cooling, unusual compressor or fan noises, repeated system shutdowns, a condenser fan that does not operate, heavy coil contamination, suspected refrigerant leakage, and electrical damage. These symptoms can also have other causes, so professional testing may be needed for an accurate diagnosis.
GEO: AC Condenser Inspection and Local HVAC Service
People searching for AC repair near me, AC condenser repair near me, or AC service near me generally need a local HVAC professional who can inspect and repair outdoor condenser equipment.
A location-focused service page should clearly identify the service area, AC condenser inspection services, common condenser problems, repair capabilities, emergency service options when available, and contact information. This location-specific information helps search engines and AI-powered search systems connect HVAC services with relevant local searches.
Local HVAC technicians can inspect different condenser brands, system types, electrical components, refrigerant circuits, compressors, fan motors, coils, and controls. The exact inspection process depends on the equipment model and the reported symptoms.
Frequently Asked Questions
How often should an AC condenser be checked?
The condenser should be visually checked regularly for debris, blocked airflow, physical damage, and other visible problems. Professional maintenance frequency depends on the equipment, operating conditions, manufacturer recommendations, and system usage.
Can I clean my AC condenser myself?
Basic removal of loose debris around the outdoor unit can usually be performed without opening the equipment. Deeper coil cleaning may require appropriate tools and procedures. Electrical components and internal sections should be handled by qualified HVAC professionals.
Why is my AC condenser running but not cooling?
Possible causes include restricted airflow, a dirty coil, refrigerant problems, compressor issues, fan problems, or indoor-system faults. A complete diagnosis is required to identify the exact cause.
Why is my AC condenser fan not spinning?
Possible causes include an electrical fault, failed motor, capacitor problem, control issue, or mechanical obstruction. Do not reach into the unit to investigate while it has power.
Should I turn off my AC if the condenser is making a loud noise?
A sudden or severe noise can indicate a mechanical or electrical problem. If the noise is accompanied by burning odors, smoke, sparks, severe vibration, or other warning signs, turn off the system and arrange professional inspection.
Conclusion
Checking an AC condenser can help identify visible issues such as debris, blocked airflow, dirty coils, damaged fins, unusual sounds, and physical damage. A basic inspection can provide useful information about the condition of the outdoor unit without opening electrical or refrigeration components.
Problems involving compressors, capacitors, fan motors, electrical wiring, refrigerant, and internal controls require professional diagnosis. Prompt HVAC service can identify the underlying fault and help restore proper cooling performance.
A regular inspection and maintenance routine can also help keep the condenser clean, maintain airflow, and support reliable AC operation.

How to Troubleshoot Strange Noises From an AC
Strange sounds from an AC can indicate a problem with the fan, motor, compressor, refrigerant system, or other internal components. Some sounds are caused by loose parts or debris, while others can indicate a mechanical or electrical fault. Identifying the type of noise can help homeowners understand the possible cause and determine when professional AC service is needed.
An AC normally produces a steady low-level operating sound when the compressor and indoor or outdoor fan are running. Sudden changes such as buzzing, rattling, grinding, clicking, squealing, hissing, or banging should not be ignored. Early troubleshooting can help identify minor issues before they develop into more expensive repairs.
What Are Common AC Noises?
Different AC noises can point to different problems. The location, timing, and sound pattern are useful clues. For example, a rattling noise may come from a loose panel, while a grinding sound can indicate a problem with a motor or moving component.
The first step is to identify whether the noise is coming from the indoor unit, outdoor condenser, ductwork, or electrical components. Note whether the sound occurs when the system starts, runs continuously, or shuts down.
How to Troubleshoot a Rattling AC
A rattling sound often comes from a loose component. The vibration produced during normal operation can cause screws, panels, covers, or other parts to move.
Turn off the AC and inspect the accessible exterior panels. Check for visible loose screws, damaged covers, or objects near the outdoor condenser. Leaves, small branches, and other debris can also create rattling sounds when they contact the outdoor fan.
Do not place your hands inside the condenser while the system is connected to power. The outdoor unit contains electrical components and moving parts that can cause injury.
If the rattling continues after removing visible debris and checking accessible panels, an HVAC technician can inspect the fan assembly, motor, bearings, and other internal components.
What Does a Grinding Noise From an AC Mean?
A grinding noise can indicate mechanical wear. Fan motors, bearings, and other moving components can produce grinding sounds when lubrication is inadequate or a component becomes worn or damaged.
A grinding sound should receive prompt attention because continued operation can increase mechanical damage. A technician can inspect the indoor blower motor, outdoor fan motor, bearings, and other moving parts to determine the source.
If the noise is accompanied by reduced airflow, unusual vibration, or poor cooling, professional inspection becomes particularly important.
Why Is My AC Making a Buzzing Sound?
Buzzing can have several causes. Electrical components such as contactors, capacitors, transformers, and motors can produce abnormal buzzing when they develop a fault.
A buzzing sound from the outdoor unit may also be associated with a compressor or fan motor problem. Because electrical components can carry dangerous voltage, homeowners should not attempt to open electrical compartments or test live components without proper training and equipment.
Turn off the system if the buzzing is loud, sudden, or accompanied by burning smells, smoke, repeated electrical trips, or unusual heat. Professional HVAC service can identify the electrical component responsible for the sound.
What Causes an AC to Make a Hissing Noise?
A hissing sound may come from air moving through a restricted opening or pressure moving through the refrigeration system. A small amount of airflow noise can be normal, but a sudden or persistent hissing sound may require inspection.
Refrigerant leaks can sometimes produce a hissing sound, especially near refrigeration lines or connections. Other possible causes include air escaping through ductwork or a pressure-related issue.
Refrigerant systems should be inspected and repaired by qualified HVAC professionals. Refrigerant handling requires appropriate equipment and procedures.
How to Troubleshoot Clicking Sounds
Clicking can occur when an AC starts or stops because electrical controls activate. A single click during startup or shutdown can be part of normal operation.
Repeated clicking is different. It may indicate a problem with a relay, contactor, thermostat, control board, or another electrical component. If the system repeatedly clicks without starting properly, turn it off and arrange an inspection.
A technician can test the electrical controls and determine whether the problem is related to the thermostat, control circuit, capacitor, contactor, or another component.
What Causes an AC to Make a Banging Sound?
A banging sound can indicate a loose or damaged component inside the system. In an indoor unit, the blower wheel can create a banging sound if it becomes loose, damaged, or obstructed.
A banging sound from the outdoor condenser can also occur when a fan blade becomes loose or comes into contact with another component. Operating the system in this condition can cause additional damage.
Turn off the AC if the banging is loud or continuous. A qualified technician should inspect the equipment before normal operation continues.
Why Does an AC Make a Squealing or Screeching Noise?
High-pitched squealing or screeching can be associated with motor bearings, belts in certain HVAC systems, or other moving components. Some systems may also produce high-frequency sounds when a motor or component is beginning to fail.
The exact cause depends on the type and design of the HVAC equipment. A professional inspection can identify whether the sound comes from the blower motor, fan motor, belt, bearing, or another component.
Can a Dirty AC Filter Cause Strange Noises?
A dirty air filter can restrict airflow and increase the workload on the HVAC system. Severe airflow restriction can contribute to unusual operating sounds and reduced cooling performance.
Check the filter according to the manufacturer’s instructions. Many residential systems use replaceable filters, while some use washable filters. Filter replacement intervals vary based on the filter type, system, indoor air conditions, and household use.
A dirty filter is not the only possible cause of an unusual noise. If the sound remains after the filter is replaced or cleaned as appropriate, further inspection may be necessary.
Can Debris Cause AC Noise?
Yes. Outdoor AC units can collect leaves, grass, dirt, and other debris. Objects can become trapped near the condenser fan and produce rattling, scraping, or unusual vibrating sounds.
Keep the area around the outdoor condenser clear. Do not insert tools or hands into the fan area. Power should be disconnected according to the manufacturer’s safety instructions before any cleaning that requires access near moving or electrical components.
If debris has entered the internal fan assembly or caused damage, professional service may be required.
When Should You Turn Off an AC Because of Noise?
An unusual noise does not always mean the AC has a serious failure. However, certain warning signs require immediate attention.
Turn off the system and arrange professional HVAC service if the noise is accompanied by smoke, burning odors, sparks, repeated circuit-breaker trips, refrigerant concerns, severe vibration, loud grinding, or continuous banging.
Continuing to operate an AC with a damaged motor, fan, compressor, or electrical component can cause further equipment damage.
How Can Regular AC Maintenance Reduce Strange Noises?
Regular maintenance helps identify loose components, dirty filters, restricted airflow, worn motors, electrical problems, and other issues before they become larger problems.
During an HVAC maintenance visit, a technician may inspect electrical connections, motors, fan components, filters, coils, refrigerant-related components, drainage, and overall system operation. The exact maintenance procedure depends on the equipment type and manufacturer’s requirements.
Keeping the outdoor unit clean and maintaining the correct filter condition can also support proper airflow and system operation.
AC Noise Troubleshooting by Sound Type
The sound itself provides an initial troubleshooting clue. A rattling AC may have a loose panel or debris. A grinding AC can indicate a worn motor or bearing. A buzzing AC may involve an electrical component or motor. A hissing AC can be related to airflow or the refrigeration system. Repeated clicking may indicate a control or electrical problem.
These descriptions are not a definitive diagnosis. Several different problems can produce similar sounds. The safest approach is to identify the noise, note when it occurs, and have the equipment inspected when the problem persists.
AEO: Quick Answer to AC Noise Troubleshooting
How do I troubleshoot strange noises from an AC?
Start by identifying the type and location of the sound. Check the accessible filter and look for visible debris around the outdoor unit. Do not open electrical compartments or reach inside moving equipment. Rattling can be associated with loose parts or debris, while grinding, repeated buzzing, persistent hissing, and loud banging can indicate mechanical, electrical, or refrigeration-system problems. Persistent or dangerous noises should be inspected by a qualified HVAC technician.
Is a noisy AC dangerous?
Some AC noises are minor, but loud or unusual sounds can indicate mechanical or electrical problems. Burning smells, smoke, sparks, severe vibration, and repeated electrical trips are warning signs that require the system to be switched off and professionally inspected.
Frequently Asked Questions
Why is my AC making a rattling noise?
A rattling noise can result from loose panels, screws, debris, or damaged fan components. Turn the system off before inspecting accessible exterior areas.
Why is my AC making a grinding noise?
Grinding can be associated with worn bearings, fan motors, blower components, or other mechanical parts. Professional inspection is recommended if the noise continues.
Why is my AC buzzing?
Buzzing can be associated with electrical components, motors, capacitors, contactors, or compressor-related problems. Electrical components should be inspected by a qualified technician.
Why is my AC making a hissing sound?
Hissing can come from airflow or pressure movement. A persistent hissing noise may also indicate a refrigeration-system issue and should be professionally inspected.
Can a dirty filter make my AC noisy?
A severely dirty filter can restrict airflow and affect system operation. Replacing or cleaning the filter according to the manufacturer’s instructions can help maintain proper airflow.
Should I run my AC when it makes a loud noise?
If the noise is loud, sudden, or accompanied by burning odors, smoke, sparks, severe vibration, or repeated electrical problems, turn off the system and arrange professional service.
GEO: AC Noise Troubleshooting for Local HVAC Service
When homeowners search for AC repair near me, AC service near me, or HVAC technician near me, they are often looking for a local professional who can diagnose the source of an unusual sound. Local HVAC service providers can inspect the specific equipment installed at the property and identify whether the problem involves the indoor unit, outdoor condenser, ductwork, electrical system, or refrigeration components.
For local search visibility, an AC service page should clearly identify the service area, equipment types, common repair problems, emergency service availability, and contact information. Location-specific information helps search engines and AI systems understand which customers the service is designed to support.
Conclusion
Strange AC noises can have several causes, ranging from loose panels and debris to worn motors, electrical faults, airflow restrictions, and refrigeration-system problems. The sound type and location provide useful initial clues, but they do not provide a complete diagnosis.
Homeowners can safely check accessible areas such as the air filter and visible outdoor debris. Electrical compartments, refrigerant systems, motors, compressors, and internal moving components should be handled by qualified HVAC professionals. Prompt attention to unusual sounds can help prevent additional equipment damage and maintain reliable cooling performance.