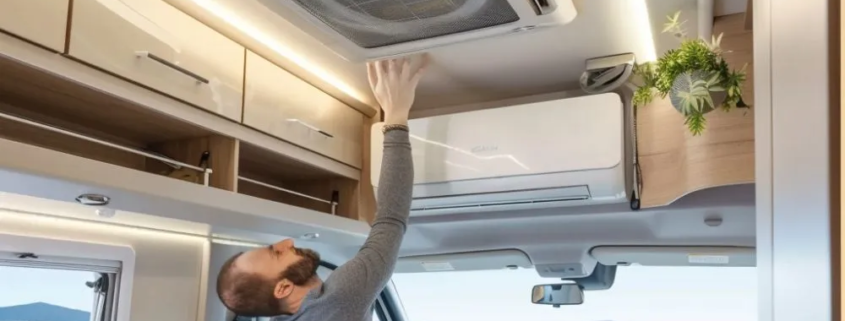
How to Clean RV Air Conditioner Filters
RV air conditioning is essential to keeping your recreational vehicle comfortable on hot days. However, to ensure optimal performance and air quality inside your RV, regular air conditioner filter cleaning is crucial. In this guide, we’ll walk you through cleaning your RV air conditioner filter step by step.
Introduction
Maintaining a clean air conditioner filter is critical to the efficient operation of your RV’s cooling system. Over time, dust, dirt, and debris accumulate in the filter, reducing airflow and efficiency. Regular filter cleaning not only improves cooling performance but also helps prevent costly repairs and ensures improved air quality inside your RV.
The importance of clean RV air conditioner filters
A clean air conditioner filter promotes better airflow, allowing the unit to cool the RV more efficiently. This prevents dust and debris from becoming airborne, which can affect respiratory health, especially for people with allergies or asthma. Additionally, a clean filter reduces stress on the air conditioner’s motor, prolonging its life and reducing energy consumption.
Signs that your RV air conditioner filter needs cleaning
- Reduced airflow from vents
- Increase in cooling time
- Musty or unpleasant smell during air conditioning
- Visible dust or debris on the filter
- If you notice any of these symptoms, it’s time to clean or replace your RV air conditioner filter.
Essential tools for cleaning RV air conditioner filters
- Before you begin, gather the following tools:
- Screwdriver (if needed to access the filter)
- A vacuum cleaner with a brush attachment
- Mild detergent or air conditioner coil cleaner
- Soft-bristled brush
- Clean, dry cloth
Step-by-step guide to cleaning RV air conditioner filters
Follow these steps to clean your RV air conditioner filter:
Step 1: Turn off the RV’s power supply
Before attempting any maintenance on your RV’s air conditioner, make sure the power supply is turned off to avoid accidents.
Step 2: Locate the air conditioner filter
The filter is usually located behind the air intake grill on the ceiling or wall of your RV.
Step 3: Remove the filter
Carefully remove the filter from its housing. Some filters can slide on easily, while others may need to be screwed on.
Step 4: Inspect the filter
Check the filter for dirt, dust, and debris. If it is very dirty or damaged, consider replacing it instead of cleaning it.
Step 5: Clean the filter
Use a vacuum cleaner with a brush attachment to remove loose dirt and debris from the filter. For stubborn dirt or grease, soak the filter in a solution of mild detergent or air conditioner coil cleaner and water, then rinse thoroughly.
Step 6: Dry the filter
Allow the filter to dry completely before reinstalling. Avoid using a heat source to speed up the drying process, as excess heat can damage the filter material.
Step 7: Reinstall the filter
Once the filter is dry, carefully return it to its housing and store it in a safe place. Make sure it fits snugly to prevent air leakage.
Tips for maintaining RV air conditioner filters
Clean the filter at least once a month during peak usage seasons.
Inspect the filter regularly for signs of wear or damage and replace if necessary.
Keep the area around the air intake grill clean to prevent debris from entering the filter.
Common mistakes to avoid when cleaning RV air conditioner filters
Use harsh chemicals or abrasive brushes, which can damage the filter material.
Reinstalling a damp filter can promote mold and mildew growth.
Neglecting to clean or replace filters regularly can result in reduced cooling performance and possible damage to the air conditioning unit.
Regular cleaning of RV air conditioner filters is a must.
- Improved cooling efficiency
- Better air quality inside the RV
- Long life of air conditioning unit
- Reduced energy consumption and lower utility bills
Conclusion
Cleaning your RV air conditioner filter is a simple but necessary maintenance task that can significantly impact the performance and longevity of your cooling system. By following the steps outlined in this guide and maintaining a regular cleaning schedule, you can ensure that your RV stays cool and comfortable throughout your trip. If you need RV AC service, go here: RV air conditioning.


Leave a Reply
Want to join the discussion?Feel free to contribute!