What to Do When Your AC Unit Freezes Up Inside
An air conditioner (AC) freezing up inside the home is a common issue that affects cooling efficiency and can damage the system if not addressed promptly. Ice formation on the evaporator coil, air handler, or ductwork reduces airflow and prevents proper cooling. Understanding the causes and corrective measures is crucial for maintaining indoor comfort and prolonging the lifespan of the AC unit.
Common Causes of Indoor AC Freezing
Freezing occurs when the evaporator coil temperature drops below the freezing point of water, causing condensation to turn into ice. One primary cause is restricted airflow. Dirty or clogged air filters, blocked vents, or closed registers reduce the volume of air passing over the coil. Without sufficient airflow, the coil becomes too cold, leading to ice buildup.
Low refrigerant levels are another significant cause. Insufficient refrigerant reduces pressure in the system, lowering the coil temperature below safe levels. Refrigerant leaks can also lead to uneven cooling and ice formation. Electrical issues, such as malfunctioning fans or blown capacitors, may prevent the blower from circulating air, causing the coil to freeze.
Environmental factors can contribute as well. Extremely low outdoor temperatures during winter can cause certain AC units, especially heat pumps, to accumulate ice inside. Additionally, operating the AC continuously without allowing sufficient cycling time may lead to freezing.
Steps to Take When Your AC Freezes
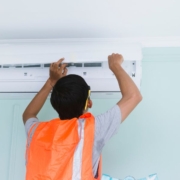
First, turn off the AC unit to prevent further damage. Continuing to operate a frozen system can harm the compressor and other components. Allow the ice to melt naturally. This may take several hours depending on the extent of the ice buildup.
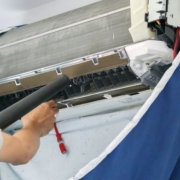
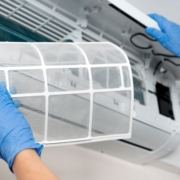
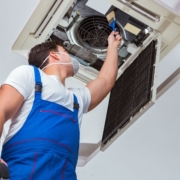
Check and replace the air filter if it is dirty or clogged. Ensure all vents and registers are open and unobstructed. Inspect the evaporator coil for dirt or debris and clean it if necessary. Cleaning improves airflow and heat exchange, reducing the likelihood of freezing.
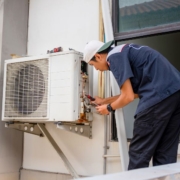
Examine the refrigerant levels. Low refrigerant requires professional attention to detect leaks and recharge the system to the proper specifications. Do not attempt to add refrigerant without proper training and certification, as this can cause environmental harm and damage the AC.
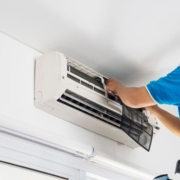
Ensure that the blower fan is functioning correctly. The fan should circulate air continuously when the system is operating. Repair or replace malfunctioning fans or capacitors as needed.
Preventive Measures
Regular maintenance helps prevent indoor freezing. Replace air filters every 1-3 months depending on usage and indoor air quality. Schedule professional inspections annually to check refrigerant levels, clean coils, and test electrical components. Avoid setting the thermostat too low in hot weather, as excessive cooling can contribute to ice formation. Ensure proper airflow by keeping furniture, curtains, and other objects away from vents.
Monitoring system performance, including airflow and cooling efficiency, allows early detection of issues. Timely attention to minor problems prevents ice buildup and extends the life of the AC unit.
FAQ
Why does my AC freeze inside?
Freezing occurs when the evaporator coil temperature drops below freezing, usually due to restricted airflow, low refrigerant, or electrical issues.
Can a dirty air filter cause freezing?
Yes. Restricted airflow from a clogged filter prevents warm air from reaching the coil, leading to ice formation.
Is it safe to run a frozen AC?
No. Operating a frozen AC can damage the compressor and reduce system efficiency. Turn the system off until ice melts.
Do I need a professional to fix frozen AC coils?
For refrigerant issues, electrical faults, or extensive ice buildup, a licensed HVAC technician should inspect and repair the system.
How can I prevent my AC from freezing again?
Maintain clean air filters, ensure proper airflow, monitor refrigerant levels, and schedule regular professional maintenance.
Conclusion
An AC unit freezing up inside is a sign of restricted airflow, low refrigerant, electrical problems, or improper usage. Immediate action involves turning off the system and allowing the ice to melt. Cleaning filters, ensuring unobstructed vents, inspecting the evaporator coil, and checking refrigerant levels are essential steps to restore normal operation. Regular maintenance, proper airflow, and timely professional inspections prevent recurrence, ensuring efficient cooling and prolonging the life of the AC unit.