How to Set AC Temperature for Cooling
Setting the right temperature on an air conditioner is crucial for comfort, energy efficiency, and system performance. Understanding how AC units respond to temperature settings allows users to maintain a comfortable indoor environment while minimizing electricity costs.
Understanding AC Temperature Settings
Air conditioners are designed to maintain a set temperature using a thermostat. The thermostat measures room temperature and signals the AC compressor and fan to turn on or off to reach the desired cooling level. Most modern AC units allow temperature adjustments in 1-degree increments, usually ranging from 16°C (61°F) to 30°C (86°F).
The ideal cooling temperature depends on factors such as room size, insulation, outdoor temperature, and humidity levels. Setting the temperature too low can cause excessive energy consumption and reduce system efficiency, while setting it too high may not provide adequate cooling.
Recommended Temperature for Cooling
For most households, the optimal temperature for cooling ranges between 24°C (75°F) and 26°C (78°F). This range provides a comfortable environment without overworking the AC unit. During very hot conditions, the thermostat may be set slightly lower, but it is generally not recommended to go below 22°C (72°F), as this can increase electricity usage by up to 20–30%.
Using energy-saving modes on modern AC units can also help maintain comfort. These modes adjust compressor and fan activity automatically to keep the room within the desired temperature range without constant power consumption.
How to Adjust AC Temperature
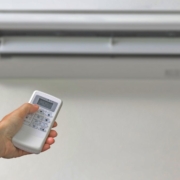
To set the AC temperature for effective cooling, start by turning on the unit and selecting cooling mode. Gradually adjust the thermostat to the desired temperature within the recommended range. It is important to allow the AC unit some time to reach the set temperature, usually 5–15 minutes, depending on the room size and current indoor temperature.
For rooms with poor insulation or high sunlight exposure, using curtains, blinds, or shades can enhance cooling efficiency. Additionally, ensuring that doors and windows are closed while the AC is running prevents cold air from escaping and warm air from entering.
Factors Affecting AC Temperature Efficiency
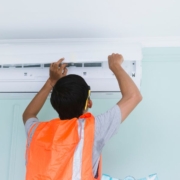
Several factors can influence how effectively an AC cools a room. High humidity levels may require lower thermostat settings for comfort. Dirty air filters, coils, or blocked vents can reduce cooling performance and force the AC to run longer. The size and capacity of the AC unit relative to the room are also important. An undersized AC may not reach the desired temperature efficiently, while an oversized unit may cycle on and off too frequently, wasting energy.
FAQ
What is the best temperature to set my AC for cooling?
The recommended range is 24°C to 26°C (75°F to 78°F) for comfort and energy efficiency.
Can setting the AC too low damage it?
Yes. Running the AC at very low temperatures can strain the compressor, increase electricity usage, and reduce lifespan.
How long does it take for an AC to reach the set temperature?
It usually takes 5–15 minutes depending on room size, insulation, and outdoor temperature.
Does humidity affect the cooling temperature?
Yes. High humidity may make the room feel warmer, requiring the AC to work harder or set to a slightly lower temperature.
Should I leave the AC on all day?
It is more energy-efficient to maintain a consistent temperature rather than turning it on and off frequently. Using a programmable thermostat can help manage this.
Conclusion
Setting the AC temperature correctly ensures a comfortable indoor environment while maintaining energy efficiency. The optimal range for most homes is between 24°C and 26°C (75°F to 78°F). Proper adjustment of the thermostat, combined with good insulation, clean filters, and closed windows, allows the AC to operate efficiently and reduces electricity consumption. Understanding these factors helps users achieve consistent cooling, protect the system, and create a comfortable living space.