5 Easy Ways to Check If Your AC Compressor Is Bad
Introduction
An AC compressor is the core component of any cooling system. It compresses refrigerant gas and moves it through the system to remove heat. Without it, cooling does not occur.
Early diagnosis of compressor issues helps prevent system failure and reduces repair costs. A faulty unit can increase energy use by 20% to 40% and reduce cooling efficiency.
This guide explains by premier cooling and heating about five simple methods to check compressor condition. These methods use basic observation, simple tools, and measurable indicators such as airflow, pressure, and temperature.
What Is an AC Compressor and How It Works
The AC compressor is responsible for compressing low-pressure refrigerant into high-pressure gas. This process increases temperature and allows heat transfer.
It operates inside an HVAC system, where it works with other components such as coils and fans. The compressor maintains refrigerant circulation throughout the system.
The process follows the refrigerant cycle. Refrigerant absorbs heat indoors and releases it outdoors. This cycle depends on correct pressure and temperature balance.
Key attributes include suction pressure (typically 60–80 psi), discharge pressure (200–300 psi), temperature variation, and continuous refrigerant flow. Any imbalance affects performance.
Common Causes of AC Compressor Failure
Electrical problems often lead to compressor damage. Voltage fluctuations above or below standard levels (220–240V in many regions) can burn internal windings. Faulty wiring also interrupts operation.
Refrigerant issues reduce cooling performance. Low refrigerant levels cause overheating. Contaminated refrigerant introduces moisture or debris, which damages internal parts.
A dirty or blocked condenser coil prevents heat release. This increases pressure and forces the compressor to work harder.
Overheating is another major factor. Poor airflow, clogged filters, and lack of maintenance increase internal temperature. Continuous overheating reduces lifespan.
Age also affects performance. Most compressors last between 10 and 15 years under normal conditions. Wear and tear reduce efficiency over time.
5 Easy Ways to Check If Your AC Compressor Is Bad
1. Listen for Unusual Noises
A working compressor produces a steady humming sound. Clicking sounds may indicate electrical relay issues. Rattling can suggest loose parts. Grinding noise often signals internal mechanical damage.
Normal operation remains consistent. Sudden changes in sound indicate possible failure.
2. Check for Weak or Warm Airflow
A faulty compressor reduces cooling output. Air from vents may feel warm or slightly cool instead of cold.
Airflow and cooling are different factors. Strong airflow with poor cooling often points to compressor problems rather than fan issues.
3. Inspect Circuit Breaker and Power Supply
A tripped breaker is a common sign of compressor overload. Frequent tripping indicates high current draw or internal faults.
Voltage should remain stable within the rated range. Low voltage reduces efficiency. High voltage damages components. Resetting the breaker once is acceptable, but repeated trips require inspection.
4. Measure Refrigerant Pressure Levels
Correct pressure ensures proper cooling. Low pressure suggests refrigerant leaks or weak compression. High pressure indicates blockage or overheating.
A manifold gauge measures suction and discharge pressure. Abnormal readings outside standard ranges confirm system imbalance.
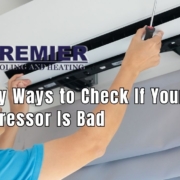
5. Perform a Visual Inspection
Visible oil leaks near the compressor indicate refrigerant leakage. Burn marks on wires suggest electrical damage.
Ice buildup on lines or components shows airflow restriction or refrigerant imbalance. Debris around the unit blocks airflow and increases operating temperature.
Tools Required for AC Compressor Diagnosis
A multimeter measures voltage and checks electrical continuity. It helps detect wiring faults and power supply issues.
A manifold gauge set measures refrigerant pressure. It provides accurate readings for diagnosis.
A thermometer checks temperature differences between air intake and output. A normal cooling system shows a difference of 8°C to 12°C.
Basic safety gear such as gloves and goggles protects against electrical and refrigerant hazards.
Safety Precautions Before Testing
Power supply must be turned off before inspection. This reduces the risk of electric shock.
Direct contact with live components should be avoided. Capacitors may store charge even after power is off.
Refrigerants require careful handling. Exposure can cause skin irritation or breathing issues.
Professional technicians are required for complex repairs, pressure testing, and refrigerant handling.
Signs You Need Repair vs Replacement
Minor issues include faulty capacitors, wiring problems, or refrigerant leaks. These can often be repaired at lower cost.
Major damage includes internal compressor failure, burnt windings, or severe overheating. These usually require replacement.
Repair costs are lower but may not restore full efficiency. Replacement improves energy performance and system reliability.
Replacement becomes more cost-effective when repair cost exceeds 50% of a new unit price.
Estimated Cost of AC Compressor Repair and Replacement
Repair costs typically range between $150 and $600 depending on the issue. Electrical repairs are usually less expensive than refrigerant-related work.
Replacement costs range from $800 to $2,500 depending on system size, brand, and labor charges.
Factors affecting cost include compressor tonnage (1.5 ton, 2 ton, 3 ton), system type, and installation complexity.
Preventive Maintenance Tips
Regular cleaning of coils and filters maintains airflow and efficiency. Dirty filters reduce airflow by up to 15%.
Refrigerant levels should be checked annually. Proper levels maintain correct pressure and temperature balance.
Professional inspections help detect early issues. Annual servicing improves system lifespan.
Maintaining proper airflow around the outdoor unit prevents overheating and pressure buildup.
FAQs
How long does an AC compressor last?
The average lifespan ranges from 10 to 15 years. Factors include usage frequency, maintenance quality, and environmental conditions.
Can I run my AC with a bad compressor?
Operating with a faulty compressor reduces cooling and increases energy consumption. It may also damage other system components.
How do I know if the compressor clutch is bad?
A faulty clutch may not engage properly. This results in no cooling despite the system running. Clicking sounds and intermittent operation are common signs.
Is it worth replacing an AC compressor?
Replacement is recommended when the system is relatively new and other components are functional. Cost comparison and efficiency gains should be considered.
Expert Tips for Better AC Performance
Stable voltage supply protects internal components. Voltage stabilizers can reduce fluctuation risks.
Programmable thermostats help maintain consistent temperature settings and reduce load.
Avoid continuous operation at maximum settings. This reduces strain and extends system life.
Conclusion
The condition of an AC compressor can be evaluated using five simple methods. These include checking noise, airflow, power supply, pressure levels, and visible condition.
Early detection helps reduce repair costs and prevents system failure. Accurate diagnosis ensures efficient operation and longer lifespan.
Regular maintenance and professional inspection remain essential for reliable performance and energy efficiency.
You have not enough Humanizer words left. Upgrade your Surfer plan.