How Long Should an AC Run to Drop 1 Degree

How Long Should an AC Run to Drop 1 Degree

Air conditioning systems maintain indoor comfort by lowering the temperature and controlling humidity. Homeowners often ask how long an AC should run to reduce the temperature by 1 degree Fahrenheit or Celsius. Understanding this depends on factors such as AC size, room volume, insulation, outdoor temperature, and system efficiency. Knowing this information helps optimize usage, reduce energy costs, and maintain system performance.

Factors Affecting Cooling Speed

The time required for an AC to lower the temperature depends on several variables. The first factor is the unit’s cooling capacity, measured in BTUs (British Thermal Units) per hour. Higher BTU ratings provide faster cooling. For example, a 10,000 BTU window unit cools a 400-square-foot room faster than a 5,000 BTU unit.

Room size and volume are important. Larger rooms or open spaces require more time to drop the temperature than small, enclosed areas. Ceiling height also affects cooling; rooms with 10-foot ceilings need more cooling than standard 8-foot ceilings.

Insulation quality influences cooling speed. Well-insulated rooms retain cool air and prevent heat gain from outside. Poor insulation or large windows exposed to direct sunlight increase the time needed for a 1-degree drop. Other factors include the number of occupants, heat-producing appliances, and humidity levels. High humidity makes cooling slower because the AC must also remove moisture from the air.

Typical Cooling Time

For a standard home room of approximately 400 to 500 square feet, a typical AC can lower the temperature by 1 degree in about 10 to 15 minutes. Central air systems with higher capacities may achieve the same result faster, often within 5 to 10 minutes for each degree.

Window or portable units may take longer depending on BTU capacity and room conditions. For example, a 5,000 BTU window AC in a 300-square-foot room may require 15 to 20 minutes to reduce the temperature by 1 degree. High outdoor temperatures and direct sunlight can extend this time further.

Improving AC Efficiency

Several strategies can help an AC lower the temperature faster. Ensuring the unit is properly sized for the room is crucial. Oversized units cool quickly but may cycle off before removing humidity, while undersized units run longer and consume more energy.

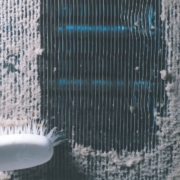
Cleaning or replacing the AC filter improves airflow and efficiency. Dirty filters reduce cooling speed and increase energy usage. Properly sealing windows and doors prevents cool air from escaping and hot air from entering, reducing cooling time. Using blinds or shades to block direct sunlight can lower the heat load on the system. Ceiling fans or portable fans help distribute cooled air, allowing the AC to reach the desired temperature more efficiently.

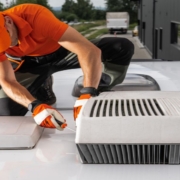
Regular maintenance, including checking refrigerant levels and cleaning coils, ensures the system operates at peak efficiency. Well-maintained units cool rooms faster and maintain temperature consistency.

Energy Considerations

AC runtime affects electricity consumption. Running the unit continuously to lower the temperature quickly increases energy use. Efficient operation involves setting the thermostat at a moderate temperature and allowing gradual cooling. Each degree of temperature reduction requires additional energy, so understanding the time needed for a 1-degree drop helps balance comfort and electricity costs.

Units with higher SEER (Seasonal Energy Efficiency Ratio) ratings provide faster cooling with lower energy consumption. For instance, a SEER 20 unit uses about 20% less energy to achieve the same cooling effect as a SEER 16 unit.

FAQ

How long does it take for an AC to drop 1 degree?
It typically takes 10 to 15 minutes for a standard AC to reduce the temperature by 1 degree in a 400 to 500-square-foot room.

Does room size affect cooling speed?
Yes. Larger rooms or rooms with high ceilings take longer to drop 1 degree compared to smaller, enclosed spaces.

Can poor insulation slow cooling?
Yes. Heat gain through walls, windows, and doors increases cooling time. Well-insulated rooms cool faster and maintain temperature.

Do AC filters affect cooling speed?
Yes. Clogged or dirty filters reduce airflow, making it take longer to lower the temperature.

Does high outdoor temperature affect AC runtime?
Yes. Hotter outdoor conditions increase the system’s workload, extending the time required to achieve a 1-degree drop.

Conclusion

The time an AC needs to lower the temperature by 1 degree depends on factors such as unit capacity, room size, insulation, outdoor temperature, and humidity. For a typical room of 400 to 500 square feet, it usually takes 10 to 15 minutes per degree. Properly sized units, clean filters, sealed windows, and shaded rooms improve efficiency and reduce runtime. Understanding these variables allows homeowners to optimize AC use, save energy, and maintain comfortable indoor conditions consistently. Regular maintenance ensures the system cools effectively while extending its lifespan.

What Size AC Do I Need

What Size AC Do I Need

Choosing the correct air conditioner size is crucial for efficient cooling and comfort. An AC that is too small will struggle to cool the space, while an oversized unit will cycle on and off frequently, wasting energy. Understanding how to calculate the required size ensures proper performance, lower energy bills, and longer system lifespan.

Understanding AC Size

AC size is measured in BTUs (British Thermal Units) per hour. This indicates the system’s cooling capacity. Higher BTU ratings provide more cooling power. Residential air conditioners typically range from 5,000 to 24,000 BTUs. Larger central air systems are rated in tons, with 1 ton equal to 12,000 BTUs.

The required size depends on the area to be cooled, ceiling height, insulation quality, number of windows, and local climate. Other factors such as the number of occupants and heat-generating appliances also affect cooling needs. Proper sizing ensures the AC maintains the desired indoor temperature without overworking the system.

Calculating AC Size

The first step in selecting an AC unit is measuring the square footage of the space. For standard residential spaces with 8-foot ceilings, a common guideline is approximately 20 BTUs per square foot. For example, a 500-square-foot room would need a unit with around 10,000 BTUs.

Adjustments may be necessary based on specific conditions. Rooms with high ceilings, large windows, or poor insulation require more cooling capacity. Spaces exposed to direct sunlight or located on the top floor of a building may also need additional BTUs. Conversely, shaded rooms or those with excellent insulation may require slightly less.

For central air systems, a professional load calculation called a Manual J calculation provides the most accurate sizing. This method considers insulation, window type, orientation, climate, and occupancy to recommend the correct AC tonnage.

Common AC Sizes and Applications

Window and portable AC units are available in smaller sizes, typically 5,000 to 12,000 BTUs, suitable for single rooms. Small bedrooms or offices require units around 5,000 to 8,000 BTUs, while living rooms or large kitchens may need 10,000 to 12,000 BTUs.

Split and central AC systems have larger capacities, ranging from 1 to 5 tons (12,000 to 60,000 BTUs). Homes with multiple rooms generally require central systems sized between 2 and 4 tons, depending on total square footage. Multi-zone systems allow individual control for different areas, optimizing comfort and energy use.

Effects of Incorrect Sizing

An undersized AC cannot cool the space efficiently, causing continuous operation, high energy bills, and strain on components such as the compressor. Over time, this may lead to system failure.

An oversized AC cools the room quickly but cycles on and off frequently. Short cycles prevent proper dehumidification, leaving the indoor air feeling humid and uncomfortable. Frequent cycling also increases wear on the system, leading to higher maintenance costs.

Energy Efficiency Considerations

Selecting the right size AC affects energy efficiency. Units with high SEER (Seasonal Energy Efficiency Ratio) ratings use less electricity to provide the same cooling. A properly sized AC consumes less power and maintains a more consistent temperature, reducing stress on electrical systems.

Thermostat settings, insulation, and shading also influence energy consumption. A combination of correct sizing, efficient operation, and home improvements can reduce cooling costs by 10% to 30% annually.

FAQ

How do I determine the AC size for a single room?
Measure the room’s square footage and multiply by approximately 20 BTUs per square foot. Adjust for high ceilings, windows, and sunlight exposure.

Is bigger AC better than smaller?
No. Oversized units cool quickly but do not remove humidity effectively and increase wear. Properly sized units provide consistent comfort and efficiency.

What AC size do I need for a 1,000-square-foot home?
A 1,000-square-foot home typically requires a central AC system around 2 tons (24,000 BTUs). Actual requirements may vary based on insulation, windows, and climate.

Do ceiling height and insulation affect AC size?
Yes. Higher ceilings and poor insulation increase cooling needs. Adjust the BTU calculation to account for these factors.

Can I use a professional load calculation for accuracy?
Yes. A Manual J calculation is the most precise method for determining AC size for your home, considering all variables such as orientation, windows, insulation, and occupancy.

Conclusion

Selecting the correct AC size is essential for comfort, efficiency, and system longevity. Factors including square footage, ceiling height, insulation, windows, sunlight exposure, and local climate determine the required BTU capacity. Undersized units struggle to cool, while oversized units waste energy and reduce humidity control. Using standard sizing guidelines or professional load calculations ensures optimal performance. Properly sized air conditioners maintain consistent temperatures, reduce energy costs, and prolong the life of the system.

How Much Does It Cost to Run AC for a Month

How Much Does It Cost to Run AC for a Month

Air conditioning is essential for maintaining comfortable indoor temperatures, especially during hot months. However, running an AC unit continuously can significantly impact electricity bills. Understanding the cost to run an AC for a month depends on factors such as energy consumption, electricity rates, unit efficiency, and usage patterns. This information helps homeowners budget and make informed decisions about energy management.

Factors Affecting AC Monthly Costs

The cost of running an air conditioner is influenced by multiple factors. First, the type and size of the AC unit determine energy consumption. Central air conditioning systems generally use more power than window or portable units. A typical central AC consumes between 2,000 and 4,000 watts per hour, while a window unit may use 500 to 1,500 watts per hour.

The efficiency of the unit, measured as the SEER (Seasonal Energy Efficiency Ratio) rating, also affects cost. Higher SEER ratings indicate more energy-efficient units, which reduce electricity usage. For example, a SEER 20 unit uses nearly 25% less energy than a SEER 16 unit to achieve the same cooling effect.

Other factors include local electricity rates, which vary by region. The national average in the United States is around $0.15 per kilowatt-hour, but this can range from $0.10 to $0.30 per kWh. The number of hours the AC runs per day also significantly affects monthly costs. Running the unit 8 hours daily costs less than running it continuously for 24 hours.

Calculating Monthly AC Costs

To estimate the monthly cost, multiply the AC unit’s power consumption by the number of hours it operates and the electricity rate. For example, a 3,000-watt central AC running 8 hours daily uses 24 kWh per day. At $0.15 per kWh, the daily cost is $3.60, resulting in a monthly cost of approximately $108.

A smaller window unit consuming 1,000 watts running 12 hours daily uses 12 kWh per day. At the same electricity rate, the daily cost is $1.80, and the monthly cost is around $54. These examples demonstrate that unit size, usage time, and local rates directly impact total expenses.

Ways to Reduce AC Running Costs

Maintaining and optimizing the AC unit helps reduce monthly electricity costs. Ensuring the filter is clean improves airflow and efficiency. Proper insulation of windows and doors prevents cool air from escaping. Setting the thermostat to a moderate temperature, such as 24°C (75°F), reduces energy consumption compared to lower temperatures.

Using programmable thermostats can control AC operation based on occupancy and schedule. For example, reducing operation during daytime hours when the home is empty can save up to 15% on monthly energy costs. Additionally, using ceiling fans or portable fans can help distribute cooled air, reducing the workload on the AC system.

Regular maintenance is another cost-saving measure. Cleaning condenser coils, checking refrigerant levels, and servicing the system improve efficiency and prevent costly repairs. Well-maintained units consume less energy to provide the same cooling effect.

FAQ

How much does it cost to run a central AC per month?
A central AC can cost between $100 and $300 per month, depending on unit size, efficiency, usage, and electricity rates.

How much does it cost to run a window AC per month?
A window unit may cost between $40 and $100 per month, based on power consumption and daily usage hours.

Does running AC continuously increase electricity bills?
Yes. Continuous operation increases total kilowatt-hours consumed, leading to higher monthly costs.

Can I reduce costs by adjusting the thermostat?
Yes. Raising the thermostat by 2–3°C reduces energy consumption by 5–10%. Moderate temperature settings are more cost-effective.

Does maintenance affect running costs?
Yes. A clean and well-maintained AC runs efficiently, consuming less electricity and reducing monthly costs.

Conclusion

The monthly cost of running an AC unit depends on its size, energy efficiency, usage patterns, and local electricity rates. Central AC units typically cost $100 to $300 per month, while window units range from $40 to $100 per month. Optimizing thermostat settings, maintaining the system, and using insulation or fans can reduce costs. Understanding these factors allows homeowners to manage energy use effectively, maintain comfort, and lower electricity bills. Proper care and smart operation ensure that the AC system works efficiently throughout the year.

How to Replace AC Filter

How to Replace AC Filter

Air conditioning systems rely on filters to maintain clean airflow and efficient operation. The AC filter traps dust, dirt, pollen, and other airborne particles, preventing them from circulating inside the home or office. Over time, the filter becomes clogged, reducing airflow and cooling efficiency. Replacing the AC filter regularly ensures better air quality, lower energy consumption, and a longer system lifespan.

Understanding AC Filters

AC filters vary in size, material, and filtration capacity. Common types include fiberglass, pleated, HEPA, and electrostatic filters. Fiberglass filters are inexpensive and capture large particles, but they have lower efficiency. Pleated filters have higher surface area and can trap smaller particles. HEPA filters remove up to 99.97% of particles as small as 0.3 microns, making them suitable for homes with allergies. Electrostatic filters use static electricity to attract dust and can be washed and reused.

The filter is usually located near the return air duct or inside the air handler unit. Identifying the correct type and size is essential for proper replacement. Using an incorrect filter can reduce airflow, strain the system, and compromise air quality.

Signs That the AC Filter Needs Replacement

Clogged or dirty filters affect system performance. Common signs include reduced airflow, uneven cooling, higher energy bills, unusual odors, and visible dust around vents. In HVAC systems, dirty filters can also cause the evaporator coil to freeze, which may lead to costly repairs. Most manufacturers recommend checking filters every 30 to 90 days, depending on usage and air quality conditions. Homes with pets or high dust levels may require more frequent replacements.

Steps to Replace an AC Filter

Replacing an AC filter is a simple task that improves system efficiency. The steps include:

  1. Turn off the AC unit at the thermostat or breaker to ensure safety.
  2. Locate the air filter. This is usually behind the return air vent or inside the air handler.
  3. Remove the old filter carefully to avoid spreading dust and debris.
  4. Check the dimensions and type of the existing filter to ensure proper replacement.
  5. Insert the new filter, making sure the airflow arrow points toward the AC system.
  6. Close the filter slot or grille and restore power to the unit.

Proper installation ensures that all air passes through the filter, trapping particles effectively.

Benefits of Replacing AC Filters Regularly

Regular filter replacement provides multiple benefits. It maintains airflow, allowing the system to cool or heat efficiently. Clean filters reduce strain on the blower motor, lowering energy consumption. They also improve indoor air quality by removing dust, pollen, and other allergens. In addition, replacing filters prevents dirt buildup on coils and ducts, which can prolong the life of the AC unit.

FAQ

How often should I replace my AC filter?
Most filters should be replaced every 30 to 90 days, depending on usage, air quality, and presence of pets. High-efficiency filters may last longer, up to 6 months.

Can I wash and reuse my AC filter?
Some electrostatic and washable filters can be rinsed and reused. Disposable fiberglass and pleated filters should be replaced entirely.

What happens if I don’t replace the AC filter?
A clogged filter reduces airflow, increases energy bills, causes uneven cooling, and may damage the system over time.

How do I know the correct filter size?
The filter dimensions are usually printed on the side of the old filter. Always match the size and type recommended by the manufacturer.

Does a dirty filter affect health?
Yes. Dirty filters allow dust, pollen, and allergens to circulate indoors, which can aggravate respiratory conditions and allergies.

Conclusion

Replacing the AC filter is a simple but crucial task that ensures efficient cooling, cleaner air, and longer system life. Filters trap airborne particles, protect internal components, and maintain proper airflow. Regular inspection and timely replacement every 30 to 90 days prevent reduced efficiency, higher energy costs, and potential damage to the AC unit. Using the correct type and size of filter is essential for optimal performance. Proper maintenance of AC filters helps maintain a comfortable, healthy, and energy-efficient indoor environment.

How Much to Fix Car AC

How Much to Fix Car AC

A car’s air conditioning system is essential for comfort, especially during hot weather. When it stops working, it can make driving difficult and unpleasant. One of the first questions drivers ask is how much it costs to fix car AC. The answer depends on the problem, the vehicle type, and the repair shop. Understanding the common issues and costs helps drivers plan better and avoid unexpected expenses.

Common Problems That Affect Car AC

Several components work together to cool the cabin. If any of them fail, the system may stop working or lose efficiency. Common issues include refrigerant leaks, compressor failure, clogged condenser, faulty blower motor, and electrical problems. Each repair has a different cost depending on parts and labor.

Average Cost to Fix Car AC

The cost of fixing a car AC can range from $150 to over $2,000. Minor issues like recharging refrigerant are on the lower end, while replacing a compressor or condenser is more expensive. On average, many drivers spend between $500 and $1,200 for common repairs. Luxury vehicles and newer models may cost more because of complex systems and specialized parts.

Cost Breakdown for Different Repairs

Refrigerant Recharge

Recharging the refrigerant is one of the simplest fixes. This service usually costs $150 to $300. It restores cooling when the AC is blowing warm air due to low refrigerant levels.

Leak Repair

If the refrigerant is leaking, the mechanic must first find the leak, repair it, and then recharge the system. This can cost between $200 and $1,000, depending on the severity and location of the leak.

Compressor Replacement

The compressor is the most expensive part of the system. It circulates refrigerant and is vital for cooling. Replacing a failed compressor can cost $800 to $2,500 with parts and labor included.

Condenser Replacement

The condenser releases heat from the refrigerant. A damaged or clogged condenser affects cooling performance. Replacement costs are usually between $600 and $1,200.

Blower Motor Repair

If the AC fan does not blow air, the blower motor may be defective. Repair or replacement typically costs $300 to $700.

Electrical System Issues

Wiring problems, blown fuses, or faulty sensors can also cause AC failure. Electrical repairs range from $150 to $500, depending on complexity.

Factors That Influence Repair Costs

Several factors affect how much it costs to fix car AC:

  • Vehicle make and model: Luxury cars and imported vehicles often require more expensive parts.
  • Age of the vehicle: Older cars may need more extensive repairs due to wear and tear.
  • Location: Labor rates vary. Repairs in large cities usually cost more than in smaller towns.
  • Extent of damage: A simple recharge is less costly than replacing major components.

Signs That Car AC Needs Repair

Recognizing early warning signs can help reduce costs. Common indicators include warm air from vents, unusual noises when AC is running, weak airflow, bad odors, and moisture inside the cabin. Addressing these signs early can prevent bigger and more expensive problems.

FAQ

How much does it cost to fix car AC on average?
The average cost ranges from $500 to $1,200, depending on the issue. Minor fixes may cost less, while major repairs like compressor replacement cost more.

Is it cheaper to recharge AC instead of repairing it?
Yes. A recharge costs about $150 to $300, but if there is a leak, the system will lose refrigerant again. In that case, repair is necessary.

Can I drive with a broken AC?
Yes, but it affects comfort and may reduce visibility if defogging does not work properly. It is best to repair the AC to maintain safety and comfort.

Why is car AC repair so expensive?
Car AC systems are complex and require specialized parts. Labor costs are also high because many components are located deep inside the engine bay.

How often should car AC be serviced?
Most experts recommend servicing every 1 to 2 years to check refrigerant levels, clean components, and prevent failures.

Conclusion

The cost to fix a car AC varies widely, from $150 for simple recharges to over $2,000 for major repairs like compressor replacement. Factors such as vehicle type, repair complexity, and labor rates influence the final price. Paying attention to early signs of AC trouble and scheduling regular maintenance can help avoid costly repairs. A well-functioning AC system ensures comfort, safety, and efficiency for every drive.

Is a Battery AC or DC

Is a Battery AC or DC

Batteries are among the most common energy storage devices used in everyday life. From powering small electronics to running electric vehicles, they provide a portable source of electricity. Understanding whether a battery is AC or DC is important because it explains how energy flows and how devices use it.

Understanding AC and DC Current

Electricity can flow in two forms: alternating current (AC) and direct current (DC). In AC, the flow of electric charge changes direction repeatedly. The voltage also reverses periodically. AC is widely used in homes and businesses because it can travel long distances with minimal power loss.

In DC, the flow of electric charge moves in one direction only. The voltage remains constant, providing a stable supply of power. DC is commonly used in low-voltage devices such as mobile phones, laptops, and flashlights.

Is a Battery AC or DC

A battery supplies direct current (DC). The chemical reactions inside a battery push electrons in a single direction from the negative terminal to the positive terminal. This creates a steady and constant voltage output. Because of this one-way flow, batteries are always DC power sources.

Household batteries such as AA, AAA, or 9-volt provide DC output. Larger batteries used in cars or backup power systems also generate DC. None of these produce alternating current on their own.

Why Batteries Are DC

The reason batteries provide DC lies in their chemical structure. Inside a battery, chemical reactions release free electrons. These electrons move through the circuit in one consistent direction. Since the internal design does not allow current to reverse, the output is always direct current.

AC power, on the other hand, requires a generator or inverter to alternate the flow. This cannot happen naturally within a battery’s chemical process.

Converting DC from a Battery to AC

Although batteries are DC sources, many devices run on AC. For example, household appliances like refrigerators, televisions, and air conditioners need alternating current. To make battery power usable for such devices, an inverter is used.

An inverter converts DC from the battery into AC with the required voltage and frequency. This technology allows batteries to serve as backup power during outages or as part of renewable energy systems such as solar power setups.

Examples of Battery Usage

  • Portable electronics: Smartphones, tablets, and laptops all run on DC from batteries.
  • Vehicles: Car batteries provide 12-volt DC to start engines and power lights.
  • Renewable energy systems: Solar panels store electricity in batteries as DC, which is then converted to AC through inverters for home use.
  • Uninterruptible power supplies (UPS): Batteries supply DC that is converted to AC for critical systems like computers and medical equipment.

Importance of Knowing Battery Output

Understanding that batteries provide DC helps in choosing the right equipment for charging and conversion. For instance, connecting a battery directly to an AC device without an inverter will not work. Also, using the correct charger ensures the battery charges safely without damage.

Knowing the difference between AC and DC also explains why some devices have built-in adapters or transformers. These components convert electricity into the proper form before powering the device.

FAQ

Is a battery AC or DC?
A battery is always a DC source because it provides a constant flow of current in one direction.

Can a battery ever produce AC?
No. Batteries naturally produce DC. To get AC from a battery, an inverter must be used.

Why do homes use AC if batteries provide DC?
AC travels more efficiently over long distances. Power plants generate AC, which is distributed through grids. Batteries are designed for local, portable energy use.

Do car batteries supply AC or DC?
Car batteries supply DC power, typically 12 volts. The vehicle’s alternator generates AC but converts it to DC for charging the battery.

Can DC from a battery run household appliances?
Not directly. Most appliances require AC, so an inverter is needed to convert DC from the battery into AC.

Conclusion

A battery is a source of direct current (DC), not alternating current (AC). Its chemical process ensures that electrons flow in one consistent direction, creating a stable power supply. While batteries only provide DC, devices such as inverters can convert this energy into AC for use with household appliances. Understanding the nature of battery output is essential for safe use, proper charging, and integration with different electrical systems.

How to Protect AC Outdoor Unit from Sunlight

How to Protect AC Outdoor Unit from Sunlight

An air conditioning system works best when all its parts are in good condition. The outdoor unit, also known as the condenser, plays an important role in cooling by releasing heat absorbed from indoors. Constant exposure to direct sunlight can reduce its efficiency, increase energy use, and shorten its lifespan. Learning how to protect an AC outdoor unit from sunlight is essential for better performance and lower operating costs.

Why Sunlight Affects the Outdoor Unit

The outdoor unit contains the compressor, condenser coils, and fan. These components function by expelling heat to the outside environment. When exposed to direct sunlight for long hours, the surrounding temperature rises, making it harder for the system to release heat. This increases workload, electricity usage, and wear on the compressor. Excess heat can also lead to overheating, which may cause breakdowns and expensive repairs.

Ideal Placement of the Outdoor Unit

Proper installation location is one of the most effective ways to protect the outdoor unit. Placing the unit on the north or east side of a building reduces exposure to direct afternoon sun. If possible, avoid west-facing installation because afternoon sunlight is intense and lasts longer. The unit should always have enough space around it for air circulation. Good placement during installation can prevent future efficiency problems caused by overheating.

Using Shade Structures

Creating shade around the outdoor unit helps reduce direct sunlight exposure. Shade structures such as pergolas, awnings, or fences can block sunlight while still allowing airflow. The structure should not be placed too close to the unit, as restricted airflow reduces efficiency. A clearance of at least 2 to 3 feet is recommended on all sides. Materials such as lattice panels work well because they provide shade without blocking ventilation.

Planting Trees and Shrubs

Strategically planting trees or shrubs near the outdoor unit offers natural shade. Deciduous trees are particularly useful because they provide shade in summer and allow sunlight in winter. Plants should not be placed too close to the unit because falling leaves or debris can block airflow. Maintaining at least 3 feet of clearance around the unit prevents clogging and ensures easy access for maintenance.

Using Protective Covers

Specially designed AC covers can shield the unit from sunlight and dust. These covers are made from breathable materials that protect against heat while allowing airflow. Covers should be chosen carefully because fully sealed covers can trap moisture, leading to corrosion. Using a mesh-type protective cover ensures both shade and ventilation.

Heat-Reflective Materials

Installing reflective barriers or panels near the outdoor unit can minimize heat absorption. Light-colored surfaces or reflective paints deflect sunlight, lowering the temperature around the condenser. This technique is often used in hot regions to reduce the impact of extreme temperatures on outdoor equipment. Reflective protection is a cost-effective method to reduce overheating.

Importance of Maintenance

Even with proper protection, regular maintenance of the outdoor unit is necessary. Cleaning the condenser coils, removing dirt, and checking refrigerant levels keep the system efficient. Overheated or sun-exposed units may collect dust faster, making maintenance even more important. Professional servicing ensures that the compressor and coils are working effectively under all conditions.

FAQ

Why should I protect my AC outdoor unit from sunlight?
Direct sunlight increases the temperature around the condenser, making it work harder. This reduces efficiency, raises energy bills, and shortens its lifespan.

Can I cover my outdoor unit completely?
No. The unit needs airflow to release heat. Fully covering it can trap moisture and block ventilation. Always use breathable or mesh-type covers.

Is planting trees near the outdoor unit safe?
Yes, if done carefully. Trees and shrubs provide shade but should be kept at least 3 feet away to prevent debris buildup and airflow blockage.

Does shading really reduce energy use?
Yes. Shading can lower the surrounding temperature by several degrees. This reduces the workload of the compressor and cuts electricity usage.

Can I move my AC unit to a shaded area?
Relocation is possible but requires professional help. It involves handling refrigerant lines and electrical connections. Choosing the correct location initially is more cost-effective.

Conclusion

Protecting the AC outdoor unit from sunlight improves efficiency, reduces energy costs, and extends system life. Proper placement, shading with structures, planting trees, using protective covers, and applying reflective materials are effective strategies. Regular maintenance ensures that the system continues to work under all conditions. Preventing overheating not only saves money but also ensures consistent indoor comfort during hot weather.

How to Add Refrigerant to AC

How to Add Refrigerant to AC

Air conditioners work by using refrigerant to transfer heat and maintain a cool indoor environment. Over time, refrigerant levels may drop because of leaks or wear in the system. Low refrigerant can reduce cooling performance, increase energy use, and strain the AC unit. Understanding how to add refrigerant to an AC system can help maintain efficiency and prevent costly damage. This process requires care and precision to ensure proper function and safety.

Why Refrigerant is Important

Refrigerant is a chemical compound that absorbs and releases heat. In an AC system, it cycles through the compressor, condenser, and evaporator coils. When refrigerant levels are low, the cooling cycle becomes less effective. Signs of low refrigerant include warm air from vents, hissing noises, ice buildup on coils, and higher electricity bills. Maintaining correct levels ensures proper cooling, reduces energy waste, and extends system life.

Preparation Before Adding Refrigerant

Before adding refrigerant, it is important to check for leaks. Adding refrigerant to a leaking system is not effective and can damage components. A pressure gauge and leak detection tools are often required. Ensure the AC unit is turned off and wear protective gear, including gloves and safety glasses. The correct type of refrigerant should always be used. Most residential units use R-410A, but older systems may use R-22. Using the wrong refrigerant can cause severe system failure.

Steps to Add Refrigerant to an AC

Adding refrigerant involves connecting a gauge set and refrigerant tank to the low-pressure port of the AC system. The following steps outline the process:

  1. Attach the pressure gauge to the service port on the low-pressure side of the system.
  2. Check the pressure reading against the recommended level in the manufacturer’s guide.
  3. Connect the refrigerant tank to the gauge set. Ensure all valves are closed before attachment.
  4. Slowly open the valve to allow refrigerant to enter the system. Add refrigerant in small amounts while monitoring the pressure.
  5. Stop adding refrigerant once the gauge shows the correct pressure level.
  6. Detach the equipment carefully and check the system for proper cooling performance.

It is important not to overfill the system. Too much refrigerant can increase pressure, damage the compressor, and reduce efficiency.

Safety Measures

Working with refrigerant requires caution. Refrigerants are pressurized chemicals that can cause frostbite, burns, or respiratory harm if mishandled. Always handle cylinders in an upright position and avoid direct contact with skin. The area should be well-ventilated to prevent buildup of harmful gases. If the system uses R-22 refrigerant, handling should only be performed by a licensed technician due to environmental regulations.

Professional Assistance

While it is possible to add refrigerant independently, professional service is recommended in most cases. Licensed technicians use advanced tools to detect leaks, measure precise refrigerant amounts, and ensure safe handling. Improper charging of refrigerant can lead to high repair costs and reduce system lifespan. Professional servicing also ensures compliance with environmental safety laws.

Benefits of Proper Refrigerant Levels

Maintaining the correct refrigerant level provides several advantages. Cooling efficiency improves, reducing indoor temperatures more quickly. Energy consumption decreases, lowering utility costs. Proper refrigerant levels also reduce strain on the compressor, preventing overheating and premature failure. A well-balanced system delivers consistent comfort and better air circulation throughout the home.

FAQ

Can I add refrigerant to my AC myself?
Yes, but it requires the right tools and safety measures. Many regions restrict handling refrigerants without certification. Professional service is often safer.

How do I know if my AC needs refrigerant?
Common signs include warm airflow, ice on coils, unusual noises, and increased energy bills. A pressure gauge can confirm low refrigerant levels.

What type of refrigerant does my AC use?
Most modern units use R-410A, while older systems may use R-22. The refrigerant type is usually listed on the unit’s label.

Is adding refrigerant the same as fixing leaks?
No. Leaks must be repaired before adding refrigerant. Adding refrigerant without repairing leaks will only give temporary results.

How often should refrigerant be added?
Refrigerant is not consumed under normal operation. If the system is sealed properly, refrigerant should not need to be added. Loss of refrigerant usually indicates a leak.

Conclusion

Refrigerant is vital for the proper function of any air conditioning system. Low levels reduce efficiency, increase costs, and cause strain on the compressor. Adding refrigerant requires preparation, correct tools, and attention to safety. While homeowners can perform the task, professional servicing is often the most reliable option. Maintaining the right refrigerant levels ensures better performance, lower energy use, and longer system lifespan. Regular maintenance and timely inspections help prevent issues and keep the AC running efficiently during hot weather.

How to Clean Coils on AC Unit

How to Clean Coils on AC Unit

Air conditioning units rely on clean coils to function efficiently. Over time, dirt, dust, and debris build up on the coils, reducing performance and increasing energy consumption. Cleaning the coils helps maintain cooling efficiency, improves air quality, and extends the lifespan of the system.

Understanding AC Coils

Air conditioners have two main types of coils: the evaporator coil and the condenser coil. The evaporator coil is located inside the indoor unit and absorbs heat from indoor air. The condenser coil is part of the outdoor unit and releases the absorbed heat outside. Both coils must remain clean for the system to work properly.

Why Cleaning AC Coils Is Important

Dirty coils act as insulation, blocking heat transfer. This forces the system to run longer, using more electricity. Studies show that dirty coils can increase energy consumption by up to 30%. Regular cleaning helps:

  • Improve cooling efficiency.
  • Reduce energy bills.
  • Prevent system breakdowns.
  • Extend the life of the air conditioner.

Tools and Materials Needed

Before starting, gather essential tools and materials:

  • Screwdriver for removing panels.
  • Soft brush or coil brush.
  • Fin comb for straightening coil fins.
  • Vacuum cleaner with a soft brush attachment.
  • Commercial coil cleaner or mild detergent mixed with water.
  • Garden hose with a spray nozzle for outdoor units.
  • Safety gloves and protective eyewear.

Step-by-Step Guide to Cleaning AC Coils

Step 1: Turn Off Power

Always turn off the power to the air conditioning unit at the main switch or circuit breaker. This prevents electrical hazards during cleaning.

Step 2: Access the Coils

Remove the access panel from the indoor unit to reach the evaporator coil. For the outdoor condenser coil, remove the protective grille or panels.

Step 3: Remove Loose Dirt and Debris

Use a soft brush or a vacuum cleaner to remove dust, leaves, and dirt from the coil surface. Be gentle to avoid bending the delicate fins.

Step 4: Apply Coil Cleaner

Spray the commercial coil cleaner evenly across the coils. If using a homemade solution, mix mild detergent with warm water and apply with a spray bottle. Allow the solution to sit for 5 to 10 minutes to loosen dirt and grime.

Step 5: Rinse the Coils

For condenser coils, rinse thoroughly with a garden hose at low pressure. Avoid using high-pressure water, as it can damage the fins. Evaporator coils inside the unit can be wiped carefully with a damp cloth.

Step 6: Straighten Bent Fins

Use a fin comb to straighten any bent fins. Properly aligned fins help maintain airflow and cooling performance.

Step 7: Reassemble and Restore Power

Once the coils are dry and clean, reassemble the panels and restore power to the unit. Test the system to ensure it operates smoothly.

Maintenance Tips for Clean Coils

  • Replace air filters every 1 to 3 months to prevent dirt buildup.
  • Keep the area around the outdoor unit clear of plants and debris.
  • Schedule professional maintenance at least once a year for deep cleaning.

Frequently Asked Questions

How often should AC coils be cleaned?
Coils should be cleaned at least once a year. In dusty or high-pollution areas, cleaning may be needed more frequently.

Can dirty coils damage the AC unit?
Yes, dirty coils can cause overheating, higher energy use, and even system failure if ignored for long periods.

Can I clean AC coils without removing them?
Yes, coils can be cleaned in place using coil cleaners and gentle brushing. Removal is not usually required.

Is professional cleaning necessary?
While basic cleaning can be done at home, professional servicing ensures thorough inspection and cleaning of hard-to-reach areas.

What happens if coils are not cleaned?
If left dirty, coils reduce cooling efficiency, increase electricity costs, and may shorten the unit’s lifespan.

Conclusion

Cleaning the coils on an AC unit is essential for maintaining performance and efficiency. Both evaporator and condenser coils need regular care to prevent dirt buildup. The process involves turning off power, accessing the coils, removing debris, applying cleaner, rinsing, and reassembling. Routine maintenance not only lowers energy consumption but also prolongs the system’s life and ensures reliable cooling.

What Is an AC Adapter

What Is an AC Adapter

An AC adapter is a device that supplies power to electronic equipment by converting alternating current (AC) from a wall outlet into direct current (DC). Most electronic devices such as laptops, routers, gaming consoles, and portable gadgets cannot use electricity directly from an outlet. They need stable and lower-voltage power, which is provided by the adapter.

How an AC Adapter Works

The electricity supplied from wall outlets is usually 110 to 240 volts AC, depending on the country. Electronic devices require much lower voltage, usually between 5 and 24 volts DC. The AC adapter reduces the high voltage to a safe level and converts it to DC so the device can operate correctly.

Inside an adapter, components such as transformers, rectifiers, and regulators perform the conversion process. The adapter also stabilizes the output to prevent fluctuations that could damage sensitive electronic circuits.

Types of AC Adapters

Standard AC Adapters

These are commonly used for laptops, monitors, and other household electronics. They have a fixed voltage output designed for specific devices.

Universal AC Adapters

Universal adapters can power different devices because they offer adjustable voltage and interchangeable connector tips. They are often used as replacements when the original adapter is unavailable.

USB AC Adapters

These are small adapters that convert AC power into low-voltage DC through a USB port. They are widely used for charging smartphones, tablets, and portable electronics.

Key Features of an AC Adapter

  • Input Voltage: The range of AC voltage it accepts, usually 100–240V.
  • Output Voltage: The DC voltage delivered to the device, such as 12V or 19V.
  • Current Rating: Measured in amperes (A), showing how much current the adapter can supply.
  • Connector Type: The plug that fits into the device, which varies by brand and model.

Matching these specifications is important because using the wrong adapter can damage the device or reduce performance.

Importance of an AC Adapter

AC adapters are essential for safe and efficient operation of electronics. They:

  • Protect devices from power surges.
  • Ensure the right voltage and current supply.
  • Improve portability by allowing lightweight designs without built-in power supplies.
  • Enable global compatibility, as many adapters support a wide input voltage range for international use.

Frequently Asked Questions

What is the difference between an AC adapter and a charger?
A charger both converts power and charges a battery, while an AC adapter only supplies power to operate a device. Some adapters also function as chargers when connected to rechargeable batteries.

Can I use any AC adapter for my device?
No, the voltage, current, and connector type must match the device’s requirements. Using the wrong adapter can cause overheating or permanent damage.

Why does my AC adapter get hot?
It gets warm because electrical components inside generate heat during power conversion. Mild heat is normal, but excessive heat may indicate a problem.

Are AC adapters universal?
Some adapters are universal, but most are designed for specific devices. Always check the specifications before using an adapter with another device.

How long do AC adapters last?
The lifespan depends on usage and quality. A well-made adapter can last several years, but wear and tear, overheating, or electrical surges may shorten its life.

Conclusion

An AC adapter is a power supply device that converts high-voltage alternating current from wall outlets into low-voltage direct current required by electronics. It ensures devices receive safe and stable power, protecting them from electrical damage. Different types of adapters exist, including standard, universal, and USB versions, each serving specific needs. Matching the correct voltage, current, and connector is essential for safe operation. AC adapters are vital for everyday electronics, making them an important part of modern technology.