What to Do When Your AC Freezes

What to Do When Your AC Freezes

Introduction

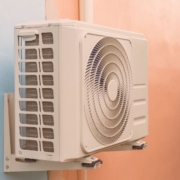
A frozen air conditioner can turn a hot summer day into a frustrating ordeal. Besides disrupting your comfort, it signals potential issues within the HVAC system that require immediate attention. Addressing the root causes of AC freezing can prevent further damage, reduce repair costs, and restore efficient cooling.

Understanding the Causes of AC Freezing

To tackle a frozen AC effectively, it’s essential to understand the underlying causes of this issue.

Lack of Airflow

Insufficient airflow over the evaporator coil prevents proper heat exchange, causing condensation on the coil to freeze. Dirty air filters, blocked vents, or closed registers often restrict airflow, leading to ice buildup.
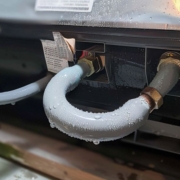
Refrigerant Issues

Low refrigerant levels or leaks disrupt the cooling cycle. When refrigerant levels drop, the evaporator coil becomes too cold, allowing moisture in the air to freeze on its surface.

Dirty Evaporator Coil

Dirt and debris on the evaporator coil act as an insulating layer, reducing the coil’s ability to absorb heat. This reduced efficiency can cause the coil temperature to drop below freezing, resulting in ice formation.

Thermostat Problems

A malfunctioning thermostat can lead to overcooling by keeping the system running longer than needed. This excessive operation increases the risk of freezing.

Signs of a Frozen AC

Recognizing the signs of a frozen AC can help you act before the issue worsens.

Reduced Airflow

If the air coming from the vents feels weak or there’s uneven cooling in your home, it may indicate restricted airflow due to ice buildup.

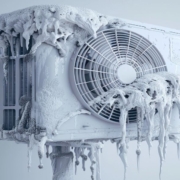
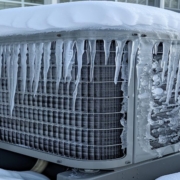
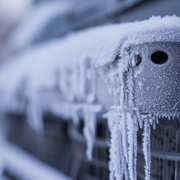
Ice Buildup on the Coils

Visible ice or frost on the evaporator coil is a clear sign that the AC is frozen. Check the indoor unit to confirm the presence of ice.

Strange Noises

Sounds like hissing or bubbling may indicate refrigerant issues or melting ice dripping onto the AC components.

Immediate Steps to Take When AC Freezes

If you suspect your air conditioner is frozen, acting quickly can minimize damage and restore functionality.

Turn Off the AC

Switch off the system immediately to halt further ice formation and protect the compressor. Use the fan-only setting to help circulate air and speed up thawing.

Allow the Ice to Thaw

Let the ice melt naturally by keeping the AC off. Avoid using sharp objects or hot water, as these can damage the components.

Check Air Filters

Inspect and replace clogged air filters. Clean filters ensure proper airflow, reducing the likelihood of freezing.

Inspect Vents and Registers

Verify that all vents and registers are open and free from obstructions to maintain consistent airflow throughout your home.

Long-Term Solutions to Prevent AC Freezing

Preventing AC freezing requires addressing the root causes and ensuring regular upkeep.

Regular Maintenance

Schedule professional maintenance at least once a year to clean the coils, check refrigerant levels, and inspect for potential issues.
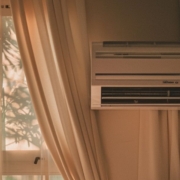
Proper Insulation

Ensure your home is well-insulated to reduce heat infiltration and maintain consistent indoor temperatures, easing the AC’s workload.

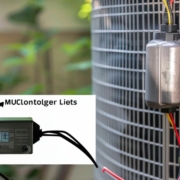
Checking Refrigerant Levels

Refrigerant levels should be monitored regularly by an HVAC professional. Address any leaks immediately to avoid disruptions in the cooling cycle.

Upgrading to a Programmable Thermostat

A programmable or smart thermostat can regulate cooling cycles and prevent overcooling by maintaining optimal indoor temperatures based on your schedule.

DIY vs. Professional Assistance

Knowing when to handle the problem yourself and when to call a professional can save time and money.

When to Attempt DIY Fixes

Simple tasks like replacing air filters, cleaning vents, and ensuring proper airflow can often be handled by homeowners without professional help.

Importance of Professional Help

Complex issues, such as refrigerant leaks, compressor malfunctions, or advanced diagnostics, require the expertise of an HVAC technician to ensure the problem is resolved correctly and safely.

Common Mistakes to Avoid

Avoiding these pitfalls can help maintain your AC’s efficiency and prevent freezing.

Ignoring Warning Signs

Delaying action when you notice weak airflow, strange noises, or ice buildup can exacerbate the issue, leading to costly repairs.

Overlooking Regular Maintenance

Skipping routine inspections and cleaning reduces the efficiency of your system and increases the risk of freezing.

Improper DIY Attempts

Attempting to fix refrigerant issues or clean coils without proper knowledge can cause further damage to the system and void warranties.

Tips for Maintaining an AC System

Proactive maintenance can help you avoid the inconvenience of a frozen AC and ensure long-term performance.

Changing Filters Regularly

Replace air filters every 1–3 months to keep airflow unobstructed and maintain system efficiency.

Cleaning Coils and Vents

Clean the evaporator and condenser coils, as well as vents and registers, to prevent dirt buildup that can obstruct airflow.

Scheduling Professional Inspections

Annual inspections by a qualified HVAC technician can identify potential issues early and ensure all components are functioning optimally.

Conclusion

A frozen AC is a common but manageable issue. Promptly addressing airflow restrictions, maintaining refrigerant levels, and scheduling regular maintenance can prevent freezing and ensure your system operates efficiently. Understanding the causes, recognizing the signs, and knowing when to seek professional help are key to keeping your home comfortable and your AC in good health.

FAQs

Can I continue using my AC if it freezes?

No, running a frozen AC can damage critical components like the compressor. Turn it off and let it thaw before taking further steps.

How long does it take for an AC to thaw?

Depending on the severity of the ice buildup, it can take several hours to overnight for the AC to thaw completely.

Is AC freezing a common problem?

Yes, especially in systems with restricted airflow, low refrigerant levels, or dirty components.

Can I prevent the AC from freezing altogether?

While you can’t guarantee prevention, regular maintenance, proper insulation, and attention to airflow can significantly reduce the risk.

How often should I have my AC system inspected?

Annual inspections are recommended, but systems in high-use regions may benefit from biannual checkups to ensure optimal performance.

What is an AC Tune-Up, and Why is it Essential for Your Cooling System

What is an AC Tune-Up, and Why is it Essential for Your Cooling System?

An air conditioning (AC) tune-up is a crucial maintenance procedure that ensures your cooling system runs efficiently throughout the hot summer months. By scheduling regular tune-ups, you can avoid unexpected breakdowns, enhance comfort, and improve energy efficiency. This article explains what an AC tune-up involves and why it’s essential for your AC’s longevity and performance.

Signs Your AC Needs a Tune-Up

Before diving into the importance of an AC tune-up, let’s explore the common signs that indicate your cooling system needs professional attention. Regularly monitoring these signs can help prevent larger issues and extend the lifespan of your unit.

Reduced Cooling Efficiency

If your AC isn’t cooling your home as efficiently as it once did, it might be due to clogged filters, refrigerant issues, or dirty coils. A tune-up can address these issues and restore your unit’s cooling power.

Strange Noises

Unusual sounds, such as grinding, squealing, or rattling, are red flags that something is amiss inside your AC unit. These noises could indicate worn-out parts or loose components that need to be repaired or lubricated during a tune-up.

Frequent Breakdowns or System Cycling

If your AC frequently cycles on and off or requires repairs more often than usual, it’s a sign that your system isn’t operating optimally. A thorough tune-up can help detect underlying problems and improve system stability.

Benefits of an AC Tune-Up

Regular AC tune-ups offer multiple benefits that help your system function more efficiently, save energy, and reduce repair costs.

Improved Energy Efficiency

An AC that runs smoothly consumes less energy, reducing electricity bills. By cleaning the coils, replacing the air filter, and ensuring the system is properly calibrated, a tune-up enhances energy efficiency, making your cooling system more cost-effective.

Extended Lifespan of the Unit

Regular maintenance prevents premature wear and tear on components, helping your AC last longer. By addressing minor issues before they become major problems, you reduce the risk of costly repairs or replacements.

Enhanced Indoor Air Quality

During a tune-up, the technician will clean filters and coils, removing dust, dirt, and allergens that can negatively affect indoor air quality. This ensures the air in your home remains clean, fresh, and healthy.

What to Expect During an AC Tune-Up

A comprehensive AC tune-up performed by a professional technician involves several tasks designed to maximize performance and reliability. Here’s what to expect during the service.

Component Inspection

The technician will examine all the critical components, including the evaporator and condenser coils, refrigerant lines, and the drainage system. They’ll also check the thermostat, electrical connections, and safety features to ensure everything is functioning properly.

Cleaning and Lubrication

A thorough cleaning of the evaporator and condenser coils removes built-up dirt and debris, improving heat exchange efficiency. The technician will also lubricate moving parts such as the fan and compressor to prevent friction and wear.

Testing for Performance

The technician will test your AC’s overall performance, checking airflow, refrigerant levels, and thermostat calibration. This ensures that your unit is running as efficiently as possible.

DIY vs. Professional AC Tune-Up

While basic tasks like changing air filters can be done by homeowners, a full AC tune-up requires the expertise of a certified technician. Let’s compare DIY maintenance with professional services.

DIY Maintenance

Homeowners can perform basic maintenance tasks such as replacing air filters, cleaning vents, and ensuring the condenser coils are free of debris. However, these actions won’t address internal issues or the detailed inspections required for long-term performance.

Professional Tune-Up

Certified HVAC technicians have the experience and tools necessary to perform a complete and detailed AC tune-up. They can identify issues that may not be visible to the untrained eye, such as refrigerant leaks or electrical problems, and ensure that all components are working at optimal levels. Furthermore, a professional can address safety concerns like electrical wiring and refrigerant handling, making the process safer for you and your system.

Frequency of AC Tune-Up

Scheduling regular AC tune-ups is key to ensuring your system runs efficiently.

Recommended Frequency

Experts suggest scheduling an AC tune-up at least once a year, ideally before the cooling season begins. This gives your system the best chance of performing at its peak during high-demand months. If your AC is older or runs continuously, you may want to consider scheduling tune-ups more frequently, such as twice a year.

Factors That Affect Frequency

The frequency of tune-ups can also depend on your AC’s age, usage, and the environment. Homes in areas with extreme temperatures or high humidity levels may need more frequent tune-ups. Similarly, if you notice your system struggling to keep up with cooling demands, more frequent maintenance may be necessary.

Cost of AC Tune-Up

The cost of an AC tune-up can vary depending on the size of your system, location, and the complexity of the required maintenance. On average, homeowners can expect to pay between $75 and $200 for a professional tune-up.

Factors That Affect Cost

Costs can fluctuate based on the size of the unit, the time of year (peak vs. off-peak seasons), and additional services such as duct cleaning or refrigerant recharging. Some HVAC companies may offer discounts or bundled services, so it’s worth checking for deals before scheduling your tune-up.

Long-Term Savings

Though the upfront cost may seem like an investment, a regular tune-up can save you money in the long run. By maintaining your unit’s efficiency, you’ll reduce energy costs, prevent costly breakdowns, and extend the life of your AC system.

Conclusion

An AC tune-up is an essential maintenance task that ensures your air conditioning system operates efficiently, lasts longer, and provides clean, cool air throughout the hot summer months. Whether you’re dealing with strange noises, reduced cooling, or frequent breakdowns, a professional tune-up can address the issue early on, preventing costly repairs.

FAQs

How often should I schedule an AC tune-up?
It’s recommended to schedule an AC tune-up at least once a year, preferably before the cooling season starts.

Can I perform an AC tune-up myself?
While you can handle basic tasks like replacing air filters, hiring a professional technician ensures a comprehensive and safe tune-up.

What factors influence the cost of an AC tune-up?
The cost can depend on the size of the unit, location, and any additional services needed, such as refrigerant recharging or duct cleaning.

Is an AC tune-up necessary if my unit is under warranty?
Yes, most manufacturers require proof of regular maintenance to keep your warranty valid. Regular tune-ups ensure your system runs smoothly and last longer.

What happens if I neglect AC maintenance?
Neglecting regular maintenance can lead to reduced energy efficiency, frequent breakdowns, and shortened system lifespan. Regular tune-ups help avoid these problems by identifying issues early.

Check this: Unlocking the Secrets of Libido Supplements: A Comprehensive Guide

How to Unfreeze Your AC

How to Unfreeze Your AC: A Comprehensive Guide

A frozen air conditioner can quickly turn a sweltering summer day into an uncomfortable experience. Fortunately, unfreezing your AC doesn’t always require expensive repairs. Understanding the causes and taking appropriate steps can help restore your unit’s functionality while preventing future issues.

Introduction to AC Freezing Issues

An AC unit freezes when moisture in the air collects on the evaporator coils and freezes into ice. This disrupts the cooling process, hindering airflow and reducing efficiency. Common causes of freezing include:

Restricted airflow due to dirty filters or blocked vents.

Low refrigerant levels caused by leaks.

Dirty evaporator coils that impede heat transfer.

Thermostat malfunctions that overwork the system.

Understanding the root cause is essential for unfreezing your AC and ensuring long-term performance.

Step 1: Check for Airflow Obstructions

Blocked airflow is one of the most common reasons for AC freezing. Start by inspecting and addressing these potential issues:

Inspect and Replace Air Filters

Dirty or clogged air filters reduce airflow, forcing your AC to work harder and causing ice buildup. Replace disposable filters or clean reusable ones every 1–3 months.

Unblock Vents and Registers

Ensure all vents and registers in your home are open and free from obstructions like furniture, curtains, or rugs. Proper airflow circulation prevents uneven cooling and ice formation.

Clean the Return Air Ducts

Dust and debris in the return air ducts can restrict airflow. Vacuum the ducts periodically to maintain optimal performance.

Step 2: Inspect Refrigerant Levels

Refrigerant is essential for heat transfer in your AC system. Low refrigerant levels can cause the evaporator coil to get too cold, leading to freezing.

Identify Signs of Low Refrigerant

Look for the following signs:

Reduced cooling efficiency or lukewarm air from vents.

Ice accumulation on the evaporator coil or refrigerant lines.

A hissing or bubbling sound near the AC unit, indicating a leak.

Seek Professional Assistance

Refrigerant handling requires specialized tools and expertise. Contact an HVAC technician to inspect, recharge, and address any leaks in your system.

Step 3: Clean the Evaporator Coil

The evaporator coil absorbs heat from your home’s air, enabling the cooling process. A dirty or clogged coil disrupts this process, causing freezing.

Turn Off the AC and Allow Ice to Melt

Before cleaning, switch off your AC and let the ice thaw completely. This may take several hours, depending on the severity of the freeze.

Clean with a Soft Brush and Mild Cleaner

Gently remove dirt and debris using a soft brush. For deeper cleaning, use a coil cleaner or a mild detergent solution. Rinse thoroughly and allow the coil to dry before restarting the system.

Step 4: Calibrate the Thermostat

A malfunctioning thermostat can cause your AC to overwork, leading to freezing. Ensuring your thermostat is accurate is vital.

Compare Thermostat Readings

Use a separate room thermometer to check if your thermostat is accurately displaying the room temperature.

Adjust or Upgrade Your Thermostat

If discrepancies are found, recalibrate your thermostat. For better efficiency, consider upgrading to a programmable or smart thermostat that prevents overcooling and optimizes usage.

Step 5: Maintain the Condenser Unit

The condenser unit outside your home dissipates heat absorbed by the refrigerant. Blockages or debris around this unit can lead to inefficiencies and freezing.

Clear Debris Around the Unit

Remove leaves, grass clippings, or dirt surrounding the condenser. Ensure at least two feet of clearance on all sides for proper airflow.

Clean the Fins and Coils

Hose down the condenser fins and coils gently to remove dirt and buildup. Use a fin comb to straighten any bent fins for optimal performance.

Step 6: Know When to Call a Professional

If your AC continues to freeze despite taking the above steps, it’s time to consult an HVAC professional.

Expert Diagnosis

Technicians can perform a detailed inspection to identify hidden issues, such as electrical problems, refrigerant leaks, or compressor malfunctions.

Preventive Maintenance

Schedule annual maintenance with a certified HVAC technician to clean, test, and fine-tune your system for optimal performance. Preventive maintenance reduces the risk of recurring freezing problems and extends the lifespan of your AC unit.

Preventing AC Freezing in the Future

Change Filters Regularly

Replace air filters every 1–3 months, especially during peak cooling seasons or in homes with pets or allergies.

Keep Coils Clean

Regularly clean evaporator and condenser coils to ensure efficient heat exchange and prevent ice formation.

Monitor Refrigerant Levels

Have a professional check your refrigerant levels annually to detect and resolve leaks early.

Insulate Your Home

Proper insulation reduces heat gain, lessening the strain on your AC and preventing overcooling.

Upgrade Old Systems

If your AC system is outdated, consider replacing it with a modern, energy-efficient model. Advanced units are less prone to freezing and offer better performance.

Conclusion

Unfreezing your AC doesn’t have to be overwhelming. By understanding the common causes of freezing and following the steps outlined above, you can resolve the issue and prevent it from recurring. Regular maintenance and professional check-ups are vital for ensuring your AC operates smoothly, providing reliable cooling when you need it most.

FAQs

How can I tell if my AC is frozen?

Signs include weak airflow, warm air from vents, ice on coils, or water puddles near the indoor unit.

Can I unfreeze my AC without professional help?

Yes, you can take basic steps like checking filters, cleaning coils, and unblocking vents. For persistent issues, consult an HVAC technician.

How long does it take to thaw a frozen AC?

Depending on the severity of the ice buildup, thawing may take several hours to overnight.

Why do refrigerant levels drop in an AC system?

Refrigerant levels usually drop due to leaks, which should be addressed by a certified professional.

How often should I maintain my AC?

Regular maintenance, including filter changes and professional inspections, should be performed annually or as needed.

How to Tell If AC Fuse Is Blown

How to Tell If AC Fuse Is Blown

AC fuses are small yet essential components of your air conditioning system. They act as protective barriers, preventing electrical overloads and short circuits that could otherwise damage your AC unit. Like any electrical component, fuses can fail over time, causing disruptions to your cooling system. In this guide, we’ll explore the signs of a blown AC fuse, how to diagnose and replace it, preventive measures, and when to seek professional help.

Introduction to AC Fuses

AC fuses are designed to protect your cooling system from damage caused by electrical surges, short circuits, or excessive current flow. When a fuse blows, it breaks the circuit, stopping the flow of electricity to the AC unit. This safety mechanism prevents overheating, potential fire hazards, and costly repairs. Understanding their function and knowing how to identify issues can save you time, discomfort, and money.

Common Signs of a Blown AC Fuse

A blown fuse can cause various symptoms that disrupt your AC’s performance. Here’s what to look for:

No Cool Air from the Vents

If your AC is running but not cooling, a blown fuse might be the reason. Without a working fuse, the system cannot deliver sufficient power to the cooling components.

AC Unit Fails to Turn On

When the fuse is blown, your air conditioner might not start at all. This is a common scenario where power is entirely cut off to the system.

Frequent Tripping of the Circuit Breaker

If your AC’s circuit breaker trips repeatedly, it could be due to an electrical overload, often linked to a blown fuse or other wiring issues.

Burning Smell or Scorch Marks

A burning smell near your AC unit or visible scorch marks on the fuse could indicate an electrical failure. Stop using the system immediately and investigate further.

Visible Damage to the Fuse

In some cases, inspecting the fuse directly can reveal discoloration, cracks, or a broken filament, all of which are signs of a blown fuse.

How to Diagnose a Blown AC Fuse

Diagnosing a blown AC fuse requires careful inspection and testing. Here’s a step-by-step process:

Inspect the Circuit Breaker

Locate the circuit breaker panel.

Check if the breaker linked to your AC is tripped.

Reset the breaker and observe whether the AC resumes normal operation. If it trips again, this could indicate a blown fuse or deeper electrical issue.

Examine the Fuse Box

Identify the fuse box for your AC, typically located near the outdoor condenser unit or in your home’s electrical panel.

Look for physical signs of damage, such as blackened areas or melted components.

Test the Fuse with a Multimeter

Set Up: Use a multimeter, setting it to measure continuity or resistance.

Test: Place the probes on each end of the fuse. Interpret Results: If the multimeter shows infinite resistance or no continuity, the fuse is blown and must be replaced.

Steps to Replace a Blown AC Fuse

Replacing a blown fuse is straightforward if done carefully. Follow these steps:

1. Gather Tools and Materials

A replacement fuse matching the original amperage rating.

Insulated gloves and fuse pullers for safety.

A multimeter to confirm the issue.

2. Turn Off Power to the Unit

Switch off the circuit breaker connected to your AC to eliminate any risk of electrical shock.

3. Locate and Remove the Blown Fuse

Open the fuse box and use insulated tools or gloves to safely remove the damaged fuse.

Inspect the socket for any visible damage or debris before inserting a new fuse.

4. Install the New Fuse

Insert the replacement fuse into the socket, ensuring it fits securely.

Avoid touching the metal ends of the fuse directly to prevent contamination or damage.

5. Restore Power

Turn the circuit breaker back on and check if the AC operates correctly.

Preventive Measures to Avoid Blown AC Fuses

Proactive maintenance can reduce the likelihood of blown fuses and improve your AC’s efficiency.

Regular Maintenance

Schedule professional AC maintenance at least once a year to inspect electrical components, clean the unit, and address any emerging issues.

Keep the Condenser Unit Clear

Debris like leaves, dirt, and grass can obstruct airflow and strain your AC, increasing the risk of electrical problems. Clean the area around the condenser regularly.

Monitor Electrical Connections

Inspect wiring and electrical connections for signs of corrosion, fraying, or loose connections. Address any issues promptly to prevent overloads.

Use the Correct Fuse Type

Always use a fuse with the same amperage rating as specified by the manufacturer. Using higher-rated fuses can damage your system and pose safety hazards.

When to Seek Professional Help

Some situations require the expertise of a licensed HVAC technician:

Persistent Electrical Issues

If replacing the fuse doesn’t solve the problem or the breaker keeps tripping, a professional can diagnose and fix underlying electrical issues.

Frequent Fuse Failures

Repeated fuse blowing indicates deeper problems, such as faulty wiring, malfunctioning components, or an overloaded circuit.

Safety Concerns

If you’re unsure about handling electrical components or feel unsafe, it’s best to call a professional to handle the repair.

Conclusion

A blown AC fuse can disrupt your cooling system but is often a simple issue to diagnose and resolve. By recognizing the signs, testing the fuse, and following proper replacement procedures, you can restore your AC’s functionality efficiently. Regular maintenance and proactive measures can further minimize the risk of future fuse failures, keeping your system running smoothly when you need it most.

FAQs

Can I replace an AC fuse myself?

Yes, but ensure you follow safety precautions and use the correct replacement fuse.

What causes AC fuses to blow?

Common causes include electrical overloads, short circuits, and wear and tear from prolonged use.

How often should I check my AC fuses?

Include fuse checks in your annual AC maintenance routine or whenever you experience cooling issues.

What if my AC fuse keeps blowing?

Persistent fuse failures indicate underlying issues that require professional diagnosis and repair.

Can I use a higher-amp fuse for my AC?

No, always use a fuse with the manufacturer-recommended amp rating to avoid damaging your system.

How to Remove Air from AC System Without Vacuum Pump

How to Remove Air from AC System Without Vacuum Pump

Maintaining your car’s air conditioning system is essential for a comfortable driving experience, especially in hot weather. One common problem is air becoming trapped in the AC system, which reduces cooling efficiency and may cause damage to vital components. While vacuum pumps are the standard tool for removing air, alternative methods can be equally effective when you don’t have one.

Understanding the Importance of Removing Air from the AC System

Air trapped in the AC system disrupts refrigerant flow, reducing efficiency and potentially causing long-term damage. Here’s why proper air removal is crucial:

 Importance of Removing Air from the AC System
Importance of Removing Air from the AC System (https://www.premiercoolingandheating.com)

Ensures Efficient Cooling

Air trapped in the AC system can hinder refrigerant circulation, reducing cooling performance. Removing air allows for proper refrigerant flow, ensuring optimal cooling efficiency.

Prevents Component Damage

Trapped air can cause pressure imbalances, leading to strain on the compressor and other components. Over time, this can result in expensive repairs or system failure.

Methods to Remove Air from AC System Without a Vacuum Pump

Although vacuum pumps are ideal for removing air, the following alternative methods can help you achieve similar results without specialized equipment:

Purging Method

This method uses the AC compressor to push air out of the system. It requires some patience but is effective when done correctly.

Gravity Bleeding Method

This approach relies on the natural flow of refrigerant to remove air. It’s a simple, hands-off technique that works well for minor air pockets.

Compressor Cycling Method

By turning the AC compressor on and off, pressure changes occur within the system, helping to dislodge trapped air. This method is easy to perform and doesn’t require additional tools.

Step-by-Step Guide: Removing Air from AC System Without a Vacuum Pump

Step-by-Step Guide Removing Air from AC System Without a Vacuum Pump
Step-by-Step Guide Removing Air from AC System Without a Vacuum Pump (https://www.premiercoolingandheating.com)

Prevents Component Damage

Trapped air can cause pressure imbalances, leading to strain on the compressor and other components. Over time, this can result in expensive repairs or system failure.

Methods to Remove Air from AC System Without a Vacuum Pump

Although vacuum pumps are ideal for removing air, the following alternative methods can help you achieve similar results without specialized equipment:

Purging Method

This method uses the AC compressor to push air out of the system. It requires some patience but is effective when done correctly.

Gravity Bleeding Method

This approach relies on the natural flow of refrigerant to remove air. It’s a simple, hands-off technique that works well for minor air pockets.

Compressor Cycling Method

By turning the AC compressor on and off, pressure changes occur within the system, helping to dislodge trapped air. This method is easy to perform and doesn’t require additional tools.

Tips for Effective Air Removal

Tips and Tricks for Effective Air Removal
Tips and Tricks for Effective Air Removal (https://www.premiercoolingandheating.com)

Be Patient

Removing air from the AC system can take time, especially with manual methods. Allow the process to work without rushing.

Use Pressure Gauges

Monitoring the system’s pressure ensures the process is proceeding correctly and prevents overcharging.

Avoid Overcharging

Be cautious when releasing refrigerant or adding new refrigerant. Overcharging can damage the system.

Inspect for Leaks

Check for refrigerant leaks after completing the process. Address any leaks immediately to maintain system efficiency.

Seek Professional Help When Needed

If the process seems overwhelming or you encounter issues, consult a certified mechanic to avoid further complications.

Contact us for AC Repair:

Contact Us Today
Contact Us Today (https://www.premiercoolingandheating.com)

Conclusion

Removing air from your car’s AC system is essential for maintaining efficient cooling and protecting system components. While vacuum pumps are the gold standard, alternative methods like purging, gravity bleeding, and compressor cycling can be effective for DIYers without specialized tools.

By following the methods outlined here and taking the necessary precautions, you can restore your AC’s performance and enjoy a comfortable ride. However, if you face challenges or are unsure about the process, don’t hesitate to contact a professional for assistance.

If you are looking for ac Service and Repair then you have go here. There you will get your best amazing AC Service all Thing premier heating and cooling. You can call here: 818-274-1971

FAQs

Can I remove air from the AC system without specialized tools?

Yes, techniques like purging, gravity bleeding, and compressor cycling are effective and require no specialized equipment.

How long does it take to remove air from the AC system?

The duration depends on the method used and the extent of air trapped. It can take 15 minutes to over an hour.

What are the risks of not removing air from the AC system?

Trapped air can reduce cooling efficiency, strain the compressor, and lead to costly repairs over time.

Can I use these methods for severe air blockages?

For severe air blockages or recurring issues, consult a professional as these methods may not fully resolve complex problems.

What should I do if refrigerant leaks during the process?

Stop immediately and seal the system. Refrigerant leaks should be addressed by a certified mechanic to ensure proper repair.

How to Make Your AC Colder

How to Make Your AC Colder

Introduction

A reliable and efficient air conditioning (AC) system is crucial, especially during scorching summer days. If your AC isn’t cooling effectively, discomfort can quickly take over. This guide provides actionable tips to enhance your AC’s cooling performance, ensuring you stay comfortable and cool.

Understanding Your AC System

Before exploring ways to enhance cooling, it’s crucial to understand how your AC system works. Typically, an AC system consists of components like the evaporator coil, condenser coil, compressor, and refrigerant. Each plays a vital role in the cooling process.

Common Reasons for Warm Air

There are several reasons why your AC might be blowing warm air instead of cold. One common issue is dirty air filters, which obstruct airflow and reduce cooling efficiency. Refrigerant leaks and faulty compressors are also common culprits.

Regular Maintenance Tips

Regular maintenance is vital to keeping your AC running smoothly. Simple tasks like cleaning or replacing air filters can significantly improve airflow and cooling performance. Additionally, checking for refrigerant leaks and keeping the condenser unit clean are essential maintenance tasks.

Improving Airflow

Improving airflow is another effective way to make your AC colder. You can achieve this by cleaning vents and ducts regularly and using fans strategically to circulate cool air more effectively throughout your space.

Optimizing Settings

Optimizing your AC settings can also help improve cooling efficiency. Programmable thermostats that adjust temperature settings based on your schedule and setting the fan to auto mode can both contribute to a colder indoor environment.

Considerations for Older Units

If you have an older AC unit, there are still ways to improve its cooling performance. Consider investing in upgrades like a more energy-efficient model or scheduling professional servicing to ensure optimal performance.

DIY Tips for Immediate Relief

In addition to regular maintenance tasks, there are some DIY tips you can implement for immediate relief from the heat. Simple measures like using curtains or blinds to block out sunlight and insulating doors and windows can help keep your space more remarkable.

Technological Solutions

Technological advancements have led to intelligent AC controllers and energy-efficient models that can enhance cooling while reducing energy consumption. Consider upgrading to these options for improved performance and cost savings.

Environmental Impact

It’s also important to consider the environmental impact of your AC usage. Energy consumption associated with cooling can contribute to carbon emissions and climate change. Look for eco-friendly alternatives and adopt energy-saving habits to minimize your carbon footprint.

Health Considerations

Maintaining indoor air quality is crucial for your health and well-being. Avoid overcooling your space, as this can lead to respiratory issues and discomfort. Additionally, consider investing in air purifiers to remove pollutants and allergens from the air.

Professional Assistance

If your AC is still not cooling effectively despite your best efforts, it may be time to seek professional assistance. A qualified technician can diagnose and repair any underlying issues, ensuring your AC operates at peak performance.

Cost-effective Strategies

Regarding AC maintenance and repairs, weighing the costs of DIY efforts against professional servicing is essential. While DIY tasks can save money upfront, professional assistance may be necessary for more complex issues and can prevent costly repairs down the line.

Long-term Maintenance

Finally, scheduling regular inspections and replacing old units when necessary is essential for the long-term maintenance of your AC system. You can ensure your AC keeps you cool for years by staying proactive and investing in proper care.

Conclusion

Making your AC colder isn’t just about turning down the thermostat. It requires understanding your system, performing regular maintenance, optimizing settings, and leveraging modern technology. By adopting these strategies, you can ensure your AC operates efficiently, saving money and keeping your space cool and comfortable.

FAQs

How often should I replace my air filters?

Replacing air filters every 1-3 months is recommended, depending on factors like indoor air quality and usage.

What should I do if I suspect a refrigerant leak?

If you suspect a refrigerant leak, it’s best to contact a professional HVAC technician to assess the situation and make any necessary repairs.

Can using fans help improve AC performance?

Yes, fans can help improve airflow and distribute cool air more effectively throughout your space, making your AC more efficient.

Are smart thermostats worth the investment?

Smart thermostats can offer convenience and energy savings by allowing you to control your AC remotely and adjust settings based on your schedule, making them a worthwhile investment for many homeowners.

How can I reduce my AC’s environmental impact?

To reduce your AC’s environmental impact, consider upgrading to an energy-efficient model, using eco-friendly refrigerants, and adopting energy-saving habits like setting your thermostat to a higher temperature when you’re away from home.

How to Defrost Your AC Unit

How to Defrost Your AC Unit

When summer heat strikes, the last thing you want is for your AC unit to freeze up, leaving you with inadequate cooling and discomfort. A frozen air conditioning unit can significantly reduce airflow and cooling efficiency. Fortunately, with the right knowledge and a few simple steps, you can defrost your AC unit and prevent future freezes. This guide will help you understand why your AC freezes and how to quickly get it back to working order.

Introduction

An air conditioning unit works by absorbing heat from your indoor air and releasing cool air into your space. However, when certain issues arise—such as restricted airflow, low refrigerant, or malfunctioning components—the moisture in the air can freeze on the unit’s coils, causing the system to freeze up. Understanding why this happens and how to resolve it is essential for maintaining a comfortable indoor environment.

Signs of a Frozen AC Unit

How do you know if your AC unit is frozen? Here are some common signs to look out for:

  • Reduced airflow: You may notice that the airflow coming from your vents is weaker than usual.
  • Ice buildup on the unit: Check the outdoor unit for ice accumulation, especially on the coils.
  • Warm air blowing from vents: Despite the unit running, you may feel warm air instead of cool air coming from the vents.

Causes of a Frozen AC Unit

Understanding the root causes of a frozen AC unit can help you prevent it from happening in the future. Some common causes include:

  • Low refrigerant levels: Insufficient refrigerant can cause the coils to become too cold and freeze the moisture in the air.
  • Dirty air filters: Dirty filters restrict airflow, causing the coils to freeze.
  • Blocked air vents: Blocked vents prevent proper airflow, leading to ice buildup on the unit.
  • Faulty thermostat: A malfunctioning thermostat can cause the AC unit to run continuously, leading to freezing.

How to Defrost an AC Unit

Now that you’ve identified a frozen AC unit, it’s time to defrost it. Here’s what you need to do:

  • Turn off the AC: Switch the air conditioning system to prevent further damage.
  • Let the ice melt naturally: Allow the ice on the unit to thaw naturally.
  • Check for blocked vents: Ensure that all vents are clear of obstructions to allow proper airflow.
  • Change the air filter: Replace dirty air filters with clean ones to improve airflow.
  • Inspect refrigerant levels: If you suspect low refrigerant levels, contact a professional to recharge the system.
  • Test the thermostat: Ensure that the thermostat is functioning correctly and set to the appropriate temperature.

Preventing Future Freezes

To avoid future instances of a frozen AC unit, follow these preventive measures:

  • Regular maintenance: Schedule annual maintenance checks to identify and address potential issues.
  • Cleaning air filters: Regularly clean or replace air filters to maintain optimal airflow.
  • Keeping vents unobstructed: Ensure that furniture or other objects do not block air vents, allowing proper airflow.

Conclusion

A frozen AC unit is an inconvenient problem, but with the right knowledge and steps, you can quickly resolve it and prevent future occurrences. By understanding the common causes of freezing, properly maintaining your unit, and addressing potential issues early, you can keep your air conditioning system running smoothly throughout the summer months.

FAQs

How long does it take to defrost an AC unit?

The defrosting process can take anywhere from several hours to a full day, depending on the severity of the freeze and the temperature inside the unit.

Can I speed up the defrosting process?

Avoid using sharp objects or hot water to speed up defrosting, as this could damage your AC. Let the ice melt naturally for the safest result.

Do I need to call a professional to defrost my AC unit?

Most AC units can be defrosted with the steps outlined here. However, if the issue persists or if you’re unsure about any part of the process, it’s best to contact a professional.

How often should I replace my air filters?

Check your air filters monthly and replace them every 1–3 months, depending on the type of filter and how often the AC is used.

What should I do if my AC unit keeps freezing up?

If your unit continues to freeze despite regular maintenance, it may have an underlying issue like low refrigerant, a broken fan, or a faulty thermostat. Contact a professional HVAC technician for an inspection and repair.

How to Clean Coils on AC Unit Inside

How to Clean Coils on AC Unit Inside: A Comprehensive Guide

Introduction

During the sweltering summer months, your air conditioning unit is essential to maintaining a comfortable indoor environment. However, to ensure that your AC continues working efficiently, regular maintenance is key. One of the most important tasks is cleaning the coils, particularly those inside the unit. Dirty coils can severely impact the performance of your AC, leading to higher energy costs and system breakdowns. In this guide, we will walk you through the steps to effectively clean the coils on your AC unit, ensuring maximum performance and a longer lifespan.

Understanding the Importance of Clean Coils

Why Clean Coils Matter

Coils in your AC unit—both the evaporator and condenser coils—are essential components in the heat exchange process. When they become dirty, they cannot transfer heat efficiently, causing the system to work harder and consume more energy. Regular cleaning ensures that the coils function properly, saving you money on energy bills and preventing premature wear and tear.

Impact on Energy Efficiency

Dirty coils force your AC to use more energy to cool your space. When the evaporator coils are covered in dirt or debris, they can’t absorb heat as effectively, leading the system to run longer cycles. Similarly, dirty condenser coils prevent heat from being released, further taxing the system. By keeping the coils clean, your AC can work more efficiently, ultimately reducing energy consumption and lowering utility bills.

Prevention of System Breakdowns

Clogged or dirty coils contribute to the accumulation of moisture, which can lead to rust or corrosion over time. Regular cleaning prevents the buildup of grime that could block airflow and cause severe damage. This simple maintenance task can help you avoid expensive repairs or even the need for a complete system replacement.

Signs That Your Coils Need Cleaning

Reduced Cooling Performance

If your AC seems to be blowing warm air or taking longer than usual to cool your space, dirty coils may be the cause. When airflow is restricted due to dust and debris, the cooling process is compromised.

Increased Energy Bills

A sudden rise in your energy costs without an increase in usage could signal that your AC is working harder to maintain the desired temperature. Dirty coils reduce efficiency and lead to prolonged cooling cycles, consuming more energy.

Ice Formation on Coils

If you notice ice forming on the evaporator coils or inside the AC unit, it’s a clear sign of restricted airflow. This issue is often caused by a buildup of dirt and debris on the coils, which prevents proper airflow and cooling.

How to Clean Coils on AC Unit Inside

Safety Precautions

Before starting the cleaning process, always ensure that the power to the AC unit is turned off. This is crucial for your safety and to prevent damage to the unit. Additionally, wear protective gloves and eyewear to safeguard yourself from cleaning chemicals and debris.

Gather the Necessary Tools

You will need the following items to clean your AC coils effectively:

  • Soft Brush: A gentle brush to remove surface debris.
  • Vacuum Cleaner with a Soft Brush Attachment: To remove finer particles.
  • Coil Cleaner Solution: Specially formulated for air conditioning systems.
  • Spray Bottle: For rinsing the coils.
  • Fin Comb: To straighten bent fins and improve airflow.

Access the Coils

Depending on your AC model, you may need to remove a panel or access cover to reach the coils. Consult your manufacturer’s instructions for guidance on how to safely access the internal components of your unit.

Brush Away Surface Debris

Using the soft brush, gently sweep away any visible dust, dirt, or debris from the coils. Be careful not to damage the fins, as they are delicate and can bend easily. Always brush in the direction of the fins to avoid causing any harm.

Vacuum the Coils

Next, use the vacuum cleaner with a soft brush attachment to gently vacuum the coils, removing smaller particles and debris that the brush couldn’t reach. Vacuuming ensures that all contaminants are removed and doesn’t push dirt deeper into the system.

Apply Coil Cleaner

Coil cleaner solutions are designed to break down stubborn dirt and grime. Dilute the coil cleaner according to the manufacturer’s instructions and spray it generously onto the coils. Let the cleaner sit for a few minutes to loosen the dirt.

Rinse the Coils

After allowing the coil cleaner to work, use the spray bottle filled with water to rinse off the cleaner and any loosened debris. Ensure that you thoroughly rinse the coils to remove all residue.

Straighten Bent Fins

During the cleaning process, you may notice some fins are bent. This can restrict airflow and reduce efficiency. Use a fin comb to carefully straighten the fins, which will help the air move freely across the coils and improve performance.

Allow the Coils to Dry

Once cleaning is complete, let the coils dry completely before restoring power to your AC unit. Allowing the coils to air dry ensures that moisture doesn’t linger, which could cause corrosion.

Conclusion

Cleaning the coils inside your AC unit is a simple yet essential task to maintain the efficiency and longevity of your system. By following these steps, you can keep your AC running smoothly, reduce energy consumption, and avoid costly repairs. Regular maintenance, including coil cleaning, helps to ensure that your air conditioner continues to keep you cool during the hottest months.

FAQs (Frequently Asked Questions)

How often should I clean the coils on my AC unit?

The coils should be cleaned at least once a year, typically before the cooling season starts. However, if you live in a dusty area or run your AC frequently, you may need to clean the coils more often.

Can I use household cleaners to clean the coils?

It’s best to use a coil cleaner specifically designed for air conditioning units. Household cleaners may be too harsh and could damage the delicate components of the system.

What if I notice mold or mildew on the coils?

If mold or mildew is present, use a mixture of water and mild detergent to clean the coils. Rinse thoroughly and allow the coils to dry completely. If the problem persists, consult an HVAC professional.

Can I clean the coils myself, or should I hire a professional?

While cleaning the coils is a manageable DIY task, if you’re unsure or uncomfortable performing the maintenance, it’s always a good idea to hire a professional HVAC technician.

Will cleaning the coils improve my AC’s cooling performance?

Yes, cleaning the coils improves heat transfer, which enhances the cooling performance of your AC and makes it more energy-efficient. A clean unit runs more smoothly and cools your space faster.

How Much Water Should Be in AC Drip Pan

How Much Water Should Be in AC Drip Pan

Introduction

Air conditioning systems are essential for keeping your indoor space comfortable, particularly during the hot summer months. However, many homeowners overlook the importance of maintaining the AC unit’s drip pan, an often-forgotten component. Properly managing the water level in the AC drip pan is critical for optimal performance and preventing potential issues like water damage, mold growth, and system malfunctions. In this guide, we will walk you through how much water should be in your AC drip pan and the steps to ensure it stays at the ideal level.

Ideal Water Level in AC Drip Pan

The amount of water in the AC drip pan can vary depending on several factors, including the size and model of your AC unit, humidity levels in your home, and the efficiency of the condensate removal system. Generally, the water level should be enough to facilitate the proper drainage of the condensate produced during the cooling process. However, it’s important that the water does not exceed the drip pan’s capacity, as this can lead to overflow, water leakage, and potential damage to your AC unit and surrounding areas.

What is the Ideal Water Level?

In most cases, the ideal water level in the AC drip pan should be about half an inch deep. This depth ensures the condensate is effectively collected while allowing it to drain properly through the condensate line. If the water level exceeds this depth or reaches the overflow point, it can lead to water damage and reduce the efficiency of your AC system. Regular monitoring can help prevent these issues and ensure your AC unit is functioning efficiently.

How to Check Water Level in AC Drip Pan

Checking the water level in the drip pan is a simple task that can be done during regular maintenance. Here’s how to do it:

  • Turn Off the AC Unit: Always ensure the AC unit is turned off before performing any checks or maintenance to avoid injury or damage to the system.
  • Locate the Drip Pan: The drip pan is usually located beneath the evaporator coil or air handler. Use a flashlight if needed to get a clear view of the drip pan’s interior.
  • Inspect the Water Level: Ideally, the water level should be approximately half an inch deep. If the water level is higher, it may suggest a problem with the condensate removal system. If the drip pan is dry, this could indicate a blockage in the drainage line or an issue with the system’s operation.

Signs of Abnormal Water Levels

Excessive Water: A consistently high water level can indicate a clogged drain line, improper drainage, or excessive humidity, all of which can cause water leakage.

Dry Drip Pan: If the drip pan is dry, the condensate isn’t draining properly, possibly due to a blocked drain line or a malfunction in the system. This could result in water backing up into the unit, leading to potential damage.

Importance of Proper Water Management

Proper water management in the AC drip pan is critical for maintaining indoor air quality and preventing structural damage. Here are the key reasons why you should regularly check and maintain the water level:

Prevent Mold and Bacteria Growth

Excess moisture in the drip pan creates a breeding ground for mold, mildew, and bacteria, which can affect indoor air quality. Mold growth in the AC unit can spread to other areas of your home, leading to health concerns for residents. Managing the water level helps minimize the risk of these harmful microorganisms.

Avoid Water Damage

Excess water in the drip pan can lead to leaks that damage the surrounding areas, including your AC unit, walls, floors, and furniture. These leaks often result in expensive repairs and replacement costs. Additionally, prolonged water leakage can contribute to rotting, rust, and other forms of structural damage.

Improve AC Efficiency

When the water level is maintained properly, the AC system can effectively manage the removal of condensate. This ensures that the unit operates at peak efficiency, cooling your home effectively without wasting energy or causing additional strain on the system.

Methods to Maintain Optimal Water Level in the AC Drip Pan

To maintain the ideal water level in your AC drip pan, consider implementing the following proactive measures:

Regular Inspection and Cleaning

Inspect the drip pan regularly for excess water and clean it to prevent dirt and debris from blocking the condensate drainage. A clogged pan or drain line can prevent proper drainage, leading to water accumulation. Cleaning the pan and the drain line periodically can keep the system functioning properly.

Clear Clogged Drain Lines

One of the most common causes of excess water in the drip pan is a clogged condensate drain line. Over time, algae, mold, and other debris can build up in the drain line, causing blockages. If you notice a persistent water buildup in the drip pan, inspect the drain line for clogs and clear them using a wet/dry vacuum or by flushing the line with a mixture of vinegar and water.

Install a Condensate Pump or Overflow Switch

Installing a condensate pump or an overflow switch can help prevent water overflow by actively pumping out excess water or shutting off the AC system when the water level gets too high. This can help protect your unit from water damage and ensure proper drainage.

Humidity Control

Excess humidity can contribute to a higher water level in the drip pan. Using a dehumidifier or improving airflow within your home can help control indoor humidity levels, reducing the amount of condensate generated by your AC unit.

FAQs (Frequently Asked Questions)

What causes water to accumulate in the AC drip pan?

Water accumulates in the AC drip pan as a result of condensation formed when the warm air inside your home is cooled by the evaporator coils. The moisture in the air turns into liquid, which is collected in the drip pan and drained away.

Can I remove excess water from the drip pan myself?

Yes, excess water can be removed manually using a sponge or towel. You can also use a wet/dry vacuum for more efficient removal. However, if the water continues to accumulate, there may be an underlying issue that requires professional attention.

Is it normal for the drip pan to be dry?

While it’s normal for the drip pan to have some moisture due to condensation, it should not be dry for extended periods. A dry pan may indicate a blocked drain line, malfunctioning system, or improper condensate removal.

How often should I check the water level in the drip pan?

It’s recommended to check the water level in the drip pan at least once a month, especially during peak cooling season. Regular checks help detect potential issues early and prevent water damage.

Can a high water level in the drip pan affect AC performance?

Yes, excessive water in the drip pan can impede proper drainage, leading to water leakage that damages the AC unit and surrounding areas. It can also reduce the efficiency of the system, causing it to work harder and consume more energy.

Conclusion

Maintaining the proper water level in the AC drip pan is essential for the efficient operation of your air conditioning unit and to prevent issues such as mold growth, water damage, and system malfunctions. By regularly inspecting and managing the water level, you can ensure your AC unit functions properly, ultimately extending its lifespan and improving indoor air quality. Proactive maintenance will help save money on repairs and keep your home cool and comfortable throughout the year.

How Much Electricity Does a Window AC Use

How Much Electricity Does a Window AC Use?

Introduction

Window air conditioners (ACs) are widely used for cooling individual rooms, making them a popular choice for apartments, bedrooms, offices, and other small spaces. Known for their affordability and ease of installation, window ACs can efficiently cool a space, but how much electricity do they actually consume? In this article, we’ll explore the factors that influence the electricity usage of window AC units and provide insights into how you can manage energy consumption.

Introduction to Window ACs

Window air conditioners are self-contained units installed in a window or through a wall. They work by drawing in warm air, cooling it with refrigerant-filled coils, and releasing the cooled air back into the room. While these AC units are compact and cost-effective, understanding their electricity consumption is essential for energy efficiency and keeping your electricity bills in check.

Understanding Electricity Consumption

Factors Affecting Electricity Usage

Several factors determine how much electricity a window AC uses:

Size and Capacity: Larger units with a higher BTU (British Thermal Unit) rating will naturally consume more electricity, as they are designed to cool larger spaces. It’s important to choose a unit that’s appropriately sized for your room to avoid excessive energy consumption.

Efficiency: Newer, energy-efficient models use less electricity to achieve the same level of cooling. These units typically have higher SEER (Seasonal Energy Efficiency Ratio) or EER (Energy Efficiency Ratio) ratings, which indicate that they provide more cooling for each watt of electricity used.

Usage Habits: The way you use the air conditioner also impacts electricity consumption. This includes the thermostat setting, frequency of use, and how well the room is insulated.

Energy Efficiency Ratio (EER)

The EER of an air conditioner measures its cooling output relative to its energy consumption. The higher the EER, the more efficient the AC is at cooling. For instance, an AC with a high EER rating will consume less power to cool the same space compared to a unit with a lower EER rating.

When shopping for a window AC, consider the EER as an indicator of its energy efficiency. As a general guideline, a higher EER translates to lower operational costs over time.

Average Electricity Consumption of Window ACs

BTU Rating and Energy Usage

The BTU rating of a window AC indicates how much heat it can remove from the air per hour. A unit with a higher BTU rating typically consumes more electricity. Here’s a general idea of how much power different BTU units consume:

  • A 5,000 BTU window AC typically uses 500–600 watts per hour.
  • A 10,000 BTU window AC uses between 900–1,200 watts per hour.
  • A 15,000 BTU window AC can consume 1,200–1,500 watts per hour.

Typical Power Consumption Range

Window AC units generally consume between 500 to 1,500 watts per hour depending on their size and efficiency. This can vary based on room temperature, humidity, and other external factors. Units with variable speed compressors or inverter technology can adjust their power consumption based on demand, making them more energy-efficient.

Impact of Usage Habits on Electricity Consumption

Temperature Settings

Your thermostat setting is a major factor in electricity consumption. Setting the temperature lower than necessary increases the power usage. Studies show that every degree lower you set the thermostat increases energy consumption by about 6-8%.

For energy efficiency, set the thermostat to 78°F (25–26°C) when you are home and 85°F (29–30°C) when you are away. This reduces the workload on the unit while still keeping the space comfortable.

Duration of Usage

The longer the window AC runs, the more electricity it consumes. To optimize usage, turn off the unit when the room is cool or use a programmable thermostat to control the cooling cycles. By maintaining a consistent temperature rather than constantly lowering it, the AC works more efficiently.

Maintenance and Cleaning

Regular maintenance plays a significant role in reducing electricity consumption. Clogged air filters, dirty coils, and poor insulation can cause the unit to work harder and use more power. To optimize your AC’s energy efficiency, perform regular maintenance tasks such as:

  • Cleaning or replacing air filters every 1-3 months.
  • Cleaning the condenser coils to prevent dirt buildup.
  • Sealing gaps around the unit to avoid air leaks.
  • Tips to Reduce Electricity Usage

Optimal Temperature Settings

Setting your thermostat to the highest comfortable temperature can significantly reduce electricity consumption without sacrificing comfort. Consider using a programmable thermostat or a smart thermostat that automatically adjusts the temperature based on your schedule.

Proper Sizing of AC Unit

Choosing the right size for your space is crucial. If your AC unit is too large for your room, it will cool the space too quickly, causing it to turn off and on frequently, which leads to energy waste. Conversely, a unit that’s too small will run constantly, using excessive power to cool the room. To determine the right size, measure your room’s square footage and refer to the manufacturer’s BTU recommendations.

Regular Maintenance

Keeping your window AC in peak condition can help minimize its energy usage. Clean the air filters, coils, and vents regularly. Ensure the unit is tightly sealed in the window to prevent cool air from escaping and warm air from entering.

Environmental Impact of Window ACs

Energy Consumption and Carbon Footprint

Window AC units, especially older or inefficient models, contribute to higher electricity usage and thus increase your carbon footprint. The electricity used to power these units often comes from fossil fuels, which release carbon dioxide (CO2) into the atmosphere. By choosing an energy-efficient model and reducing usage when possible, you can lower your environmental impact.

Comparison with Other Cooling Options

When compared to other cooling options, such as fans or evaporative coolers, window ACs consume more electricity but provide a higher cooling capacity. If you are looking to cool a small space and want a cost-effective solution, a window AC is ideal. However, for larger areas or for those who want a greener alternative, a central air system or a ductless mini-split system may be more efficient in the long run.

Conclusion

Window air conditioners are an excellent choice for efficiently cooling smaller rooms. However, understanding their electricity consumption is key to minimizing energy usage and reducing your electricity bills. By selecting the right-sized unit, maintaining your AC regularly, and setting appropriate temperature levels, you can ensure both cost savings and energy efficiency.

FAQs

How do I determine the right size of a window AC for my room?

Measure your room’s square footage and refer to the manufacturer’s guidelines for BTU recommendations.

Do window AC units with higher EER ratings cost more?

Energy-efficient models may have a higher upfront cost but lead to significant long-term savings on your electricity bills.

Can I use a window AC to cool multiple rooms?

Window ACs are designed for single-room use. They may only be effective in cooling multiple rooms if the space is small and well-insulated.

Is it better to leave the AC running all day or turn it off only when needed?

Turning the AC off when not in use and using programmable thermostats to regulate the temperature based on your schedule is more energy-efficient.

How often should I clean or replace the air filter in my window AC?

Check the manufacturer’s recommendations, but filters should generally be cleaned or replaced every 1-3 months to ensure optimal performance.