Why Does My AC Keep Freezing

Why Does My AC Keep Freezing

Air conditioners are designed to cool indoor spaces efficiently. However, one common problem homeowners face is a freezing AC unit. When the evaporator coil or refrigerant lines freeze, the system stops cooling effectively and can cause damage if left untreated. Understanding the reasons behind AC freezing helps in preventing and resolving the issue.

Causes of AC Freezing

One of the main causes of AC freezing is restricted airflow. The evaporator coil requires a steady flow of air to maintain the proper temperature. If air filters are clogged or vents are blocked, airflow is reduced, causing the coil to become too cold and eventually freeze. Regular cleaning and maintenance of air filters and vents are crucial to prevent this problem.

Low refrigerant levels can also lead to freezing. Refrigerant absorbs heat from the indoor air, and when levels drop, the pressure in the system decreases. This causes the temperature of the evaporator coil to drop below freezing, resulting in ice buildup. Leaks in the refrigerant lines or improper charging during installation are common reasons for low refrigerant levels.

Dirty evaporator coils are another factor. Dust and debris accumulation on the coils reduces heat exchange efficiency. As a result, the coil gets excessively cold, causing the moisture in the air to freeze. Cleaning the coils regularly can prevent ice formation and maintain optimal cooling performance.

Thermostat settings and operation can contribute to freezing as well. Setting the thermostat too low in extremely hot conditions forces the AC to run continuously, reducing airflow and refrigerant pressure. This prolonged operation can cause the coil to freeze. Ensuring the thermostat is set to a reasonable temperature, typically between 72°F and 78°F, can help avoid freezing.

External factors such as low ambient temperatures can also cause the AC to freeze. Most air conditioners are designed to operate in temperatures above 60°F. Operating the system in cooler conditions can cause the refrigerant to overcool the coils and freeze.

Effects of a Freezing AC

A freezing AC reduces its cooling efficiency. Ice on the evaporator coil prevents proper heat absorption, making the air conditioner struggle to reach the desired indoor temperature. Running a frozen AC for extended periods can damage components like the compressor, leading to costly repairs. Water from melting ice can also drip into unintended areas, causing potential water damage.

Preventing AC Freezing

Maintaining proper airflow is essential. Clean or replace air filters every 1 to 3 months depending on usage and ensure vents are unobstructed. Monitoring refrigerant levels regularly and addressing leaks promptly prevents pressure drops that cause freezing. Scheduling annual professional AC maintenance ensures evaporator coils are clean and the system operates efficiently. Using a programmable thermostat helps regulate temperature and prevents the unit from overworking. Avoid setting the AC below recommended temperatures during hot weather.

FAQ

Can a dirty air filter cause my AC to freeze?
Yes. Reduced airflow from a clogged filter can make the evaporator coil too cold, leading to ice formation.

How do I know if my AC is low on refrigerant?
Signs include decreased cooling, hissing sounds near the refrigerant lines, and ice buildup on the evaporator coil.

Is it safe to run a frozen AC?
No. Operating a frozen unit can damage the compressor and other components, leading to costly repairs.

Can the outdoor temperature affect AC freezing?
Yes. Running an AC when the outdoor temperature is below 60°F can cause the refrigerant to overcool the coils and freeze.

How often should I maintain my AC to prevent freezing?
Professional maintenance once a year and regular filter cleaning every 1 to 3 months are recommended.

Conclusion

AC freezing is typically caused by restricted airflow, low refrigerant levels, dirty evaporator coils, improper thermostat settings, or low outdoor temperatures. Ice formation on the evaporator coil reduces cooling efficiency and can damage the system if ignored. Maintaining clean air filters, ensuring proper refrigerant levels, keeping coils clean, and monitoring thermostat settings are essential for preventing freezing. Regular professional maintenance further protects the system and ensures optimal performance. Understanding these factors allows homeowners to identify issues early and maintain a reliable and efficient air conditioning system.

What is BTU in AC

What is BTU in AC

BTU, or British Thermal Unit, is a standard measurement used to quantify the cooling or heating capacity of an air conditioner. Understanding BTU helps homeowners and businesses select the right AC unit for their space, ensuring efficient cooling and energy usage.

Understanding BTU in Air Conditioners

A British Thermal Unit represents the amount of energy needed to raise or lower the temperature of one pound of water by one degree Fahrenheit. In air conditioning, BTU measures how much heat the unit can remove from a room in one hour. Higher BTU ratings indicate a greater cooling capacity, suitable for larger rooms or spaces with higher heat loads.

The capacity of air conditioners is often matched to room size, insulation, and local climate. For instance, a small room of about 150 square feet may require an AC unit with 5,000 to 6,000 BTU per hour, while a larger living room of 400 square feet may need 10,000 to 12,000 BTU per hour. Selecting an appropriate BTU rating ensures the AC can maintain the desired temperature without overworking, which can increase energy costs and reduce the lifespan of the unit.

Factors like ceiling height, sunlight exposure, number of windows, and heat-generating appliances also affect the required BTU. A room with high ceilings or significant direct sunlight may need an AC unit with a 10–15% higher BTU rating to maintain comfort.

BTU and Energy Efficiency

BTU ratings also relate to energy efficiency. Air conditioners with high BTU output consume more electricity, so matching the BTU to the room size is essential for cost-effective operation. An oversized unit may cool the room too quickly without properly dehumidifying the air, leading to discomfort and increased energy use. Conversely, an undersized unit may run continuously, consuming more energy and reducing efficiency.

Modern AC units often include an Energy Efficiency Ratio (EER) or Seasonal Energy Efficiency Ratio (SEER) rating alongside the BTU. These values indicate how efficiently the unit uses electricity relative to its cooling capacity. A higher SEER or EER value means the air conditioner delivers more cooling per unit of energy consumed.

BTU Conversion and Measurement

BTU can also be converted into other units of energy. One BTU equals approximately 1,055 joules or 0.293 watt-hours. This conversion helps compare AC units or calculate energy costs using local electricity rates. Homeowners can estimate the electricity usage of an AC unit by multiplying its BTU rating by the hours of operation and adjusting for efficiency ratings.

Understanding BTU allows consumers to choose the correct air conditioner size and optimize comfort while minimizing electricity costs. It also aids in comparing different units, ensuring that the AC meets both cooling requirements and energy efficiency goals.

FAQ

How do I know what BTU AC I need?
Calculate your room size in square feet and match it to the recommended BTU range. Consider ceiling height, sunlight, and heat from appliances for more accuracy.

What happens if I choose an AC with too high BTU?
An oversized unit may cool too quickly, fail to dehumidify properly, increase electricity costs, and reduce comfort.

What if the AC BTU is too low?
An undersized unit will run continuously, struggle to maintain temperature, and consume more energy over time.

Is BTU the only factor for AC performance?
No. Energy efficiency ratings such as SEER and EER, airflow, and unit design also affect performance and electricity usage.

Can I convert BTU to watts for energy calculation?
Yes. One BTU equals approximately 0.293 watt-hours, allowing energy consumption estimation.

Conclusion

BTU in air conditioners measures the unit’s cooling capacity, helping determine the right size for a room or space. Selecting the correct BTU rating ensures comfort, energy efficiency, and proper AC operation. Factors like room size, sunlight, ceiling height, and heat sources influence the required BTU. Understanding BTU alongside efficiency ratings such as SEER or EER allows homeowners to make informed decisions, balance energy consumption, and achieve optimal cooling performance. Correctly matched AC units provide consistent comfort while reducing electricity costs and extending the unit’s lifespan.

Lights Flicker When AC Turns On

Lights Flicker When AC Turns On

Experiencing lights flickering when an air conditioner starts can indicate electrical issues or normal operational effects. Understanding the causes and solutions helps maintain home safety and ensures efficient AC performance.

Causes of Lights Flickering When AC Turns On

Air conditioners require a surge of power when the compressor starts. This sudden demand can cause a brief voltage drop in the home’s electrical system. Standard household circuits are designed to handle minor fluctuations, but noticeable flickering may occur if the AC draws a significant amount of electricity relative to the circuit’s capacity.

Another common cause is overloaded circuits. If multiple high-power appliances, such as refrigerators, water heaters, or electric ovens, are operating on the same circuit as the AC, the combined load can cause lights to dim or flicker temporarily. This is especially noticeable with older homes that have wiring designed for lower amperage.

Loose or faulty wiring is another potential factor. Connections in the breaker panel, outlets, or junction boxes that are not secure can create resistance, leading to flickering when high-demand appliances like AC units start. Corroded or damaged wires can amplify this issue, posing both performance and safety concerns.

How to Prevent Flickering

Proper electrical planning can reduce or eliminate flickering. Ensuring that the AC has a dedicated circuit with adequate amperage capacity is essential. Most residential central AC units require a 30–60 amp circuit, depending on their size and power rating. Window units typically require a 15–20 amp circuit.

Routine electrical maintenance is also important. Checking for loose connections in the breaker panel, outlets, and wiring can prevent voltage drops. Replacing old or damaged wires ensures consistent power delivery to the AC and other appliances.

Using a soft-start AC system can help reduce the initial power surge. These systems gradually ramp up the compressor motor, minimizing voltage drops and preventing lights from flickering. Additionally, ensuring that high-power appliances are spread across different circuits helps balance the load in the electrical system.

Potential Safety Concerns

Persistent flickering can indicate underlying electrical issues. Overloaded circuits, loose connections, or damaged wiring increase the risk of electrical fires. It is important to have a licensed electrician inspect the home’s electrical system if flickering occurs frequently or lasts longer than a few seconds when the AC starts.

Ignoring electrical problems can damage the AC unit and other sensitive electronics. Voltage fluctuations can shorten the lifespan of appliances and cause intermittent failures. Addressing flickering promptly helps maintain both safety and equipment reliability.

FAQ

Is it normal for lights to flicker when an AC starts?
A brief flicker lasting one or two seconds is often normal due to the compressor’s initial power draw.

What should I do if lights flicker constantly with AC use?
Constant flickering indicates potential electrical issues. Contact a licensed electrician to inspect wiring, breakers, and circuits.

Can flickering damage my electronics?
Frequent voltage fluctuations can reduce the lifespan of electronic devices and sensitive appliances. Surge protection can help mitigate damage.

Should my AC have a dedicated circuit?
Yes. Most central AC units require a dedicated 30–60 amp circuit to prevent voltage drops and ensure safe operation.

Can soft-start systems prevent flickering?
Yes. Soft-start AC systems reduce the initial power surge, minimizing flickering and protecting the electrical system.

Conclusion

Lights flickering when an AC turns on is often caused by the compressor’s high initial power demand, overloaded circuits, or loose wiring. Ensuring a dedicated circuit with sufficient amperage, maintaining secure electrical connections, and considering soft-start systems can reduce or eliminate flickering. Persistent issues should be addressed by a licensed electrician to maintain home safety and protect appliances. Correct electrical setup ensures consistent AC operation, prevents damage to electronics, and provides a safe and comfortable indoor environment.

How to Set AC Temperature for Cooling

How to Set AC Temperature for Cooling

Setting the right temperature on an air conditioner is crucial for comfort, energy efficiency, and system performance. Understanding how AC units respond to temperature settings allows users to maintain a comfortable indoor environment while minimizing electricity costs.

Understanding AC Temperature Settings

Air conditioners are designed to maintain a set temperature using a thermostat. The thermostat measures room temperature and signals the AC compressor and fan to turn on or off to reach the desired cooling level. Most modern AC units allow temperature adjustments in 1-degree increments, usually ranging from 16°C (61°F) to 30°C (86°F).

The ideal cooling temperature depends on factors such as room size, insulation, outdoor temperature, and humidity levels. Setting the temperature too low can cause excessive energy consumption and reduce system efficiency, while setting it too high may not provide adequate cooling.

Recommended Temperature for Cooling

For most households, the optimal temperature for cooling ranges between 24°C (75°F) and 26°C (78°F). This range provides a comfortable environment without overworking the AC unit. During very hot conditions, the thermostat may be set slightly lower, but it is generally not recommended to go below 22°C (72°F), as this can increase electricity usage by up to 20–30%.

Using energy-saving modes on modern AC units can also help maintain comfort. These modes adjust compressor and fan activity automatically to keep the room within the desired temperature range without constant power consumption.

How to Adjust AC Temperature

To set the AC temperature for effective cooling, start by turning on the unit and selecting cooling mode. Gradually adjust the thermostat to the desired temperature within the recommended range. It is important to allow the AC unit some time to reach the set temperature, usually 5–15 minutes, depending on the room size and current indoor temperature.

For rooms with poor insulation or high sunlight exposure, using curtains, blinds, or shades can enhance cooling efficiency. Additionally, ensuring that doors and windows are closed while the AC is running prevents cold air from escaping and warm air from entering.

Factors Affecting AC Temperature Efficiency

Several factors can influence how effectively an AC cools a room. High humidity levels may require lower thermostat settings for comfort. Dirty air filters, coils, or blocked vents can reduce cooling performance and force the AC to run longer. The size and capacity of the AC unit relative to the room are also important. An undersized AC may not reach the desired temperature efficiently, while an oversized unit may cycle on and off too frequently, wasting energy.

FAQ

What is the best temperature to set my AC for cooling?
The recommended range is 24°C to 26°C (75°F to 78°F) for comfort and energy efficiency.

Can setting the AC too low damage it?
Yes. Running the AC at very low temperatures can strain the compressor, increase electricity usage, and reduce lifespan.

How long does it take for an AC to reach the set temperature?
It usually takes 5–15 minutes depending on room size, insulation, and outdoor temperature.

Does humidity affect the cooling temperature?
Yes. High humidity may make the room feel warmer, requiring the AC to work harder or set to a slightly lower temperature.

Should I leave the AC on all day?
It is more energy-efficient to maintain a consistent temperature rather than turning it on and off frequently. Using a programmable thermostat can help manage this.

Conclusion

Setting the AC temperature correctly ensures a comfortable indoor environment while maintaining energy efficiency. The optimal range for most homes is between 24°C and 26°C (75°F to 78°F). Proper adjustment of the thermostat, combined with good insulation, clean filters, and closed windows, allows the AC to operate efficiently and reduces electricity consumption. Understanding these factors helps users achieve consistent cooling, protect the system, and create a comfortable living space.

What is Dry Mode on AC

What is Dry Mode on AC

Air conditioners have several operating modes to provide comfort and efficiency. One of the common features on modern AC units is Dry Mode. Understanding this mode helps in maintaining indoor air quality, controlling humidity, and optimizing energy use.

Understanding Dry Mode

Dry Mode is a function that reduces humidity in the room without significantly lowering the temperature. It works by running the compressor and fan at lower speeds. The AC draws air over the evaporator coil, where moisture condenses into water and is drained outside. The cooled air is then circulated back into the room, but the temperature drop is minimal compared to standard cooling mode.

This mode is particularly useful in areas with high humidity, as it improves comfort without making the room too cold. In climates where the air feels sticky and damp, Dry Mode removes excess moisture, creating a more comfortable environment.

How Dry Mode Works

When Dry Mode is activated, the AC compressor cycles intermittently. This reduces energy consumption compared to full cooling mode. The fan speed is often slower, allowing more air contact with the evaporator coil, which enhances moisture removal. The condensed water is collected in the drain pan and directed outside through the drain pipe.

Unlike cooling mode, Dry Mode does not aim to maintain a specific temperature. Instead, it focuses on reducing the relative humidity level. Typical AC units in Dry Mode can reduce indoor humidity by 10–20%, depending on the room size and environmental conditions.

Benefits of Using Dry Mode

Using Dry Mode has several advantages. First, it improves indoor comfort in humid conditions without overcooling the room. Second, it helps prevent mold and mildew growth by reducing moisture accumulation on walls, ceilings, and furniture. Third, energy consumption is usually lower than full cooling mode, as the compressor works intermittently and fan speed is reduced.

Dry Mode is also beneficial for electronic equipment and wooden furniture, which can be sensitive to high humidity. Maintaining moderate humidity protects these items from damage caused by moisture.

When to Use Dry Mode

Dry Mode is ideal in rainy or humid seasons, or in regions with high atmospheric moisture. It is useful in rooms where occupants feel uncomfortable due to damp air, even if the temperature is moderate. However, it is not suitable for very hot conditions where significant cooling is needed. For maximum cooling, regular cooling mode should be used instead.

FAQ

Does Dry Mode cool the room?
Yes, but only slightly. The primary function is to remove humidity rather than lower temperature.

Is Dry Mode energy-efficient?
Yes. The compressor and fan run at lower speeds, which reduces electricity consumption compared to full cooling mode.

Can Dry Mode prevent mold growth?
It helps by reducing humidity, which is a key factor in mold and mildew development.

Is Dry Mode suitable for very hot climates?
No. In extreme heat, Dry Mode alone may not provide enough cooling, so standard cooling mode is recommended.

How long should Dry Mode run?
The duration depends on indoor humidity and room size. Running for 1–3 hours often significantly reduces dampness.

Conclusion

Dry Mode on an AC unit is designed to reduce indoor humidity while minimally affecting temperature. It enhances comfort in humid conditions, protects furniture and electronics, and consumes less energy compared to standard cooling. Understanding when and how to use Dry Mode helps maintain a healthy indoor environment, prevents mold growth, and ensures energy-efficient operation of the air conditioner.

How Many Watts Does a Window AC Use

How Many Watts Does a Window AC Use

Understanding the power consumption of a window AC unit is essential for managing electricity costs and ensuring proper electrical setup. Window air conditioners are common in homes and small offices. They combine cooling efficiency with compact design, but their energy usage varies depending on size, model, and usage patterns.

Power Consumption of Window AC Units

Window AC units are rated in watts, which measure the electrical power they consume. The exact power usage depends on the unit’s cooling capacity, usually expressed in British Thermal Units (BTU). For example, a unit with 5,000 BTU may use around 500 watts, while a 12,000 BTU unit can consume up to 1,500 watts.

Larger units with higher BTU ratings provide more cooling but require more electricity. Energy efficiency is also indicated by the Energy Efficiency Ratio (EER), calculated as BTU per watt. Units with higher EER use less power for the same cooling output. For instance, a 10,000 BTU window AC with an EER of 10 consumes about 1,000 watts, whereas a similar unit with an EER of 12 consumes roughly 833 watts.

Other factors affecting power consumption include fan speed, temperature setting, room size, insulation, and outdoor temperature. Running the unit at lower temperatures increases compressor work, leading to higher electricity use.

Average Electricity Usage

The average window AC unit consumes 500 to 1,500 watts per hour, depending on BTU and efficiency. If used for 8 hours per day, a 1,000-watt unit would use 8 kilowatt-hours (kWh) daily. Monthly usage can be calculated by multiplying daily kWh by the number of operating days. For instance, a 1,000-watt unit running 30 days for 8 hours daily would consume approximately 240 kWh per month.

Understanding wattage helps calculate electricity costs. If the local rate is $0.15 per kWh, the monthly cost for the unit above would be about $36. This calculation allows homeowners to plan energy use and budget effectively.

Factors That Influence Wattage

Room Size: Larger rooms require higher BTU units, which consume more power.

Insulation: Poor insulation increases cooling demand and energy consumption.

Temperature Setting: Lower thermostat settings make the compressor work harder, increasing wattage.

Unit Age and Maintenance: Older units with clogged filters or worn compressors consume more electricity.

Fan Speed: Higher fan speeds slightly increase power consumption, although most energy is used by the compressor.

Voltage Supply: Units designed for 110-120 volts differ slightly in wattage compared to 220-240 volts models, although cooling output remains similar.

Energy Efficiency Tips

Maintaining efficiency reduces energy use. Clean or replace filters regularly to prevent airflow obstruction. Seal windows and doors to reduce heat entry. Use energy-saving modes if available, which cycle the compressor more efficiently. Proper installation ensures the unit is level and vents are unobstructed, which minimizes power waste.

Using a smart plug or energy monitor can track real-time wattage and help optimize usage. Setting the temperature to 24–26°C (75–78°F) balances comfort with power savings.

FAQ

How many watts does a 5,000 BTU window AC use?
Approximately 500 watts per hour, depending on model efficiency.

Does a higher BTU mean more electricity usage?
Yes. Larger BTU units cool bigger spaces but consume more power.

How can I reduce electricity usage of a window AC?
Keep filters clean, use energy-saving mode, set moderate temperatures, and ensure proper insulation.

Is wattage the same as amperage?
No. Wattage measures power, while amperage measures current. Power can be calculated as Watts = Volts × Amps.

Can a window AC unit run on solar power?
Yes, if the solar system can supply sufficient watts to meet the unit’s power requirement, typically 500–1,500 watts depending on size.

Conclusion

The wattage of a window AC unit varies from 500 to 1,500 watts, depending on BTU rating, efficiency, and usage conditions. Understanding wattage helps estimate electricity consumption and costs, plan for electrical capacity, and implement energy-saving measures.

Monitoring power use, maintaining the unit, and using efficient settings ensures reliable cooling while minimizing electricity bills. Proper installation and routine maintenance further enhance efficiency, reduce strain on the compressor, and extend the life of the window AC unit. Accurate knowledge of wattage allows homeowners to balance comfort, energy use, and cost effectively.

Does Coolant Affect AC

Does Coolant Affect AC

Air conditioning (AC) systems in vehicles and buildings rely on multiple components to maintain effective cooling. One common question is whether coolant affects AC performance. Understanding the relationship between coolant and AC helps in proper maintenance and prevents system damage.

Role of Coolant in AC Systems

Coolant, also known as antifreeze, primarily regulates engine temperature. It circulates through the engine, absorbing heat and preventing overheating. While coolant is not directly part of the AC system, it indirectly affects AC efficiency in vehicles.

In vehicles, the AC relies on the compressor, which is powered by the engine. If the engine overheats due to low or degraded coolant, the AC compressor may struggle to operate, reducing cooling performance. Excessive engine heat can also trigger safety mechanisms, shutting off AC operation to prevent engine damage.

Coolant also maintains the radiator and condenser temperatures. The condenser releases heat absorbed from the cabin air. If the coolant system is compromised, the condenser may operate less efficiently, indirectly reducing AC cooling capacity.

How Coolant Problems Affect AC

Low Coolant Levels: Insufficient coolant can lead to engine overheating. As a result, the AC system may operate at reduced efficiency or shut off temporarily. Long-term low coolant levels can damage the compressor, hoses, and condenser.

Contaminated or Old Coolant: Over time, coolant can degrade or become contaminated with rust or debris. This reduces heat transfer efficiency, causing higher engine temperatures. A hotter engine places additional strain on the AC compressor, decreasing its performance.

Coolant Leaks: Leaks in the cooling system can create air pockets, leading to fluctuating engine temperatures. The AC system may respond to these fluctuations with inconsistent cooling or intermittent operation.

Thermostat or Water Pump Failure: Malfunctions in the thermostat or water pump disrupt coolant circulation. Engine temperature rises, causing the AC to become less effective. In severe cases, AC compressors may fail prematurely due to excessive heat exposure.

AC-Specific Coolants

It is important to differentiate between engine coolant and AC refrigerant. AC systems require refrigerants such as R134a, R1234yf, or R22 in older systems. These refrigerants are distinct from engine coolant and circulate within the AC system to absorb and release heat. Engine coolant does not replace refrigerant, nor can it cool the cabin air directly.

Using the correct refrigerant is essential for pressure regulation and optimal cooling. AC performance issues are often misattributed to engine coolant when the actual problem is low or contaminated refrigerant.

Maintaining Both Systems

Proper maintenance of both the engine cooling system and AC system ensures efficient performance. Regularly check coolant levels and quality using the dipstick or reservoir markings. Replace degraded coolant according to manufacturer recommendations, usually every 2 to 5 years or 30,000 to 50,000 miles.

Inspect hoses, radiator, and water pump for leaks or corrosion. Keep the AC condenser clean, especially if it is located near the radiator, to allow efficient heat exchange. Scheduled AC servicing includes refrigerant level checks and compressor inspection, preventing indirect effects from engine overheating.

Maintaining correct engine temperature improves fuel efficiency, reduces wear on engine components, and allows the AC compressor to operate under optimal conditions.

FAQ

Does low coolant reduce AC performance?
Yes. Low coolant can cause engine overheating, which may reduce AC efficiency or trigger safety shutdowns.

Can AC work without coolant?
Technically, the AC can operate, but engine overheating due to lack of coolant can damage the compressor and reduce cooling capacity.

Is engine coolant the same as AC refrigerant?
No. Engine coolant regulates engine temperature, while AC refrigerant absorbs and releases heat to cool the cabin air.

How often should coolant be replaced?
Coolant typically needs replacement every 2 to 5 years or after 30,000 to 50,000 miles, depending on vehicle specifications.

Can a coolant leak damage the AC system?
Yes. Leaks can cause engine overheating, placing stress on the AC compressor and potentially reducing AC lifespan.

Conclusion

Coolant plays an indirect but important role in AC performance, particularly in vehicles. Engine coolant regulates temperature, ensuring the AC compressor operates efficiently. Low or degraded coolant can cause engine overheating, which reduces cooling capacity and may lead to premature AC component failure.

While engine coolant is not a substitute for AC refrigerant, maintaining proper coolant levels and quality supports both engine health and AC performance. Regular inspection of coolant, hoses, and the radiator, combined with routine AC maintenance, ensures reliable cooling, protects critical components, and extends the life of the AC system. Proper care of both systems allows the vehicle or building to maintain optimal temperature control efficiently and safely.

How Long Does an AC Unit Last

How Long Does an AC Unit Last

Air conditioning (AC) units are essential for maintaining comfortable indoor temperatures, particularly during hot months. Knowing how long an AC unit lasts helps homeowners plan for maintenance, replacements, and budgeting. The lifespan of an AC unit depends on factors such as unit type, usage frequency, maintenance, and environmental conditions.

Average Lifespan of AC Units

Most residential AC units have a lifespan ranging from 10 to 20 years. Central air conditioning systems typically last 12 to 15 years, while window or portable units may last 8 to 12 years depending on usage. High-efficiency units and properly maintained systems can sometimes exceed 20 years.

The lifespan is influenced by operational hours, climate, and maintenance practices. Units in regions with extreme heat often operate longer hours, which may reduce their lifespan. Frequent on-and-off cycling can also place stress on components, shortening durability.

Factors Affecting AC Longevity

Maintenance: Regular maintenance extends the life of an AC unit. Tasks include filter cleaning or replacement, coil cleaning, refrigerant level checks, and inspecting electrical connections. Units that receive annual professional servicing often last longer than neglected systems.

Usage Patterns: Units that operate continuously or are oversized for the home may experience more wear and tear. Correct sizing, usually measured in BTUs (British Thermal Units) per square foot, ensures the unit runs efficiently without overworking.

Environmental Conditions: Dusty or humid environments can shorten an AC’s lifespan. Debris accumulation on coils, excessive moisture, or corrosive elements can damage internal components. Units installed in shaded or protected locations may experience less stress.

Quality of the Unit: Brand, model, and build quality significantly affect durability. Higher-end units may feature more robust compressors and motors, which can last longer. Cheaper units might require earlier replacement.

Signs an AC Unit is Nearing the End of Its Life

Certain indicators suggest that an AC unit may need replacement soon. Reduced cooling capacity, unusual noises, frequent breakdowns, and rising energy bills often indicate declining efficiency. Older units may use R22 refrigerant, which is being phased out and can be costly to recharge.

Leaks, rusted components, or frequent repairs may also signal that the system is beyond economical repair. In many cases, replacing an older unit is more cost-effective than continuous repairs.

Maintenance Tips to Extend AC Life

Regular cleaning of filters and coils prevents dust buildup, maintaining airflow and cooling efficiency. Checking refrigerant levels ensures proper operation of the compressor. Electrical inspections prevent short circuits and motor damage.

Keeping the outdoor condenser unit free of debris and shaded reduces stress on the system. Scheduling annual professional servicing can catch minor issues early, preventing major failures.

Energy-efficient use also prolongs lifespan. Setting the thermostat to maintain moderate temperatures reduces continuous cycling, while using ceiling fans can distribute cooled air efficiently.

FAQ

How long do central AC units usually last?
Central AC units typically last 12 to 15 years, depending on maintenance, usage, and environmental conditions.

Do window AC units last as long as central units?
No. Window or portable units usually last 8 to 12 years due to smaller components and continuous operation.

Can regular maintenance increase lifespan?
Yes. Routine cleaning, inspections, and professional servicing can extend an AC unit’s life by several years.

What affects an AC unit’s longevity the most?
Key factors include maintenance frequency, operational hours, environmental conditions, and build quality.

When should I consider replacing an old AC unit?
Consider replacement if the unit is older than 12-15 years, requires frequent repairs, or uses obsolete refrigerant like R22.

Conclusion

Understanding how long an AC unit lasts helps homeowners plan for maintenance and replacement costs. Most units function efficiently for 10 to 20 years, depending on type, usage, maintenance, and environment. Central systems generally last longer than window units, and higher-quality units often surpass the average lifespan.

Regular care, including cleaning filters, checking refrigerant levels, and professional servicing, extends the life of the system while maintaining efficiency. Recognizing signs of wear such as reduced cooling, unusual noises, and rising energy bills can prevent sudden breakdowns. Proper maintenance and timely replacement decisions ensure consistent comfort and energy savings over the life of the AC unit.

How to Clean Window AC Unit Without Removing

How to Clean Window AC Unit Without Removing

Maintaining a window air conditioner (AC) is essential to ensure efficient cooling, energy savings, and indoor air quality. Cleaning the unit without removing it from the window is possible if proper steps and precautions are followed. Regular cleaning prevents dust buildup, mold growth, and reduced airflow, which can affect performance.

Understanding the Importance of Cleaning

A window AC unit draws air from outside, passing it over coils and filters before circulating it indoors. Over time, dust, pollen, and debris accumulate on the filter, evaporator coil, and condenser. This buildup reduces airflow, increases energy consumption, and can lead to unpleasant odors. Mold and mildew may form if moisture collects in the unit, potentially causing respiratory issues.

Cleaning without removing the AC helps maintain performance and reduces the risk of damaging the unit or disrupting the installation. Homeowners should plan quarterly or biannual cleaning, especially before and after the cooling season.

Step-by-Step Cleaning Process

Start by turning off the AC unit and unplugging it from the electrical outlet. Safety is critical to avoid electric shock while cleaning internal components.

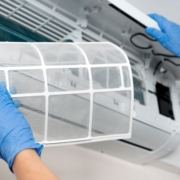
Begin with the front grille and filter. Many window AC units have a removable grille that allows access to the filter. If the filter cannot be removed, use a vacuum cleaner with a brush attachment to remove dust and debris. For washable filters, rinse under lukewarm water and let them dry completely before reinstalling.

Next, address the evaporator coil located behind the filter. A soft brush or compressed air can remove dust without dislodging the coil fins. Avoid using excessive water directly on the coil, as it may damage electrical components. Some homeowners use coil cleaning sprays designed for AC units. Follow the manufacturer instructions and allow time for the cleaner to work.

The condenser coil on the exterior part of the unit can also accumulate dust and dirt. Clean it with a soft brush or a vacuum while the AC is off. Ensure that the fins are not bent or damaged during cleaning. If accessible, a gentle spray from a garden hose can rinse debris, but avoid high water pressure to protect delicate components.

For general maintenance, wipe the outer casing with a damp cloth. Remove any dirt, leaves, or debris blocking the vents. This improves airflow and prevents the AC from overheating.

After cleaning, allow all components to dry completely before turning the unit back on. Inspect for loose screws or connections, and tighten them if necessary. Regular cleaning improves cooling efficiency and prolongs the AC’s lifespan.

Common Issues Addressed by Cleaning

Cleaning a window AC unit without removing it can resolve several common problems. Dust and debris in the filter and coils often cause reduced cooling efficiency, high energy consumption, and unusual noises. Mold growth in the evaporator coil may lead to musty odors.

Clogged condenser fins reduce heat dissipation, causing the unit to overheat or cycle frequently. Cleaning ensures unobstructed airflow, maintaining the manufacturer-rated cooling capacity, typically measured in BTUs per hour.

Regular cleaning also prevents water leakage inside the home due to blocked drainage channels. Moisture trapped in the unit can damage walls and window frames if not addressed.

FAQ

How often should I clean my window AC unit without removing it?
Cleaning should be done at least every three months during heavy usage, with a thorough seasonal cleaning before and after summer.

Can I use water to clean the coils without removing the unit?
Use minimal water or a light spray to avoid damaging electrical components. Prefer coil cleaning sprays or compressed air when possible.

What tools do I need for cleaning?
Basic tools include a vacuum cleaner with brush attachment, soft brush, damp cloth, coil cleaning spray, and compressed air. No specialized tools are required.

Will cleaning improve energy efficiency?
Yes. Removing dust and debris ensures the unit runs efficiently, which can reduce electricity consumption by 5 to 15 percent.

Can mold grow if I don’t clean the unit?
Yes. Moisture accumulation combined with dust encourages mold and mildew growth, leading to unpleasant odors and potential health issues.

Conclusion

Cleaning a window AC unit without removing it is a practical method to maintain cooling efficiency, reduce energy costs, and prevent odors. Regular maintenance includes vacuuming filters, brushing coils, cleaning the casing, and ensuring proper airflow. Homeowners should schedule cleaning at least quarterly and inspect for signs of dust, mold, or debris. Proper care enhances the lifespan and performance of the AC unit, ensuring a comfortable indoor environment throughout the cooling season.

How to Get Your Home Warranty to Replace AC Unit

How to Get Your Home Warranty to Replace AC Unit

A home warranty can help cover the repair or replacement of major home systems, including the air conditioning (AC) unit. Understanding the process, requirements, and coverage limitations is essential to ensure the warranty fulfills its purpose.

Understanding Home Warranty Coverage for AC Units

Most home warranty plans include coverage for central air conditioning systems, but coverage can vary. Typically, a standard plan covers mechanical breakdowns, electrical failures, and component malfunctions, while optional or premium plans may include full replacement coverage. Policies often exclude pre-existing conditions, improper maintenance, or cosmetic damage. Reviewing the terms and conditions is crucial before filing a claim.

Coverage usually applies to residential central AC units that are installed according to manufacturer specifications. Older units, usually over 10 to 15 years, may have limited coverage or require additional documentation to confirm eligibility for replacement.

Steps to File a Claim for AC Replacement

The first step is to contact your home warranty provider. Most companies allow claims via phone, online portal, or mobile app. Provide the property details, AC unit age, and description of the problem. Include any error codes, unusual noises, or visible damage.

The home warranty provider will typically schedule a licensed contractor to inspect the unit. The inspection confirms whether the AC unit is eligible for repair or replacement under the policy. Contractors assess the unit’s condition, installation, and maintenance history. Documentation such as receipts for previous maintenance or repairs may be required.

Once the inspection is complete, the provider evaluates the claim. If the unit is deemed inoperable and unrepairable, and the policy covers replacement, the warranty company approves the replacement process. Some policies provide a specific dollar limit for replacement. Homeowners may need to cover costs exceeding this limit.

Preparing for the AC Replacement

Before replacement, confirm the approved specifications with the home warranty provider. Policies may require the replacement unit to meet certain efficiency ratings or brand standards. Scheduling the installation with the contractor should be done promptly to minimize downtime, especially during hot summer months.

Homeowners should also prepare the area around the AC unit for replacement. Ensure that outdoor units are accessible, and indoor vents or electrical panels are clear. This preparation helps contractors complete the work efficiently and safely.

Common Challenges and How to Address Them

Some homeowners face challenges when requesting AC replacement under a home warranty. Older units may not qualify for full replacement, and coverage limits can result in out-of-pocket expenses. Understanding the policy limits in advance helps avoid unexpected costs.

Documentation gaps can delay claims. Keep records of maintenance, prior repairs, and installation dates to demonstrate that the unit was properly maintained and eligible for coverage.

Disagreements with the warranty provider may occur if the unit’s failure is attributed to improper installation, neglect, or pre-existing issues. In such cases, review the policy carefully, provide supporting evidence, and consider requesting a second contractor inspection if allowed by the warranty.

Tips to Maximize Home Warranty Benefits

Maintaining your AC unit according to manufacturer guidelines increases the likelihood of coverage. Annual inspections, filter changes, and coil cleaning demonstrate responsible ownership.

Filing claims promptly when issues arise also improves outcomes. Delaying action can lead to further damage, which may be classified as neglect and reduce coverage eligibility.

Understand the financial limits of your policy. Some warranties cover up to $5,000 to $7,500 for major system replacement. Knowing the cap allows homeowners to budget for any additional costs.

FAQ

Will a home warranty replace my AC unit if it’s old?
Coverage depends on the policy terms and unit condition. Older units, especially over 15 years, may have limited coverage or require proof of maintenance.

How long does it take for a warranty company to approve AC replacement?
Typically, the process takes 1 to 3 weeks, including inspection, evaluation, and scheduling, but times can vary depending on contractor availability and seasonal demand.

Do I need to pay a service fee?
Most home warranties require a service call fee, usually between $50 and $125, even if the AC unit is approved for replacement.

Can I choose my own AC contractor?
Home warranty policies usually require using a licensed contractor approved by the company, though some providers allow recommendations or exceptions.

What if my AC unit fails due to lack of maintenance?
Improper maintenance may result in denied coverage. Keeping maintenance records is essential for claim approval.

Conclusion

Getting your home warranty to replace an AC unit involves understanding policy coverage, filing a detailed claim, and cooperating with a licensed contractor. Ensuring proper maintenance records and documentation increases the likelihood of approval. Homeowners should also be aware of replacement limits and service fees. Regular upkeep, prompt reporting of issues, and clear communication with the warranty provider help secure a timely and effective AC replacement, ensuring your home remains comfortable and efficiently cooled.