Why Does My AC Smell
A foul or unusual odor from an air conditioning (AC) unit is a common concern for homeowners. Understanding the sources and causes of AC smells is important for maintaining indoor air quality and ensuring the system functions efficiently. AC odors can range from musty or moldy to chemical or burning smells, each indicating a different issue within the system.
Common Causes of AC Smells
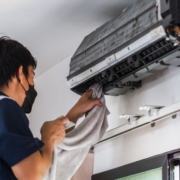
One of the most frequent causes of a bad odor from an AC unit is mold and mildew growth. Moisture collects in the evaporator coil, drip pan, and air ducts over time. When warm air passes through these damp areas, mold spores spread throughout the home, creating a musty smell. High humidity and infrequent filter changes can worsen the problem.
Clogged or dirty air filters also contribute to unpleasant odors. Filters trap dust, pollen, and debris, which can decompose and emit a foul scent if not replaced regularly. AC systems typically require filter changes every 30 to 90 days, depending on usage and air quality conditions.
Another cause is a dirty or blocked condensate drain line. The drain line removes water condensed from indoor air. If it becomes clogged, stagnant water accumulates, promoting bacterial and fungal growth. This often produces a sour or musty odor when the AC runs.
Electrical issues can generate burning smells. Faulty wiring, overheated motors, or failing components can create a distinctive odor similar to burning plastic. These issues require immediate attention to prevent fire hazards and costly repairs.
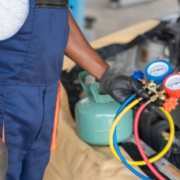
Gas or chemical odors may indicate refrigerant leaks. Refrigerants, such as R-410A or R-22, have a slight chemical smell when escaping from the system. Low refrigerant levels can also reduce cooling efficiency and strain the compressor, potentially causing further damage.
Dead animals in the ductwork or near the unit can produce strong, unpleasant odors. Rodents, birds, or insects sometimes enter the AC system and decompose, creating a noticeable smell. This requires removal of the animal and sanitizing the affected area to restore air quality.
Preventive Measures
Regular maintenance is key to preventing odors. Cleaning or replacing air filters every 30 to 90 days keeps airflow clear and reduces dust accumulation. Cleaning the evaporator coil and condensate drain line removes trapped moisture, inhibiting mold growth. Professional AC inspections once or twice a year can detect early issues with wiring, refrigerant levels, or duct contamination.
Maintaining proper humidity levels indoors also reduces the likelihood of mold-related odors. Using a dehumidifier or ensuring the AC unit has adequate drainage helps control moisture. Ensuring vents and ducts are sealed prevents outdoor debris and pests from entering the system.
Identifying the Type of Odor
Musty or moldy odors often indicate microbial growth within the system. Sour smells usually point to stagnant water in the condensate drain. Burning odors typically signal electrical problems or overheating components. Chemical or refrigerant odors may indicate a leak. Foul smells from decaying matter suggest animals or pests are present in the ducts. Identifying the specific type of smell can guide appropriate troubleshooting and repair actions.
FAQ
Why does my AC smell when I first turn it on?
When AC units remain off for extended periods, dust and moisture accumulate. Initial operation can release trapped odors.
How can I remove mold smell from my AC?
Cleaning the evaporator coil, drip pan, and air ducts, along with changing air filters, reduces mold-related odors. Professional cleaning may be necessary for severe cases.
Can electrical issues cause AC smells?
Yes, overheating motors, faulty wiring, or burned components can produce burning odors, requiring immediate attention.
Is a refrigerant leak dangerous?
Yes, leaking refrigerants reduce cooling efficiency and may pose health risks if inhaled. Certified technicians should handle leaks.
How often should I clean my AC to prevent odors?
Filters should be replaced every 30 to 90 days. Condensate lines, coils, and ducts should be inspected and cleaned annually.
Conclusion
AC odors can indicate a range of issues, including mold, clogged filters, electrical problems, refrigerant leaks, or pests. Identifying the source of the smell is critical to restoring proper function and maintaining indoor air quality. Regular maintenance, timely filter replacement, and professional inspections help prevent most odor problems. Addressing electrical or refrigerant issues promptly ensures safety and preserves the efficiency of the AC system. Understanding the causes and solutions for AC odors allows homeowners to maintain a clean, safe, and comfortable indoor environment.