How to reset a Dometic RV air conditioner

How to reset a Dometic RV air conditioner

RV air conditioning is essential to ensure comfort while traveling, especially in warm weather. Dometic RV air conditioners are a popular choice among RV owners due to their reliability and efficiency. However, like any appliance, they may experience problems that require a reset to restore optimal performance. In this article, we’ll explore how to reset a Dometic RV air conditioner effectively.

Introduction to Dometic RV Air Conditioners

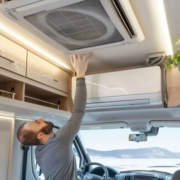
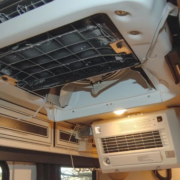
Dometic RV air conditioners are renowned for efficiently cooling RV interiors. They are designed to withstand the rigors of travel and provide consistent cooling even in extreme temperatures. These units are compact, lightweight, and specially engineered for RVs, making them the preferred choice for many travelers.

Common Problems with Dometic RV Air Conditioners

Before delving into the reset process, it’s important to understand common problems that may require resetting a Dometic RV air conditioner.

– Lack of cooling

One of the most common problems RV owners have is insufficient cooling from their air conditioners. This can be caused by a number of factors, including refrigerant leaks, clogged filters, and compressor problems.

– Noise operation

Excessive noise during operation can be disruptive and indicate underlying problems such as loose components, worn fan blades, or debris accumulation within the unit.
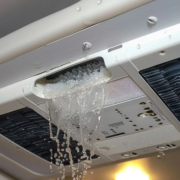
– Poor airflow

Inadequate airflow can result in uneven cooling or ineffective temperature control inside the RV. Blocked vents, dirty filters, or faulty fan motors can cause this.

The Importance of Resetting the Dometic RV Air Conditioner

Resetting a Dometic RV air conditioner is often the first step in solving common problems. This allows the unit to clear any temporary errors or faults and recalibrate and resume normal operation.

Steps to Reset a Dometic RV Air Conditioner

– Check the power source

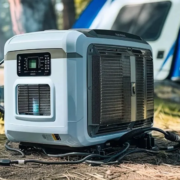
Before starting the reset process, make sure the RV is connected to a reliable power source, such as shore power or a generator. Insufficient power supply can interrupt the reset procedure.

– Turn off the unit

Using the control panel or remote, turn off the Dometic RV air conditioner and allow it to rest for a few minutes. This ensures that any residual power is dissipated before proceeding with the reset.

– Reset the circuit breaker

Locate the circuit breaker panel on your RV and locate the breaker associated with the air conditioner. Toggle the breaker switch to the “off” position, then wait about five minutes before resetting it to the “on” position.

– Wait and restart

After power is restored, allow sufficient time for the air conditioner to reset and recalibrate. Once the breaker has reset, please wait for the unit to start before turning it on again using the control panel or remote.

Troubleshooting tips for persistent problems

If the reset method fails to fix the problem or the problems persist, consider the following troubleshooting tips:

 Checking for refrigerant leaks

Inspect refrigerant lines and connections for any signs of leaks or damage. Low refrigerant levels can impair the air conditioner’s cooling efficiency.

Cleaning the air filter

Clean or replace air filters regularly to prevent dust and debris from accumulating, which can block airflow and reduce cooling performance.

Inspect the thermostat

Make sure the thermostat is working properly and is set to the desired temperature. A faulty thermostat can cause incorrect temperature readings and irregular cooling cycles.

Regular maintenance tips to avoid resetting

To reduce the need to reset your Dometic RV air conditioner, follow these maintenance tips:
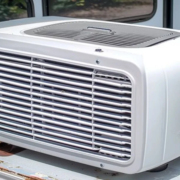
Clean the unit regularly.

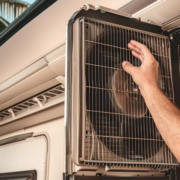
Remove any dirt, debris, or vegetation from the exterior of the air conditioner to prevent airflow restriction and possible component damage.

– Checking for debris and obstructions

Periodically inspect the air intake and exhaust vents for obstructions such as leaves, insects, or bird nests. Remove any obstructions to ensure optimal airflow.

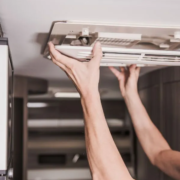
– Professional inspection

Schedule regular maintenance inspections with a certified RV technician to identify and address potential problems before they escalate. Professional servicing can extend the life of your air conditioner and improve overall performance.

Conclusion

Resetting a Dometic RV air conditioner is straightforward and can help resolve common problems such as lack of cooling, noisy operation, or poor airflow. By following the steps outlined in this article and implementing regular maintenance practices, RV owners can ensure optimal performance and comfort during their travels. Find your best RV AC service provider.

FAQs:

Q: How often should I reset my Dometic RV air conditioner?

Answer: Resetting your Dometic RV air conditioner should only be necessary if you experience specific problems such as lack of cooling or noisy operation. Otherwise, regular maintenance and cleaning can help prevent the need for frequent resets.

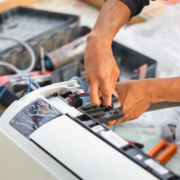
Q: Can I reset my Dometic RV air conditioner myself, or do I need professional help?

Answer: In most cases, you can reset your Dometic RV air conditioner yourself by following the steps outlined in this article. However, if you need clarification or continue to experience problems, it is recommended that you seek the help of a certified RV technician.

Q: Will resetting my Dometic RV air conditioner void the warranty?

Answer: No, resetting your Dometic RV air conditioner will not void the warranty as long as you follow the manufacturer’s guidelines and instructions in the user manual.

Q: What should I do if resetting my Dometic RV air conditioner does not solve the problem?

A: If resetting the air conditioner fails to resolve the problem or the problems persist, consider troubleshooting other possible causes, such as refrigerant leaks, dirty filters, or faulty components.

Q: How can I find a certified RV technician for professional maintenance?

Answer: You can search online for RV service centers or dealerships in your area that offer maintenance and repair services for Dometic RV air conditioners. Make sure the technician is certified and experienced in working with RV HVAC systems.

How many watts does an RV air conditioner use?

How many watts does an RV air conditioner use?

RV air conditioners are essential for maintaining comfort while parked on the road or at a campsite. However, understanding their energy consumption is crucial for efficient energy management, especially when relying on battery or generator power. In this comprehensive guide, we’ll discuss the intricacies of RV air conditioner power usage and provide valuable insight into optimizing energy efficiency.

Introduction to RV Air Conditioning

RV air conditioners are specially designed to cool the interior of recreational vehicles, ensuring a comfortable living environment regardless of the temperature outside. These units come in various sizes and configurations to accommodate various RV types, from compact trailers to spacious motorhomes.

Understanding electricity consumption

Types of RV Air Conditioners

There are primarily two types of RV air conditioners: ducted and non-ducted. Ducted systems distribute air through a network of vents, providing uniform cooling throughout the RV. Non-ducted units, on the other hand, emit air directly into the seating area, making them more suitable for smaller vehicles or retrofitting.

Factors Affecting Energy Consumption

Several factors affect the cost of powering an RV air conditioner, including:

Unit Size: Larger air conditioners generally require more power to operate efficiently.

Insulation and ventilation: Well-insulated RVs with adequate ventilation require less energy to maintain desired temperatures.

Ambient temperature: Excessive heat or cold outside temperatures can affect the workload of the air conditioner, affecting power consumption.

Usage patterns: Frequency and duration of usage play an important role in overall energy consumption.

Calculate energy consumption

Watts vs. Btu

RV air conditioners’ power consumption is measured in watts while cooling capacity is usually rated in British Thermal Units (BTUs). A higher wattage indicates greater energy consumption, while a higher BTU rating indicates increased cooling power.

Power requirements for different RV sizes

The power requirements of an RV air conditioner vary depending on the vehicle’s size and layout. Small trailers or campers may require air conditioners with lower wattage ratings, while larger motorhomes require more powerful units to cool the entire living area effectively.

Competency considerations

Energy Star Rating

When choosing an RV air conditioner, look for models with an ENERGY STAR rating, which indicates higher energy efficiency. These units are designed to consume less energy while providing optimal cooling performance, resulting in lower utility bills and reduced environmental impact.

Inverter vs Non-Inverter RV Air Conditioners

Inverter technology allows RV air conditioners to adjust compressor speed based on cooling demand, resulting in significant energy savings compared to traditional non-inverter models. Although the upfront cost of inverter units can be high, their long-term benefits in terms of efficiency and performance make them a worthwhile investment for the environmentally-conscious RV enthusiast.

Tips to reduce electricity consumption

Insulation and ventilation

Proper insulation and ventilation are important to minimize heat transfer and maximize airflow within the RV. Insulating walls, windows, and doors can help maintain stable indoor temperatures, reducing the workload on air conditioners. Additionally, installing roof vents or fans improves air circulation, increasing overall comfort and energy efficiency.

Solar panels and generators

Harnessing solar energy with rooftop solar panels can significantly reduce reliance on grid electricity or generator use. Solar energy can be stored in batteries for use during times of peak demand, providing a sustainable and cost-effective cooling solution for off-grid RV living. Alternatively, portable generators offer reliable backup power to run air conditioners when solar power is insufficient or unavailable.

General Frequently Asked Questions

How many watts does a typical RV air conditioner use?

A typical RV air conditioner uses between 1,200 and 3,500 watts, depending on factors such as size, performance, and operating conditions.

Can you run an RV air conditioner on a generator?

Yes, most RV air conditioners can be powered by a generator, provided it has enough wattage and voltage output to meet the unit’s requirements.

Does Inverter RV Air Conditioner Save Energy?

Yes, inverter RV air conditioners are more energy-efficient than traditional non-inverter models, thanks to the ability to adjust compressor speed based on cooling demand.

How do I calculate the cost of powering my RV air conditioner?

To calculate your RV air conditioner’s power consumption, multiply its wattage rating by the number of hours it runs each day. This will give you daily energy consumption in watt-hours (Wh), which can be used to estimate monthly or annual usage.

What alternative cooling options are there for RVs?

Yes, alternative cooling options for RVs include portable evaporative coolers, window air conditioners, and vent-free cooling fans, which can supplement or replace traditional RV air conditioners, depending on personal preference and needs.

Conclusion

Understanding RV air conditioners’ energy consumption is essential for efficient energy management and a comfortable travel experience. By choosing energy-efficient units, optimizing insulation and ventilation, and using renewable energy sources, RV enthusiasts can minimize environmental impact while enjoying reliable cooling solutions on the road. Get your RV AC service.

How to Clean RV Air Conditioner Filters

How to Clean RV Air Conditioner Filters

RV air conditioning is essential to keeping your recreational vehicle comfortable on hot days. However, to ensure optimal performance and air quality inside your RV, regular air conditioner filter cleaning is crucial. In this guide, we’ll walk you through cleaning your RV air conditioner filter step by step.

Introduction

Maintaining a clean air conditioner filter is critical to the efficient operation of your RV’s cooling system. Over time, dust, dirt, and debris accumulate in the filter, reducing airflow and efficiency. Regular filter cleaning not only improves cooling performance but also helps prevent costly repairs and ensures improved air quality inside your RV.

The importance of clean RV air conditioner filters

A clean air conditioner filter promotes better airflow, allowing the unit to cool the RV more efficiently. This prevents dust and debris from becoming airborne, which can affect respiratory health, especially for people with allergies or asthma. Additionally, a clean filter reduces stress on the air conditioner’s motor, prolonging its life and reducing energy consumption.

Signs that your RV air conditioner filter needs cleaning

  • Reduced airflow from vents
  • Increase in cooling time
  • Musty or unpleasant smell during air conditioning
  • Visible dust or debris on the filter
  • If you notice any of these symptoms, it’s time to clean or replace your RV air conditioner filter.

Essential tools for cleaning RV air conditioner filters

  • Before you begin, gather the following tools:
  • Screwdriver (if needed to access the filter)
  • A vacuum cleaner with a brush attachment
  • Mild detergent or air conditioner coil cleaner
  • Soft-bristled brush
  • Clean, dry cloth

Step-by-step guide to cleaning RV air conditioner filters

Follow these steps to clean your RV air conditioner filter:

Step 1: Turn off the RV’s power supply

Before attempting any maintenance on your RV’s air conditioner, make sure the power supply is turned off to avoid accidents.

Step 2: Locate the air conditioner filter

The filter is usually located behind the air intake grill on the ceiling or wall of your RV.

Step 3: Remove the filter

Carefully remove the filter from its housing. Some filters can slide on easily, while others may need to be screwed on.

Step 4: Inspect the filter

Check the filter for dirt, dust, and debris. If it is very dirty or damaged, consider replacing it instead of cleaning it.

Step 5: Clean the filter

Use a vacuum cleaner with a brush attachment to remove loose dirt and debris from the filter. For stubborn dirt or grease, soak the filter in a solution of mild detergent or air conditioner coil cleaner and water, then rinse thoroughly.

Step 6: Dry the filter

Allow the filter to dry completely before reinstalling. Avoid using a heat source to speed up the drying process, as excess heat can damage the filter material.

Step 7: Reinstall the filter

Once the filter is dry, carefully return it to its housing and store it in a safe place. Make sure it fits snugly to prevent air leakage.

Tips for maintaining RV air conditioner filters

Clean the filter at least once a month during peak usage seasons.

Inspect the filter regularly for signs of wear or damage and replace if necessary.

Keep the area around the air intake grill clean to prevent debris from entering the filter.

Common mistakes to avoid when cleaning RV air conditioner filters

Use harsh chemicals or abrasive brushes, which can damage the filter material.

Reinstalling a damp filter can promote mold and mildew growth.

Neglecting to clean or replace filters regularly can result in reduced cooling performance and possible damage to the air conditioning unit.

Regular cleaning of RV air conditioner filters is a must.

  • Improved cooling efficiency
  • Better air quality inside the RV
  • Long life of air conditioning unit
  • Reduced energy consumption and lower utility bills

Conclusion

Cleaning your RV air conditioner filter is a simple but necessary maintenance task that can significantly impact the performance and longevity of your cooling system. By following the steps outlined in this guide and maintaining a regular cleaning schedule, you can ensure that your RV stays cool and comfortable throughout your trip. If you need RV AC service, go here: RV air conditioning.

What size generator for a 30 Amp RV air conditioner

What size generator for a 30 Amp RV air conditioner

RV camping is an incredible way to explore the great outdoors while enjoying the comforts of home. However, to ensure an enjoyable experience, equipping your recreational vehicle (RV) with the right amenities is crucial. A reliable generator is essential, especially if you plan to run an air conditioner. But what size generator do you need for a 30 amp RV air conditioner? Let’s delve into the specifics.

Understanding the importance of proper generator sizing

Choosing the right generator size for your RV air conditioner is important for several reasons. First and foremost, an undersized generator can need help to power your air conditioner efficiently, leading to frequent breakdowns and potential damage to both the generator and the appliance. On the other hand, an oversized generator may be unnecessary and result in wasted fuel and increased costs.

RV air conditioners typically operate on 30 or 50-amp electrical systems, with 30-amp setups more common in smaller or older RVs. Therefore, determining the appropriate generator size requires careful evaluation of various factors.

Factors to consider

Wattage and amperage requirements

The first step in choosing the right generator size is to understand the power requirements of your RV air conditioner. Most 30-amp air conditioners require about 3,500 to 4,000 starting watts and 1,500 to 2,000 running watts. However, it is essential to check the specific features of your unit, as these may vary depending on the brand and model.

Starting vs. Running Wattage

It is very important to distinguish between starting (or surge) wattage and running (or continuous) wattage. Starting wattage refers to the additional power required to start appliances with electric motors, such as air conditioners and refrigerators while running wattage is the power required to start once. The generator must be able to handle both the air conditioner’s starting and running wattage.

Types and sizes of air conditioners

The size and type of your RV air conditioner play an important role in determining the appropriate generator size. Larger units with higher cooling capacity will require more power to operate, requiring a larger generator. Additionally, rooftop air conditioners are more common in RVs and have higher power requirements than portable or window units.

Additional appliances and electronics

Consider any other appliances or electronics you run simultaneously with air conditioners, such as lighting, televisions, and kitchen appliances. These devices will add to the total power load and affect your generator size requirements.

Altitude and temperature considerations

Note that altitude and ambient temperature can affect generator performance. Higher altitudes and hotter climates can reduce the efficiency of combustion engines, potentially requiring a larger generator to compensate for the reduced power output.

Accounting method

Determining the correct generator size involves some simple calculations based on the power requirements of your RV air conditioner and other appliances.

The basic formula for sizing generator

Add the starting wattage of all the appliances you plan to run simultaneously.

Add up the running wattage of all appliances.

Choose a generator with a rated wattage equal to or greater than the total starting and running watts. If you want RV AC service, you can go to RV Air Conditioner Repair, which is near me. I hope you get good service.

Example calculations for various RV air conditioner sizes

  • Small RV with a 3,500-watt air conditioner:
  •  Starting Wattage: 3,500 watts
  •  Running Watts: 1,500 Watts
  •  Total watts: 5,000 watts
  •  Larger RVs with a 4,000-watt air conditioner and extra appliances:
  •  Starting Wattage (Air Conditioner): 4,000 Watts
  •  Running Watts (Air Conditioner): 2,000 Watts
  •  Running wattage (additional equipment): 1,000 watts
  •  Total watts: 7,000 watts
  •  Recommendations for different situations

Small RV with single air conditioner

For small RVs equipped with a single air conditioner, a generator rated at about 5,000 to 6,000 watts is sufficient. This size provides enough power to comfortably start and run the air conditioner along with other essential appliances.

Large RV with multiple appliances

If you have a large RV with multiple appliances running simultaneously, choose a generator with a higher-rated wattage, usually between 7,000 and 8,000 watts. This ensures sufficient power to meet increased demand without overloading the generator.

High altitude camping

When camping at high altitudes or in hot climates, consider choosing a slightly larger generator to reduce engine performance. Additionally, investing in an inverter generator, which adjusts its engine speed based on power demand, can improve fuel efficiency and overall performance.

Types of generators

Inverter generator vs conventional generator

Inverter generators offer several advantages over conventional generators, including quieter operation, cleaner power output, and improved fuel efficiency. Although they tend to be more expensive, their benefits make them an attractive option for RV camping.

Portable vs. built-in generators

Portable generators are versatile and can be moved around as needed, making them ideal for RV use. However, built-in generators, often integrated into larger RVs, offer the convenience of permanent installation and can provide higher power output.

Tips for optimal performance

To ensure optimal performance and longevity of your generator and air conditioner, follow these tips:

Proper Maintenance: Service and maintain your generator regularly according to the manufacturer’s guidelines.

Energy conservation: Reduce energy consumption by using energy-efficient appliances and turning off unnecessary electronics when not in use.

Safety Precautions: Operate the generator in a well-ventilated area away from flammable materials and never overload it beyond its rated capacity.

Conclusion

Choosing the right size generator for your 30 amp RV air conditioner is essential to a comfortable and enjoyable camping experience. By considering factors such as wattage requirements, generator type, and environmental conditions, you can select the perfect generator to meet your needs. Be sure to prioritize safety and maintenance to ensure reliable performance on your outdoor adventures.

Frequently Asked Questions (Frequently Asked Questions)

1. Can I run my 30 amp RV air conditioner on a small generator?

It is not recommended. Undersized generators can struggle to effectively power the air conditioner, leading to potential damage and frequent outages.

2. What if my RV has a 50 amp electrical system?

If your RV has a 50-amp electrical system, you will need a generator capable of providing enough power for your high-amperage requirements.

3. Are inverter generators worth the extra cost?

Inverter generators offer several benefits, including quiet operation and improved fuel efficiency, making them a worthwhile investment for many RV enthusiasts.

4. How do I determine the elevation of my camping location?

You can use a GPS device or consult online resources to determine the elevation of your camping destination.

5. Can I use a portable generator indoors?

No, portable generators should never be used indoors due to the risk of carbon monoxide poisoning. Always operate the generator in a well-ventilated outdoor area.

How Do you Reset an RV Air Conditioner

How Do you Reset an RV Air Conditioner

For RV enthusiasts, comfort on the road is paramount, especially on hot summer days. RV air conditioning plays an important role in ensuring a pleasant interior temperature while traveling or camping. However, like any other appliance, RV air conditioners can experience problems that require a reset to restore optimal performance. In this article, we’ll provide you with a comprehensive guide on how to reset your RV air conditioner, ensuring you stay cool and comfortable during your trip.

Understanding Reset Requirements:

Before diving into the reset process, it’s essential to understand why you need to reset your RV air conditioner. Common causes include electrical faults, frozen coils, or simply the need to recalibrate the system. A reset helps clear any temporary faults and restores the air conditioner to its default settings, allowing it to operate efficiently.

Step-by-step instructions for resetting your RV air conditioner:

Turn off the power:

Start by turning off the power supply to your RV air conditioner. Locate the circuit breaker or switch in your RV’s electrical panel dedicated to the air conditioning unit and turn it off. This ensures safety during the reset process.

Wait a few minutes:

After turning off the power, allow the RV air conditioner to idle for a few minutes. This step is very important as it allows the system’s capacitors to discharge fully. Waiting ensures that any residual electricity is dissipated while resetting, preventing potential electrical hazards.

Turn the power back on:

After you’ve waited a few minutes, it’s time to restore power to the RV air conditioner. Flip the circuit breaker or turn it back on to supply power to the unit. Make sure you follow proper safety protocols when handling electrical components.

Adjust the thermostat:

After power is restored, adjust the thermostat setting on your RV air conditioner. Set it to your desired temperature and make sure the mode is switched to “Cool” for air conditioner operation. This step ensures that the air conditioner works according to your comfort preferences.

Monitor for proper operation:

Once you have completed the reset and adjusted the thermostat settings, monitor the RV air conditioner for proper operation. Listen for the compressor kicking in and feel the cool air coming from the vents. If the air conditioner fails to work as expected, further troubleshooting may be required.

Inspect filters and vents:

When resetting the RV air conditioner, inspect and clean the air filter and vents. Clogged filters and vents can restrict airflow, affecting the air conditioner’s performance. Regular maintenance ensures optimal performance and extends the life of your RV air conditioning unit.

Seek professional help if needed:

Suppose resetting the RV air conditioner does not solve the problem, or you encounter any problems during the process. In that case, it is recommended to seek professional help. Qualified RV technicians have the skills and tools to diagnose and resolve any underlying problems effectively.

Conclusion:

Resetting your RV air conditioner is a simple but important maintenance task that ensures optimal performance and comfort during your trip. By following the step-by-step instructions outlined in this article, you can effectively reset your RV air conditioner and enjoy cool and fresh air wherever your adventure takes you. Be sure to prioritize safety and regular maintenance to keep your RV air conditioning system in top condition for years to come.

You may like also:

why is my rv air conditioner dripping water inside

Understanding the Problem: why is my rv air conditioner dripping water inside?

Problem identification

If water is dripping inside your RV from the air conditioner, it is extremely important to address the problem immediately. This problem can arise for a variety of reasons, from minor issues to potentially significant concerns.

Clogged drain line

A common cause of water leaks is a clogged drain line. Over time, dirt, debris, and algae can build up in drain lines, blocking the flow of water. As a result, water can back up and drip inside your RV.

Poor insulation

In some cases, insufficient insulation around air conditioner components can create condensation. When warm air from inside the RV comes in contact with the cold surface of the air conditioner, condensation occurs. Without proper insulation to contain this moisture, it can drip into the RV. If you need RV AC repair service, then go here: RV air conditioner repair near me.

Improper installation

Improper installation of air conditioning units can also contribute to water leakage problems. If the unit is not level or securely mounted, it may not drain properly, causing water to pool and leak inside the RV.

damaged material

Water leakage can also result from damage to key components such as the condensate pan or evaporator coil. Cracks, rust, or other types of deterioration can compromise the unit’s ability to collect and drain condensate effectively.

problem-solving

To solve the problem of water getting inside your RV from the air conditioner, consider the following steps:

Inspect the drain line: Check the drain line for signs of blockage or obstruction. Use a wet/dry vacuum or pipe cleaner to remove any debris that may clog it.

Clean the unit: Clean the air conditioner unit regularly to prevent dirt and debris from accumulating. This includes cleaning the condensate pan, evaporator coil, and surrounding components.

Check insulation: Make sure the air conditioner unit is adequately insulated to prevent condensation from forming. Replace any worn or damaged insulation as needed.

Check Installation: Double-check to make sure the installation of the air conditioner unit is level and securely mounted. Make any necessary adjustments to improve drainage and prevent water leakage.

Repair or replace damaged components: If any components are damaged or deteriorated, repair or replace them immediately to restore unit performance and prevent further water leakage.

Conclusion

Water dripping inside your RV from the air conditioner can be a frustrating and potentially harmful problem. By understanding the potential causes and taking proactive steps to address them, you can prevent water damage and ensure your RV stays comfortable and dry. Regular maintenance and prompt repairs are key to keeping your air conditioner working efficiently and effectively.

You may like also:

How do i make my RV air conditioner colder

How do i make my RV air conditioner colder

Regarding RVing, nothing beats the relief of stepping into a cool, refreshing environment after a day in the sun. However, if your RV air conditioner isn’t delivering the cool blast you want, it’s time to take action. Let’s take a look at practical techniques for maximizing the cooling potential of your RV’s air conditioning system.

Cleanliness is coolness: Start with maintenance.

Proper maintenance is paramount to optimal air conditioning performance. Start by cleaning or superseding the air filter regularly. A clogged filter blocks airflow, hindering cooling efficiency. Additionally, make sure the condenser coils are clean and free of debris. This simple maintenance routine can significantly increase cooling capacity.

Stop leaks: Keep cool air.

Inspect your RV for any potential leaks that could compromise the performance of your air conditioning system. Seal gaps in windows, doors, vents, and any other openings with weatherstripping or caulking. By preventing cold air from escaping and warm air from infiltrating, you maintain a consistent, comfortable interior temperature.

Optimize Airflow: Improve circulation.

Maximize airflow in your RV by strategically placing fans. Ceiling fans can help distribute cool air evenly throughout the space, while portable fans can target specific areas for instant relief. Additionally, consider installing vent covers to control airflow and prevent drafts, especially in windy conditions.

Harness the power of shade: Combat solar heat gain.

Protect your RV from direct sunlight by parking in a shaded area whenever possible. Use awnings, window coverings, or outdoor sunshades to reduce solar heat gain. By reducing the amount of heat absorbed by your RV, you will reduce the workload on your air conditioner, allowing it to work more efficiently.

Upgrade for efficiency: Invest in energy-efficient appliances

Consider upgrading to a newer, more energy-efficient RV air conditioner if your current unit is older. Modern models use advanced technology that provides higher cooling performance with lower energy consumption. Although initially an investment, the long-term savings on energy bills make it worthwhile.

Conclusion: 

Achieving optimal cooling in your RV air conditioner is within reach with the right techniques and maintenance routines. By prioritizing cleanliness, closing leaks, increasing airflow, reducing solar heat gain, and investing in energy-efficient equipment, you can create a cool and comfortable sanctuary on your trip. So, get ready, stay calm, and embark on your next adventure with confidence!

How to repair RV air conditioner shroud

How to repair RV air conditioner shroud

Repairing an RV air conditioner shroud can be a relatively simple task, and it’s essential to address any damage promptly to maintain the unit’s efficiency and protect it from the elements. Here’s a step-by-step guide on how to repair an RV air conditioner shroud:

Materials Needed:

  • Fiberglass repair kit or ABS plastic welding kit (depending on the shroud material)
  •  Sandpaper
  •  Cleaning solution (e.g., isopropyl alcohol)
  •  Cloth or sponge
  •  Masking tape
  •  UV-resistant spray paint (matching the shroud color)

Steps:

Assessment:

  • Inspect the RV air conditioner shroud for cracks, holes, or other damage.
  •  Identify the shroud material (commonly fiberglass or ABS plastic).

Clean the Shroud:

  • Wipe the damaged area with a cleaning solution, such as isopropyl alcohol, to remove dirt, grime, and any residue.

Prepare the Surface:

  • Use sandpaper to roughen the damaged area slightly. This helps the repair material adhere better.

Repair with Fiberglass Kit (for Fiberglass Shrouds):

  • If the shroud is made of fiberglass, follow the instructions on the fiberglass repair kit.
  •  Apply the fiberglass repair resin or epoxy to the damaged area.
  •  Place the fiberglass mesh or fabric over the resin, ensuring full coverage.
  •  Apply another layer of resin over the mesh and smooth it out.
  •  Allow the repair to cure according to the kit instructions.

Repair with ABS Plastic Welding Kit (for ABS Plastic Shrouds):

  • If the shroud is made of ABS plastic, use an ABS plastic welding kit.
  •  Clean the damaged area thoroughly.
  •  Follow the kit instructions to weld the plastic together, filling any cracks or holes.

Sand and Smooth:

  • Once the repair has fully cured or dried, use sandpaper to smooth out any rough edges or uneven surfaces.

Masking and Painting:

  • Mask off the repaired area with masking tape to protect the surrounding shroud.
  •  Use UV-resistant spray paint in a color that matches the shroud to paint over the repaired area.
  •  Follow the paint manufacturer’s instructions regarding drying and curing times.

Final Inspection:

  • Once the paint has dried and cured, inspect the repaired area to ensure it blends seamlessly with the rest of the shroud.

By following these steps, you can effectively repair your RV air conditioner shroud, providing it remains sturdy and visually appealing. Regular maintenance and prompt repairs contribute to the longevity of your RV’s air conditioning system.

You may like also:

RV Air Conditioner Repair

Keeping Cool on the Road: A Comprehensive Guide to RV Air Conditioner Repair

Embarking on a road trip in your RV is an exciting adventure, but when the heat starts to rise, a malfunctioning air conditioner can quickly make your journey uncomfortable. In this comprehensive guide, we’ll discuss common issues with RV air conditioners and provide practical tips for troubleshooting and repair.

Understanding Your RV Air Conditioner:

  • Before delving into repairs, it’s essential to have a basic understanding of how your RV air conditioner operates. Most RV air conditioners work similarly to those found in homes, utilizing a compressor, condenser, evaporator, and fan to cool the air. Familiarizing yourself with these components can make troubleshooting more straightforward.

Common Issues and Solutions:

No Power or Electrical Problems:

  • Check the power source and ensure proper connections.
  •  Inspect fuses and breakers in the RV electrical panel.
  •  Verify the thermostat settings.

Poor Cooling Performance:

  • Clean or replace air filters for improved airflow.
  •  Remove obstructions from air intake and exhaust vents.
  •  Clean evaporator and condenser coils to enhance heat exchange.

Strange Noises:

  • Inspect fan blades for obstructions.
  •  Tighten loose bolts or screws.
  •  Lubricate the motor and fan bearings if necessary.

Refrigerant Issues:

  • Consult a professional for suspected refrigerant leaks.
  •  Check for ice buildup on evaporator coils.

Thermostat Problems:

  • Verify proper thermostat functioning and temperature settings.
  •  Replace thermostat batteries if applicable.

Water Leaks:

  • The clear condensate drain of any clogs.
  •  Ensure the RV is level for proper drainage.

Preventive Maintenance Tips:

Regular maintenance is key to avoiding major issues. Consider the following:

  • Clean or replace air filters every few months.
  •  Inspect and clean coils at the beginning of each season.
  •  Keep the area around the air conditioner unit free from debris.

When to Seek Professional Help:

While many RV air conditioner issues can be resolved with DIY efforts, some may require professional assistance. If you’re uncertain about the problem or lack the necessary expertise, consult a qualified RV air conditioner technician.

Conclusion:

Maintaining a functional RV air conditioner is crucial for a comfortable and enjoyable road trip experience. By understanding the common issues and implementing preventive maintenance measures, you can keep your RV cool and your adventures stress-free. Remember, when in doubt, seek professional help to ensure the longevity of your RV air conditioning system. Safe travels!