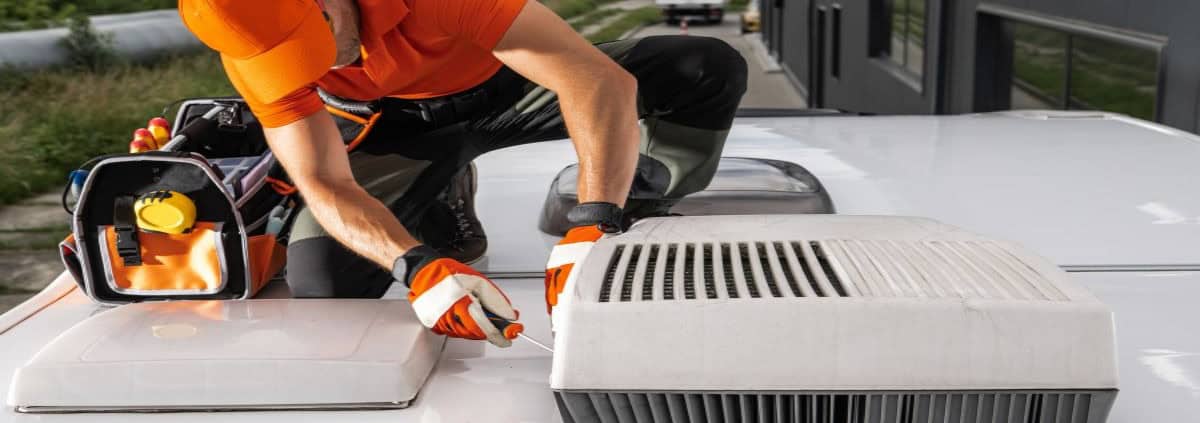
How to Protect AC Outdoor Unit from Sunlight
An air conditioning system works best when all its parts are in good condition. The outdoor unit, also known as the condenser, plays an important role in cooling by releasing heat absorbed from indoors. Constant exposure to direct sunlight can reduce its efficiency, increase energy use, and shorten its lifespan. Learning how to protect an AC outdoor unit from sunlight is essential for better performance and lower operating costs.
Why Sunlight Affects the Outdoor Unit
The outdoor unit contains the compressor, condenser coils, and fan. These components function by expelling heat to the outside environment. When exposed to direct sunlight for long hours, the surrounding temperature rises, making it harder for the system to release heat. This increases workload, electricity usage, and wear on the compressor. Excess heat can also lead to overheating, which may cause breakdowns and expensive repairs.
Ideal Placement of the Outdoor Unit
Proper installation location is one of the most effective ways to protect the outdoor unit. Placing the unit on the north or east side of a building reduces exposure to direct afternoon sun. If possible, avoid west-facing installation because afternoon sunlight is intense and lasts longer. The unit should always have enough space around it for air circulation. Good placement during installation can prevent future efficiency problems caused by overheating.
Using Shade Structures
Creating shade around the outdoor unit helps reduce direct sunlight exposure. Shade structures such as pergolas, awnings, or fences can block sunlight while still allowing airflow. The structure should not be placed too close to the unit, as restricted airflow reduces efficiency. A clearance of at least 2 to 3 feet is recommended on all sides. Materials such as lattice panels work well because they provide shade without blocking ventilation.
Planting Trees and Shrubs
Strategically planting trees or shrubs near the outdoor unit offers natural shade. Deciduous trees are particularly useful because they provide shade in summer and allow sunlight in winter. Plants should not be placed too close to the unit because falling leaves or debris can block airflow. Maintaining at least 3 feet of clearance around the unit prevents clogging and ensures easy access for maintenance.
Using Protective Covers
Specially designed AC covers can shield the unit from sunlight and dust. These covers are made from breathable materials that protect against heat while allowing airflow. Covers should be chosen carefully because fully sealed covers can trap moisture, leading to corrosion. Using a mesh-type protective cover ensures both shade and ventilation.
Heat-Reflective Materials
Installing reflective barriers or panels near the outdoor unit can minimize heat absorption. Light-colored surfaces or reflective paints deflect sunlight, lowering the temperature around the condenser. This technique is often used in hot regions to reduce the impact of extreme temperatures on outdoor equipment. Reflective protection is a cost-effective method to reduce overheating.
Importance of Maintenance
Even with proper protection, regular maintenance of the outdoor unit is necessary. Cleaning the condenser coils, removing dirt, and checking refrigerant levels keep the system efficient. Overheated or sun-exposed units may collect dust faster, making maintenance even more important. Professional servicing ensures that the compressor and coils are working effectively under all conditions.
FAQ
Why should I protect my AC outdoor unit from sunlight?
Direct sunlight increases the temperature around the condenser, making it work harder. This reduces efficiency, raises energy bills, and shortens its lifespan.
Can I cover my outdoor unit completely?
No. The unit needs airflow to release heat. Fully covering it can trap moisture and block ventilation. Always use breathable or mesh-type covers.
Is planting trees near the outdoor unit safe?
Yes, if done carefully. Trees and shrubs provide shade but should be kept at least 3 feet away to prevent debris buildup and airflow blockage.
Does shading really reduce energy use?
Yes. Shading can lower the surrounding temperature by several degrees. This reduces the workload of the compressor and cuts electricity usage.
Can I move my AC unit to a shaded area?
Relocation is possible but requires professional help. It involves handling refrigerant lines and electrical connections. Choosing the correct location initially is more cost-effective.
Conclusion
Protecting the AC outdoor unit from sunlight improves efficiency, reduces energy costs, and extends system life. Proper placement, shading with structures, planting trees, using protective covers, and applying reflective materials are effective strategies. Regular maintenance ensures that the system continues to work under all conditions. Preventing overheating not only saves money but also ensures consistent indoor comfort during hot weather.
How to Add Refrigerant to AC
Air conditioners work by using refrigerant to transfer heat and maintain a cool indoor environment. Over time, refrigerant levels may drop because of leaks or wear in the system. Low refrigerant can reduce cooling performance, increase energy use, and strain the AC unit. Understanding how to add refrigerant to an AC system can help maintain efficiency and prevent costly damage. This process requires care and precision to ensure proper function and safety.
Why Refrigerant is Important
Refrigerant is a chemical compound that absorbs and releases heat. In an AC system, it cycles through the compressor, condenser, and evaporator coils. When refrigerant levels are low, the cooling cycle becomes less effective. Signs of low refrigerant include warm air from vents, hissing noises, ice buildup on coils, and higher electricity bills. Maintaining correct levels ensures proper cooling, reduces energy waste, and extends system life.
Preparation Before Adding Refrigerant
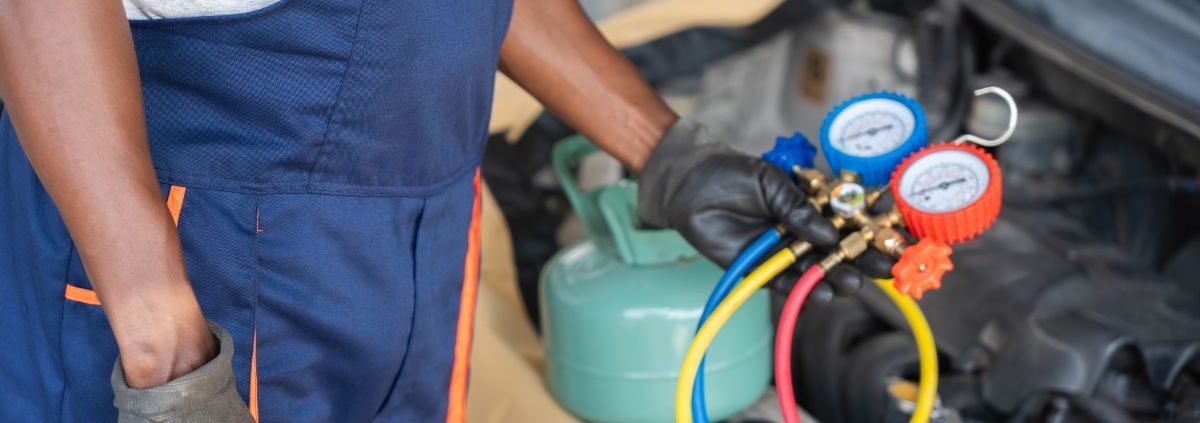
Before adding refrigerant, it is important to check for leaks. Adding refrigerant to a leaking system is not effective and can damage components. A pressure gauge and leak detection tools are often required. Ensure the AC unit is turned off and wear protective gear, including gloves and safety glasses. The correct type of refrigerant should always be used. Most residential units use R-410A, but older systems may use R-22. Using the wrong refrigerant can cause severe system failure.
Steps to Add Refrigerant to an AC
Adding refrigerant involves connecting a gauge set and refrigerant tank to the low-pressure port of the AC system. The following steps outline the process:
- Attach the pressure gauge to the service port on the low-pressure side of the system.
- Check the pressure reading against the recommended level in the manufacturer’s guide.
- Connect the refrigerant tank to the gauge set. Ensure all valves are closed before attachment.
- Slowly open the valve to allow refrigerant to enter the system. Add refrigerant in small amounts while monitoring the pressure.
- Stop adding refrigerant once the gauge shows the correct pressure level.
- Detach the equipment carefully and check the system for proper cooling performance.
It is important not to overfill the system. Too much refrigerant can increase pressure, damage the compressor, and reduce efficiency.
Safety Measures
Working with refrigerant requires caution. Refrigerants are pressurized chemicals that can cause frostbite, burns, or respiratory harm if mishandled. Always handle cylinders in an upright position and avoid direct contact with skin. The area should be well-ventilated to prevent buildup of harmful gases. If the system uses R-22 refrigerant, handling should only be performed by a licensed technician due to environmental regulations.
Professional Assistance
While it is possible to add refrigerant independently, professional service is recommended in most cases. Licensed technicians use advanced tools to detect leaks, measure precise refrigerant amounts, and ensure safe handling. Improper charging of refrigerant can lead to high repair costs and reduce system lifespan. Professional servicing also ensures compliance with environmental safety laws.
Benefits of Proper Refrigerant Levels
Maintaining the correct refrigerant level provides several advantages. Cooling efficiency improves, reducing indoor temperatures more quickly. Energy consumption decreases, lowering utility costs. Proper refrigerant levels also reduce strain on the compressor, preventing overheating and premature failure. A well-balanced system delivers consistent comfort and better air circulation throughout the home.
FAQ
Can I add refrigerant to my AC myself?
Yes, but it requires the right tools and safety measures. Many regions restrict handling refrigerants without certification. Professional service is often safer.
How do I know if my AC needs refrigerant?
Common signs include warm airflow, ice on coils, unusual noises, and increased energy bills. A pressure gauge can confirm low refrigerant levels.
What type of refrigerant does my AC use?
Most modern units use R-410A, while older systems may use R-22. The refrigerant type is usually listed on the unit’s label.
Is adding refrigerant the same as fixing leaks?
No. Leaks must be repaired before adding refrigerant. Adding refrigerant without repairing leaks will only give temporary results.
How often should refrigerant be added?
Refrigerant is not consumed under normal operation. If the system is sealed properly, refrigerant should not need to be added. Loss of refrigerant usually indicates a leak.
Conclusion
Refrigerant is vital for the proper function of any air conditioning system. Low levels reduce efficiency, increase costs, and cause strain on the compressor. Adding refrigerant requires preparation, correct tools, and attention to safety. While homeowners can perform the task, professional servicing is often the most reliable option. Maintaining the right refrigerant levels ensures better performance, lower energy use, and longer system lifespan. Regular maintenance and timely inspections help prevent issues and keep the AC running efficiently during hot weather.

How to Clean Coils on AC Unit
Air conditioning units rely on clean coils to function efficiently. Over time, dirt, dust, and debris build up on the coils, reducing performance and increasing energy consumption. Cleaning the coils helps maintain cooling efficiency, improves air quality, and extends the lifespan of the system.
Understanding AC Coils
Air conditioners have two main types of coils: the evaporator coil and the condenser coil. The evaporator coil is located inside the indoor unit and absorbs heat from indoor air. The condenser coil is part of the outdoor unit and releases the absorbed heat outside. Both coils must remain clean for the system to work properly.
Why Cleaning AC Coils Is Important
Dirty coils act as insulation, blocking heat transfer. This forces the system to run longer, using more electricity. Studies show that dirty coils can increase energy consumption by up to 30%. Regular cleaning helps:
- Improve cooling efficiency.
- Reduce energy bills.
- Prevent system breakdowns.
- Extend the life of the air conditioner.
Tools and Materials Needed
Before starting, gather essential tools and materials:
- Screwdriver for removing panels.
- Soft brush or coil brush.
- Fin comb for straightening coil fins.
- Vacuum cleaner with a soft brush attachment.
- Commercial coil cleaner or mild detergent mixed with water.
- Garden hose with a spray nozzle for outdoor units.
- Safety gloves and protective eyewear.
Step-by-Step Guide to Cleaning AC Coils
Step 1: Turn Off Power
Always turn off the power to the air conditioning unit at the main switch or circuit breaker. This prevents electrical hazards during cleaning.
Step 2: Access the Coils
Remove the access panel from the indoor unit to reach the evaporator coil. For the outdoor condenser coil, remove the protective grille or panels.
Step 3: Remove Loose Dirt and Debris
Use a soft brush or a vacuum cleaner to remove dust, leaves, and dirt from the coil surface. Be gentle to avoid bending the delicate fins.
Step 4: Apply Coil Cleaner
Spray the commercial coil cleaner evenly across the coils. If using a homemade solution, mix mild detergent with warm water and apply with a spray bottle. Allow the solution to sit for 5 to 10 minutes to loosen dirt and grime.
Step 5: Rinse the Coils
For condenser coils, rinse thoroughly with a garden hose at low pressure. Avoid using high-pressure water, as it can damage the fins. Evaporator coils inside the unit can be wiped carefully with a damp cloth.
Step 6: Straighten Bent Fins
Use a fin comb to straighten any bent fins. Properly aligned fins help maintain airflow and cooling performance.
Step 7: Reassemble and Restore Power
Once the coils are dry and clean, reassemble the panels and restore power to the unit. Test the system to ensure it operates smoothly.
Maintenance Tips for Clean Coils
- Replace air filters every 1 to 3 months to prevent dirt buildup.
- Keep the area around the outdoor unit clear of plants and debris.
- Schedule professional maintenance at least once a year for deep cleaning.
Frequently Asked Questions
How often should AC coils be cleaned?
Coils should be cleaned at least once a year. In dusty or high-pollution areas, cleaning may be needed more frequently.
Can dirty coils damage the AC unit?
Yes, dirty coils can cause overheating, higher energy use, and even system failure if ignored for long periods.
Can I clean AC coils without removing them?
Yes, coils can be cleaned in place using coil cleaners and gentle brushing. Removal is not usually required.
Is professional cleaning necessary?
While basic cleaning can be done at home, professional servicing ensures thorough inspection and cleaning of hard-to-reach areas.
What happens if coils are not cleaned?
If left dirty, coils reduce cooling efficiency, increase electricity costs, and may shorten the unit’s lifespan.
Conclusion
Cleaning the coils on an AC unit is essential for maintaining performance and efficiency. Both evaporator and condenser coils need regular care to prevent dirt buildup. The process involves turning off power, accessing the coils, removing debris, applying cleaner, rinsing, and reassembling. Routine maintenance not only lowers energy consumption but also prolongs the system’s life and ensures reliable cooling.