
How to Cool House Without AC
Cooling a house without an air conditioner is possible using a combination of passive cooling, airflow management, and heat reduction strategies. Understanding the factors that contribute to indoor heat and applying practical methods can maintain a comfortable environment even during hot weather.
Use Natural Ventilation
Natural ventilation relies on air movement through windows, doors, and vents. Opening windows on opposite sides of the house creates cross-ventilation, allowing hot air to escape and cooler air to enter. Using vents near the floor and ceiling enhances airflow, as warm air rises and exits through higher openings while cooler air enters below.
Ceiling fans, floor fans, and window fans can amplify natural airflow. Fans create a wind-chill effect, making occupants feel cooler even if the indoor temperature remains the same. Strategically positioning fans near open windows can draw in cooler outdoor air at night or push hot indoor air outside during the day.
Block Heat From Entering
Preventing heat from entering the home reduces the need for active cooling. Curtains, blinds, and reflective window films can block direct sunlight. Using light-colored or heat-reflective shades minimizes solar heat gain through windows.
Insulating the attic, walls, and roof decreases heat transfer from the outside. Weatherstripping and sealing gaps around doors and windows prevent warm air infiltration. Planting shade trees or installing awnings outside windows further reduces direct sunlight and keeps the interior cooler.
Optimize Indoor Humidity
High indoor humidity increases the perception of heat. Using dehumidifiers lowers moisture levels, making the air feel cooler and more comfortable. Simple methods like placing buckets of ice in front of fans or using evaporative cooling trays can also reduce indoor heat through moisture evaporation.
Proper ventilation in kitchens and bathrooms removes excess humidity produced by cooking, showering, or laundry. Exhaust fans and open windows help expel warm, moist air quickly.
Create Cool Zones
Designating areas of the house as cool zones allows residents to stay comfortable without cooling the entire home. Lower floors are usually cooler because heat rises. Bedrooms and living areas can be prioritized by using fans or natural ventilation in these spaces.
Sleeping in lightweight, breathable fabrics such as cotton or linen enhances comfort. Using cooling mats or gel pillows provides localized relief from heat during hot nights.
Night Cooling
Outdoor temperatures are often lower at night. Opening windows and doors after sunset can flush out accumulated heat from the day. Closing windows early in the morning helps trap cooler air inside before the outdoor temperature rises.
Ceiling and floor fans can be used to circulate nighttime cool air throughout the house. Combining night ventilation with curtains or blinds during the day maintains cooler indoor temperatures for longer periods.
FAQ
Can I cool my house without electricity?
Yes. Natural ventilation, shading, insulation, and night cooling strategies can reduce indoor temperatures without using electricity.
Do fans really cool a house?
Fans do not lower temperature but increase airflow, creating a wind-chill effect that makes people feel cooler.
Are reflective window films effective?
Yes. Reflective films can block up to 80% of solar heat, reducing indoor temperatures significantly during peak sunlight hours.
Can plants help cool my house?
Yes. Trees, shrubs, and climbing plants provide shade and evapotranspiration, lowering outdoor and indoor temperatures.
Is it safe to sleep with windows open at night?
Yes, if security is considered. Using screens and limiting openings to upper floors or secured areas enhances safety while allowing airflow.
Conclusion
Cooling a house without air conditioning requires managing heat gain, enhancing airflow, and controlling indoor humidity. Using natural ventilation, fans, shading, insulation, and night cooling strategies can significantly reduce indoor temperatures. Creating cool zones, optimizing fabrics and bedding, and implementing simple evaporative methods provide additional comfort. Integrating multiple techniques ensures a cooler living environment while reducing energy consumption and maintaining indoor comfort even during hot weather. Proper planning, strategic airflow, and passive cooling methods make it possible to stay comfortable without relying on mechanical air conditioning.
What Is the Difference Between AC and DC
Understanding the difference between AC (Alternating Current) and DC (Direct Current) is essential in electrical engineering, electronics, and everyday applications. These two types of electrical current operate differently and are used in distinct situations depending on efficiency, safety, and device requirements.
What Is AC
Alternating Current (AC) is a type of electrical current in which the flow of electrons changes direction periodically. The voltage in AC circuits also reverses its polarity at regular intervals. In the United States, standard AC supplied to homes has a frequency of 60 Hz, meaning the current changes direction 60 times per second.
AC is widely used for power distribution because it can be transmitted efficiently over long distances. Transformers can easily increase or decrease AC voltage, reducing energy loss during transmission. Common applications of AC include household appliances, lighting, heating systems, and large motors.
The voltage in AC can vary continuously in a sinusoidal waveform, which allows flexible and efficient energy distribution. High-voltage AC transmission is preferred in power grids because it minimizes energy loss over hundreds of kilometers.
What Is DC
Direct Current (DC) is a type of electrical current where the flow of electrons is unidirectional, meaning it moves in a single direction. The voltage remains constant, unlike AC, which alternates. DC is commonly used in batteries, solar panels, electronic devices, and electric vehicles.
DC provides a stable voltage, making it ideal for devices that require constant power, such as laptops, LED lights, and mobile phones. Modern electronics often convert AC from wall outlets into DC to power internal circuits. DC is also used in low-voltage applications, where consistent voltage is necessary for proper operation.
Key Differences Between AC and DC
The main differences between AC and DC include flow direction, voltage variation, and applications. AC alternates direction periodically, while DC flows in one direction only. AC voltage varies in a waveform, whereas DC voltage is constant and stable.
Transmission efficiency is another difference. AC can travel long distances with minimal energy loss due to the use of transformers, while DC transmission over long distances traditionally required more complex technology. However, modern HVDC (High Voltage Direct Current) systems are used for specific long-distance applications.
Safety considerations also differ. AC can cause severe muscle contractions and may be more dangerous at lower voltages, while DC can create continuous burns but is often easier to control in low-voltage circuits.
Applications of AC and DC
AC is primarily used for residential, commercial, and industrial power supply. Household devices, large motors, air conditioners, and refrigerators rely on AC because it is convenient and cost-effective for high-power applications.
DC is used in battery-powered devices, electronics, solar power systems, and electric vehicles. Devices like smartphones, computers, LED lighting, and electric cars depend on DC for consistent and stable power. Power converters often transform AC from the grid into DC for these applications.
Some devices combine AC and DC technologies. For example, hybrid electric vehicles may use DC batteries to store energy but employ AC motors for propulsion. Similarly, renewable energy systems like solar panels generate DC, which is then converted to AC to feed into the power grid.
FAQ
Can AC be converted to DC?
Yes. Devices called rectifiers convert AC into DC for use in electronics, batteries, and other applications requiring constant voltage.
Can DC be converted to AC?
Yes. Inverters convert DC into AC, allowing battery power or solar energy to supply household appliances or the power grid.
Which is safer, AC or DC?
Both can be dangerous. AC can cause severe muscle contractions at lower voltages, while DC can create continuous burns. Safety depends on voltage, current, and exposure time.
Why is AC used for power transmission?
AC is efficient for long-distance transmission because voltage can be easily increased or decreased using transformers, minimizing energy loss.
Is DC used in homes?
DC is rarely supplied directly in homes. Most home devices requiring DC convert AC from the grid using adapters or power supplies.
Conclusion
The difference between AC and DC lies in current flow, voltage behavior, and application. AC alternates direction periodically and is used for household and industrial power distribution due to its efficiency in long-distance transmission. DC flows in one direction and provides stable voltage, making it ideal for batteries, electronics, and renewable energy systems. Understanding these differences helps in selecting the correct current type for various applications, ensures safe usage, and improves the efficiency of electrical and electronic systems. Modern technology often integrates both AC and DC, converting between the two as needed for optimal performance in devices and power systems.
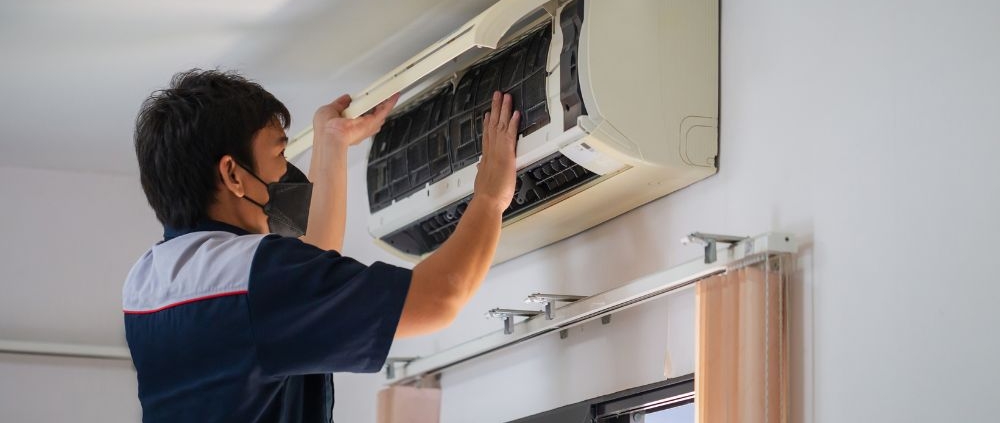
How to Clean AC Unit Outside
Cleaning the outdoor air conditioning (AC) unit is essential for maintaining efficient cooling, extending system life, and preventing costly repairs. Dirt, debris, and buildup on the condenser coils and fins can reduce airflow, increase energy consumption, and strain the compressor. Understanding the proper cleaning process ensures optimal performance and safety.
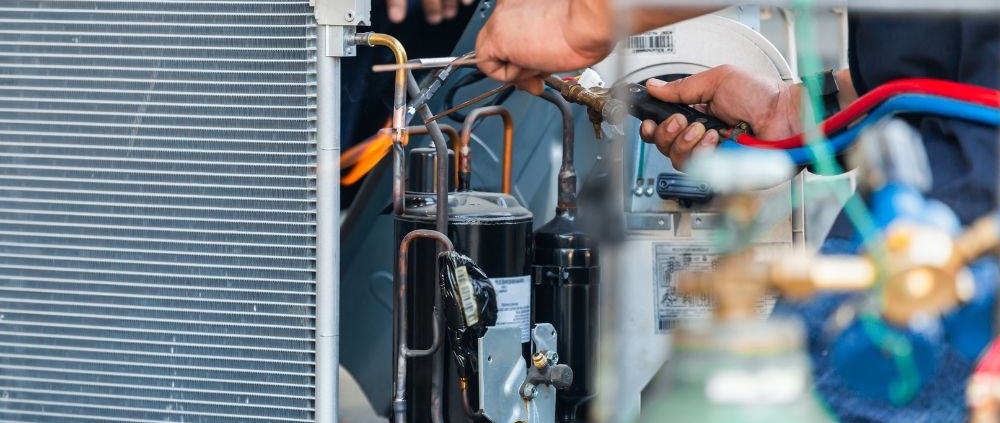
Why Cleaning the Outdoor AC Unit Is Important
The outdoor unit, also called the condenser unit, expels heat absorbed from inside the home. Debris such as leaves, grass clippings, dust, and pollen can accumulate on the coils and fins, reducing heat transfer. A dirty unit can increase electricity usage by 10–30%, overwork the compressor, and shorten the lifespan of the system.
Regular cleaning also prevents corrosion, insect nests, and blockages around the fan. Proper maintenance ensures that the unit operates at the correct efficiency levels and maintains consistent indoor temperatures.
Preparing to Clean the AC Unit
Turn off the power supply at the breaker to prevent accidents. Confirm that the disconnect switch near the unit is off. Wear protective gloves and safety glasses to avoid contact with sharp fins or chemical cleaners. Remove loose debris from the area surrounding the unit to allow for better airflow and safe cleaning.
Inspect the unit for damage, such as bent fins or signs of rust. Note areas that require careful attention during cleaning. Ensure the surrounding plants or landscaping are trimmed at least 2 feet away from the unit to maintain airflow and prevent future debris accumulation.
Cleaning the Outdoor AC Unit
Start by removing the protective grille or cover to access the coils and fan. Use a soft brush or vacuum to remove loose leaves, dust, and dirt. Avoid bending the delicate aluminum fins.
Use a garden hose with a gentle spray to rinse the coils from the outside in. Do not use a pressure washer, as excessive force can damage the fins or bend them, reducing efficiency. For stubborn dirt or buildup, a coil cleaner specifically designed for AC units can be applied according to the manufacturer’s instructions.
Clean the fan blades gently to remove dirt and debris. Inspect the fins for any bent areas. Straighten bent fins carefully with a fin comb, ensuring that airflow is not restricted. After cleaning, reassemble the grille or cover and ensure all screws and parts are securely fastened.
Check the surrounding area to remove any remaining debris that could obstruct airflow. Proper clearance around the unit, typically 2–3 feet, allows efficient heat dissipation and reduces strain on the system.
Maintenance Tips
Perform cleaning at least once a year, preferably before the cooling season begins. During heavy pollen or leaf seasons, more frequent inspections and cleaning may be necessary.
Regularly check the drain line and clear any blockages to prevent water buildup. Inspect refrigerant lines for insulation and ensure no leaks are present. Ensure electrical connections are tight and free from corrosion.
Trimming nearby plants, keeping debris away from the unit, and ensuring adequate ventilation around the condenser prevents dirt accumulation and improves efficiency. Routine professional maintenance every 1–2 years complements homeowner cleaning.
FAQ
Can I clean the AC unit myself?
Yes. Homeowners can clean debris, rinse coils, and straighten fins. For refrigerant issues or electrical problems, a licensed technician should be contacted.
How often should the outdoor AC unit be cleaned?
At least once a year, preferably before the cooling season. Units in dusty or leafy environments may require cleaning twice a year.
Can I use a pressure washer?
No. High pressure can bend fins or damage components. Use a garden hose with gentle spray instead.
What if the fins are bent?
Bent fins reduce airflow. Use a fin comb to straighten them carefully without damaging the coil.
Is professional cleaning necessary?
Professional service every 1–2 years ensures thorough inspection, refrigerant checks, and maintenance of electrical components, complementing homeowner cleaning.
Conclusion
Cleaning the outdoor AC unit is a critical step in maintaining energy efficiency, system performance, and longevity. Proper cleaning involves turning off the power, removing debris, rinsing the coils with a gentle hose, and straightening any bent fins. Keeping the area around the condenser clear, inspecting fan blades, and using appropriate coil cleaners ensures optimal heat transfer and airflow. Annual cleaning and regular maintenance prevent overworked compressors, reduce electricity consumption, and extend the life of the system. Combining homeowner cleaning with professional inspections guarantees a well-functioning and reliable air conditioning system throughout the year.
