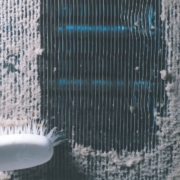
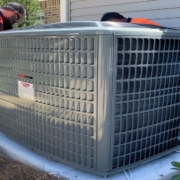
Air conditioning units rely on clean coils to function efficiently. Over time, dirt, dust, and debris build up on the coils, reducing performance and increasing energy consumption. Cleaning the coils helps maintain cooling efficiency, improves air quality, and extends the lifespan of the system.
Understanding AC Coils
Air conditioners have two main types of coils: the evaporator coil and the condenser coil. The evaporator coil is located inside the indoor unit and absorbs heat from indoor air. The condenser coil is part of the outdoor unit and releases the absorbed heat outside. Both coils must remain clean for the system to work properly.
Why Cleaning AC Coils Is Important
Dirty coils act as insulation, blocking heat transfer. This forces the system to run longer, using more electricity. Studies show that dirty coils can increase energy consumption by up to 30%. Regular cleaning helps:
Improve cooling efficiency.
Reduce energy bills.
Prevent system breakdowns.
Extend the life of the air conditioner.
Tools and Materials Needed
Before starting, gather essential tools and materials:
Screwdriver for removing panels.
Soft brush or coil brush.
Fin comb for straightening coil fins.
Vacuum cleaner with a soft brush attachment.
Commercial coil cleaner or mild detergent mixed with water.
Garden hose with a spray nozzle for outdoor units.
Safety gloves and protective eyewear.
Step-by-Step Guide to Cleaning AC Coils
Step 1: Turn Off Power
Always turn off the power to the air conditioning unit at the main switch or circuit breaker. This prevents electrical hazards during cleaning.
Step 2: Access the Coils
Remove the access panel from the indoor unit to reach the evaporator coil. For the outdoor condenser coil, remove the protective grille or panels.
Step 3: Remove Loose Dirt and Debris
Use a soft brush or a vacuum cleaner to remove dust, leaves, and dirt from the coil surface. Be gentle to avoid bending the delicate fins.
Step 4: Apply Coil Cleaner
Spray the commercial coil cleaner evenly across the coils. If using a homemade solution, mix mild detergent with warm water and apply with a spray bottle. Allow the solution to sit for 5 to 10 minutes to loosen dirt and grime.
Step 5: Rinse the Coils
For condenser coils, rinse thoroughly with a garden hose at low pressure. Avoid using high-pressure water, as it can damage the fins. Evaporator coils inside the unit can be wiped carefully with a damp cloth.
Step 6: Straighten Bent Fins
Use a fin comb to straighten any bent fins. Properly aligned fins help maintain airflow and cooling performance.
Step 7: Reassemble and Restore Power
Once the coils are dry and clean, reassemble the panels and restore power to the unit. Test the system to ensure it operates smoothly.
Maintenance Tips for Clean Coils
Replace air filters every 1 to 3 months to prevent dirt buildup.
Keep the area around the outdoor unit clear of plants and debris.
Schedule professional maintenance at least once a year for deep cleaning.
Frequently Asked Questions
How often should AC coils be cleaned? Coils should be cleaned at least once a year. In dusty or high-pollution areas, cleaning may be needed more frequently.
Can dirty coils damage the AC unit? Yes, dirty coils can cause overheating, higher energy use, and even system failure if ignored for long periods.
Can I clean AC coils without removing them? Yes, coils can be cleaned in place using coil cleaners and gentle brushing. Removal is not usually required.
Is professional cleaning necessary? While basic cleaning can be done at home, professional servicing ensures thorough inspection and cleaning of hard-to-reach areas.
What happens if coils are not cleaned? If left dirty, coils reduce cooling efficiency, increase electricity costs, and may shorten the unit’s lifespan.
Conclusion
Cleaning the coils on an AC unit is essential for maintaining performance and efficiency. Both evaporator and condenser coils need regular care to prevent dirt buildup. The process involves turning off power, accessing the coils, removing debris, applying cleaner, rinsing, and reassembling. Routine maintenance not only lowers energy consumption but also prolongs the system’s life and ensures reliable cooling.
https://www.premiercoolingandheating.com/wp-content/uploads/2025/09/How-to-Clean-Coils-on-AC-Unit.jpg6001200Va Imdadhttps://www.premiercoolingandheating.com/wp-content/uploads/2023/05/Logo-300x81.jpgVa Imdad2025-10-01 05:41:552025-09-29 05:43:49How to Clean Coils on AC Unit
An AC adapter is a device that supplies power to electronic equipment by converting alternating current (AC) from a wall outlet into direct current (DC). Most electronic devices such as laptops, routers, gaming consoles, and portable gadgets cannot use electricity directly from an outlet. They need stable and lower-voltage power, which is provided by the adapter.
How an AC Adapter Works
The electricity supplied from wall outlets is usually 110 to 240 volts AC, depending on the country. Electronic devices require much lower voltage, usually between 5 and 24 volts DC. The AC adapter reduces the high voltage to a safe level and converts it to DC so the device can operate correctly.
Inside an adapter, components such as transformers, rectifiers, and regulators perform the conversion process. The adapter also stabilizes the output to prevent fluctuations that could damage sensitive electronic circuits.
Types of AC Adapters
Standard AC Adapters
These are commonly used for laptops, monitors, and other household electronics. They have a fixed voltage output designed for specific devices.
Universal AC Adapters
Universal adapters can power different devices because they offer adjustable voltage and interchangeable connector tips. They are often used as replacements when the original adapter is unavailable.
USB AC Adapters
These are small adapters that convert AC power into low-voltage DC through a USB port. They are widely used for charging smartphones, tablets, and portable electronics.
Key Features of an AC Adapter
Input Voltage: The range of AC voltage it accepts, usually 100–240V.
Output Voltage: The DC voltage delivered to the device, such as 12V or 19V.
Current Rating: Measured in amperes (A), showing how much current the adapter can supply.
Connector Type: The plug that fits into the device, which varies by brand and model.
Matching these specifications is important because using the wrong adapter can damage the device or reduce performance.
Importance of an AC Adapter
AC adapters are essential for safe and efficient operation of electronics. They:
Protect devices from power surges.
Ensure the right voltage and current supply.
Improve portability by allowing lightweight designs without built-in power supplies.
Enable global compatibility, as many adapters support a wide input voltage range for international use.
Frequently Asked Questions
What is the difference between an AC adapter and a charger? A charger both converts power and charges a battery, while an AC adapter only supplies power to operate a device. Some adapters also function as chargers when connected to rechargeable batteries.
Can I use any AC adapter for my device? No, the voltage, current, and connector type must match the device’s requirements. Using the wrong adapter can cause overheating or permanent damage.
Why does my AC adapter get hot? It gets warm because electrical components inside generate heat during power conversion. Mild heat is normal, but excessive heat may indicate a problem.
Are AC adapters universal? Some adapters are universal, but most are designed for specific devices. Always check the specifications before using an adapter with another device.
How long do AC adapters last? The lifespan depends on usage and quality. A well-made adapter can last several years, but wear and tear, overheating, or electrical surges may shorten its life.
Conclusion
An AC adapter is a power supply device that converts high-voltage alternating current from wall outlets into low-voltage direct current required by electronics. It ensures devices receive safe and stable power, protecting them from electrical damage. Different types of adapters exist, including standard, universal, and USB versions, each serving specific needs. Matching the correct voltage, current, and connector is essential for safe operation. AC adapters are vital for everyday electronics, making them an important part of modern technology.
https://www.premiercoolingandheating.com/wp-content/uploads/2025/09/What-Is-an-AC-Adapter.jpg6001200Va Imdadhttps://www.premiercoolingandheating.com/wp-content/uploads/2023/05/Logo-300x81.jpgVa Imdad2025-09-30 05:36:312025-09-29 05:41:45What Is an AC Adapter
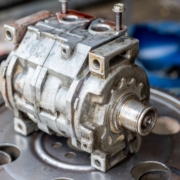
The air conditioning system in a car relies on several components, with the compressor being one of the most important. The AC compressor is powered by the engine through a belt, and it pressurizes the refrigerant that cools the cabin air. When the compressor is faulty, many drivers wonder if it will have an impact on the engine’s performance. Understanding the relationship between the AC compressor and the engine helps explain potential problems.
Role of the AC Compressor in a Vehicle
The AC compressor is often referred to as the heart of the air conditioning system. It compresses the refrigerant and circulates it through the condenser and evaporator. This process absorbs heat from the cabin and releases it outside. The compressor operates using power from the engine via the serpentine belt or accessory belt. Because it is directly connected, any problem with the compressor can place extra strain on the engine.
How a Bad AC Compressor Affects the Engine
Increased Engine Load
A failing compressor may not rotate smoothly. This adds resistance to the serpentine belt, forcing the engine to work harder. As a result, the engine may lose efficiency and consume more fuel.
Unusual Noises
A damaged compressor often produces grinding or squealing noises. These sounds can put stress on the belt and pulley system, which directly connects to the engine.
Engine Overheating
If the compressor seizes, it can lock up the belt drive system. This can affect other components powered by the same belt, such as the water pump or alternator. In some cases, this leads to overheating and reduced charging of the battery.
Reduced Power
When the AC is engaged, a defective compressor can demand excessive power from the engine. Drivers may notice sluggish acceleration or lower overall performance.
Signs of a Bad AC Compressor
Loud noises when the AC is switched on.
Weak or warm airflow from vents.
AC clutch not engaging.
Burning smell due to overheating components.
Increased engine strain when the AC is operating.
These signs indicate that the compressor is not functioning properly and may affect engine performance if ignored.
Can You Drive with a Bad AC Compressor?
Yes, a vehicle can still operate with a faulty compressor, but there are risks. If the compressor is seized, it can damage the serpentine belt and cause other systems, such as power steering or the alternator, to fail. Driving with a bad compressor may also increase fuel consumption. It is recommended to repair or replace the compressor promptly to avoid further damage.
Frequently Asked Questions
Does a bad AC compressor reduce fuel efficiency? Yes, a faulty compressor increases engine load, leading to higher fuel consumption.
Can a seized AC compressor stop the car from running? If the compressor seizes and locks the serpentine belt, it can disable critical engine-driven components, which may cause the car to stop running.
Will the engine overheat if the AC compressor is bad? Yes, in some cases. If the belt driving the compressor also powers the water pump, overheating may occur if the belt breaks or slips.
Can I bypass a bad AC compressor? Some vehicles allow the installation of a bypass pulley, which lets the serpentine belt run without powering the compressor. This is a temporary solution until repairs are made.
How much power does the AC compressor take from the engine? On average, the AC compressor uses about 5 to 10 horsepower, depending on the vehicle and compressor size. A damaged compressor may require even more power, which impacts performance.
Conclusion
A bad AC compressor can affect the engine because it is directly powered by the serpentine belt. Problems such as added resistance, noise, overheating, and reduced fuel efficiency are common. While a car can run with a faulty compressor, the risks include engine strain, belt damage, and overheating. Identifying symptoms early and repairing or replacing the compressor helps maintain both AC performance and engine health.
https://www.premiercoolingandheating.com/wp-content/uploads/2025/09/Will-a-Bad-AC-Compressor-Affect-the-Engine.jpg6001200Va Imdadhttps://www.premiercoolingandheating.com/wp-content/uploads/2023/05/Logo-300x81.jpgVa Imdad2025-09-29 05:45:552025-09-29 05:45:58Will a Bad AC Compressor Affect the Engine
Modern air conditioners often come with multiple modes designed to improve comfort and efficiency. One of these options is the dry mode. Many homeowners are unsure of what this setting does and how it differs from regular cooling. Understanding the purpose of dry mode helps users operate their system more effectively and maintain indoor air quality.
What Is Dry Mode on an AC
Dry mode is a setting that reduces humidity in the air without focusing on lowering the temperature as much as the cooling mode. Air conditioners remove moisture during normal operation, but the dry function emphasizes dehumidification. This makes the air feel cooler and more comfortable even if the temperature does not change significantly.
How Dry Mode Works
When dry mode is activated, the AC runs the compressor and fan at a slower pace. Instead of operating continuously to reach a set temperature, the system cycles on and off to remove excess moisture. The evaporator coil condenses water vapor from the air, which is then drained outside through the condensate line.
This process lowers humidity levels in the room while consuming less energy than full cooling mode. The temperature usually remains steady, but the reduced moisture makes the environment more comfortable.
Benefits of Using Dry Mode
Improved Comfort
High humidity makes a room feel warmer than it actually is. Reducing moisture levels helps occupants feel cooler even at the same temperature setting.
Energy Efficiency
Dry mode uses less power compared to cooling mode because the compressor does not run continuously. This helps reduce energy bills.
Protection Against Mold and Mildew
Moisture creates an ideal environment for mold and mildew growth. Running dry mode lowers indoor humidity, reducing the risk of mold buildup inside the home or AC unit.
Better Air Quality
Excess humidity can cause musty odors and increase allergens in the air. Removing moisture improves indoor air quality.
When to Use Dry Mode
Dry mode is most effective during humid weather when the temperature is not very high. It is ideal during rainy seasons or in coastal areas where humidity levels are elevated. However, it is not designed to replace cooling mode during extremely hot conditions, as its primary function is moisture control rather than temperature reduction.
Difference Between Cool Mode and Dry Mode
Cool Mode: Focuses on lowering the room temperature to the desired setting. The compressor runs longer to achieve and maintain cooling.
Dry Mode: Focuses on reducing humidity. The compressor and fan run intermittently, removing moisture while keeping energy use lower.
Both modes provide comfort but serve different purposes depending on indoor conditions.
Frequently Asked Questions
Does dry mode save electricity? Yes, dry mode consumes less energy compared to cooling mode because the compressor runs less often.
Can dry mode replace a dehumidifier? Dry mode reduces humidity effectively, but a dedicated dehumidifier is more powerful for spaces with consistently high moisture levels.
Is dry mode suitable for hot summer days? No, dry mode is not designed to handle high temperatures. It works best in mild but humid weather.
How long should I run my AC in dry mode? It depends on humidity levels, but running it for a few hours is usually enough to balance indoor moisture.
Does dry mode make the room colder? It may lower the temperature slightly, but its main function is reducing humidity rather than cooling the air.
Conclusion
Dry mode on an air conditioner is designed to reduce indoor humidity without heavily lowering the temperature. It works by cycling the compressor and fan to remove excess moisture, improving comfort and indoor air quality. This mode is especially useful in humid climates or during rainy seasons. While it cannot replace full cooling during hot conditions, it helps save energy, prevents mold growth, and makes the living space more comfortable.
https://www.premiercoolingandheating.com/wp-content/uploads/2025/09/What-Does-Dry-Mean-on-AC.jpg6001200Va Imdadhttps://www.premiercoolingandheating.com/wp-content/uploads/2023/05/Logo-300x81.jpgVa Imdad2025-09-29 05:36:182025-09-29 05:36:21What Does Dry Mean on AC
An air conditioning unit should provide cool and fresh air. When it starts releasing unpleasant odors, it indicates an issue that needs attention. Bad smells from an AC unit can range from musty odors to burning or chemical-like scents. Each type of smell points to a specific problem within the system. Understanding the causes helps identify the problem and prevent further damage.
Common Reasons an AC Smells Bad
Mold and Mildew Growth
Moisture often builds up inside air conditioning systems, especially in the evaporator coils and drain pans. When the moisture is not drained properly, it creates the perfect environment for mold and mildew. This usually produces a musty or damp smell.
Clogged Condensate Drain Line
The condensate drain line removes excess water from the system. When it becomes clogged with dirt, dust, or algae, water can back up inside the unit. This not only causes leaks but also produces foul odors.
Dirty Air Filters
Air filters trap dust, pollen, and debris. If filters are not changed regularly, they collect too much dirt and can produce a stale or dusty odor. Dirty filters also reduce airflow and efficiency.
Electrical Issues
A burning smell may indicate wiring problems, overheating components, or malfunctioning motors. This type of odor is serious and requires immediate professional inspection to prevent fire risks.
Dead Animals or Insects
Small rodents or insects can sometimes enter ductwork or the unit itself. If they become trapped and die, a strong foul smell spreads through the airflow.
Refrigerant Leaks
A chemical or sweet smell often points to a refrigerant leak. Refrigerants are crucial for cooling, and a leak not only reduces performance but can also be harmful to health.
How to Identify the Source of the Smell
The type of odor often reveals the underlying problem.
A musty smell usually means mold or mildew.
A burning odor often signals electrical problems.
A rotten smell suggests a dead animal in the system.
A chemical smell may point to refrigerant issues.
Technicians use inspections to confirm the cause. Checking filters, drain lines, ducts, and coils helps identify where the smell originates.
How to Prevent Bad Smells from AC Units
Regular maintenance is the most effective way to keep an AC system smelling fresh. Replacing air filters every 1 to 3 months, cleaning the drain line, and scheduling annual professional inspections reduce odor risks. Keeping ducts clean also prevents buildup of dust, mold, and bacteria that produce bad smells.
Frequently Asked Questions
Why does my AC smell like mildew? This often means moisture is trapped inside the system, allowing mold and mildew to grow. Cleaning coils, pans, and drain lines usually solves the issue.
Is a burning smell from the AC dangerous? Yes, a burning odor can signal electrical problems. It should be inspected immediately to avoid fire hazards.
Can dirty filters make my AC smell bad? Yes, dirty filters trap debris and bacteria, which can produce stale or dusty odors if not replaced regularly.
Why does my AC smell like chemicals? A chemical smell may indicate a refrigerant leak, which reduces cooling efficiency and can affect indoor air quality.
Can pests cause odors in my AC system? Yes, rodents or insects inside ducts or the unit can create strong foul smells if they die or leave waste behind.
Conclusion
A bad smell from an AC unit is a sign of underlying issues that need prompt attention. Mold growth, clogged drain lines, dirty filters, electrical problems, pests, or refrigerant leaks are common causes. Identifying the odor type helps determine the source of the problem. Regular maintenance, including filter changes and system cleaning, prevents most odor issues. Timely inspection by HVAC professionals ensures the system works safely, efficiently, and without unpleasant smells.
https://www.premiercoolingandheating.com/wp-content/uploads/2025/09/Why-Does-My-AC-Smell-Bad.jpg6001200Va Imdadhttps://www.premiercoolingandheating.com/wp-content/uploads/2023/05/Logo-300x81.jpgVa Imdad2025-09-29 05:34:152025-09-29 05:34:18Why Does My AC Smell Bad
Replacing an air conditioning unit is a major task that involves planning, preparation, and professional installation. Many homeowners want to know how much time it will take before their new system is ready to use. The installation timeline depends on several factors, including the type of unit, home size, ductwork condition, and the expertise of the HVAC technician.
Average Time for AC Unit Replacement
On average, replacing an AC unit takes between 4 to 8 hours. For a straightforward swap of an old unit with a new one of similar size and design, the process can often be completed in half a day. However, more complex replacements may extend to a full day or even two days.
Factors That Affect Installation Time
Type of AC Unit
Central air conditioning systems typically take longer to replace compared to smaller ductless mini-splits. A central system requires connecting to existing ductwork, electrical wiring, and refrigerant lines, while ductless units need less structural work.
Condition of Ductwork
If ductwork is in good condition, the installation is faster. However, damaged or outdated ducts may need repairs or replacement. This additional work can add 1 to 3 days depending on the extent of changes required.
Size of the Home
Larger homes often need bigger systems, which take more time to install. A small residential system may be installed within a few hours, while larger units designed for multi-level homes take longer.
Accessibility of the Unit Location
If the air conditioning system is located in an attic, crawl space, or tight area, technicians may need extra time for removal and installation. Easy-to-reach locations speed up the process.
Permits and Safety Checks
Some states and cities require permits for AC replacement. HVAC technicians may also need to perform safety checks and inspections, which can extend the total time.
Step-by-Step Timeline of AC Replacement
Removal of the Old Unit – Disconnecting the refrigerant, electrical wiring, and removing the old system usually takes 1 to 2 hours.
Preparation Work – This includes setting the new pad, adjusting duct connections, or preparing the site, which may take 1 to 3 hours.
Installing the New Unit – Placing the system, connecting refrigerant lines, wiring, and attaching ductwork usually requires 2 to 4 hours.
Testing and Inspection – After installation, the technician checks for leaks, measures airflow, tests electrical systems, and ensures the system runs efficiently. This step takes 1 to 2 hours.
Frequently Asked Questions
How long does it take to install a central AC system in a new home? Installing a brand-new central AC system in a home without existing ductwork can take 3 to 5 days because technicians need to design and install the duct system.
Can AC replacement be done in one day? Yes, most replacements where ductwork is already in place can be completed in a single day, usually within 6 to 8 hours.
Does replacing ductwork add more time? Yes, replacing ductwork can add several days to the project, depending on the size and complexity of the home.
How soon can you use the AC after replacement? Once installation and testing are complete, the system is ready to use immediately.
Is AC replacement faster for ductless systems? Yes, ductless mini-split systems can be installed in 4 to 6 hours, making them quicker than central systems.
Conclusion
Replacing an AC unit generally takes 4 to 8 hours, though certain conditions may extend the process. The type of unit, condition of ductwork, and accessibility of the installation site all influence the timeline. For most homeowners, AC replacement is completed in a single day, allowing the new system to operate efficiently and restore comfort quickly. Professional installation ensures safe operation, energy efficiency, and compliance with local regulations.
https://www.premiercoolingandheating.com/wp-content/uploads/2025/09/How-Long-Does-It-Take-to-Replace-an-AC-Unit.jpg6001200Va Imdadhttps://www.premiercoolingandheating.com/wp-content/uploads/2023/05/Logo-300x81.jpgVa Imdad2025-09-29 05:32:102025-09-29 05:32:26How Long Does It Take to Replace an AC Unit
Replacing an AC capacitor is a crucial maintenance task that can help ensure your air conditioning system operates efficiently. The AC capacitor plays a key role in powering the compressor and fan motor, making it an essential component for cooling your home effectively. When it fails, your air conditioner may struggle to start or fail to function entirely, leading to discomfort and potentially higher energy costs.
Learning how to replace an AC capacitor can save you significant repair expenses and reduce
downtime during the hotter months. This step-by-step guide will walk you through the process in five easy steps, ensuring you complete the replacement safely and correctly.
Before beginning, it’s essential to prioritize safety by following proper precautions and using the right tools. With careful attention and the information in this guide, you can restore your AC’s performance and maintain a comfortable indoor environment.
What is an AC Capacitor, and Why Does It Fail (https://www.premiercoolingandheating.com)
What is an AC Capacitor, and Why Does It Fail?
Definition and Function
An AC capacitor is an essential electrical component within an air conditioning system. It stores and releases electrical energy to power the compressor, fan, and blower motor, enabling the system to start and maintain operation efficiently. Capacitors come in two main types: start capacitors and run capacitors. Start capacitors provide the extra energy needed to start the system, while run capacitors ensure steady energy flow during operation.
Common Reasons for Failure
Over time, AC capacitors may fail due to several factors. Excessive heat exposure can degrade their internal components, especially during prolonged use in high temperatures. Power surges, such as those caused by lightning or electrical issues, can damage the capacitor’s delicate circuits. Age is another significant factor; most capacitors have a lifespan of 10–20 years, depending on quality and usage.
Other causes include manufacturing defects, physical damage, or improper installation. When a capacitor fails, signs like a humming noise, failure of the AC to start, or warm air instead of cool air indicate a potential problem. Identifying these symptoms early can help prevent further damage to the system.
Tools and Materials You’ll Need (https://www.premiercoolingandheating.com)
Tools and Materials You’ll Need
Essential Tools
Several tools are necessary to replace an AC capacitor safely and effectively. A screwdriver is required to remove the AC unit’s access panel, while needle-nose pliers are helpful for disconnecting and reconnecting wires securely. An insulated multimeter is crucial for testing the capacitor and ensuring the power is off before starting the replacement process. Insulated gloves are recommended to protect against accidental electrical contact during the procedure.
Replacement Capacitor
The new AC capacitor must match the specifications of the old one. This includes the capacitance value (measured in microfarads, µF), voltage rating, and type. These details are usually printed on the old capacitor’s label. Using a capacitor with incorrect specifications can lead to system malfunctions or damage.
Safety Gear
Safety should be prioritized during the replacement process. Protective gear, such as insulated gloves and safety goggles, minimizes the risk of electrical shocks and debris-related injuries. Ensuring proper lighting and ventilation further enhances safety while working on the unit.
Safety Precautions Before You Start (https://www.premiercoolingandheating.com)
Safety Precautions Before You Start
Turn Off Power to the AC Unit
Before starting any work, ensure the power to the AC unit is turned off at the main breaker box.
This step eliminates the risk of electric shock while handling the capacitor. Do not rely solely on the thermostat to turn off the system; always disconnect power directly from the breaker.
Verify Power is Off
After switching off the breaker, use a multimeter to confirm that no electrical current is running to the AC unit. Touch the multimeter’s probes to the terminals where the power connects to ensure the system is completely de-energized.
Discharge the Old Capacitor
Capacitors can hold a dangerous electrical charge even with the power turned off. Use an insulated screwdriver to carefully short the terminals of the old capacitor, discharging any residual electricity. This step is critical to avoid accidental shocks.
Prepare the Workspace
Work in a well-lit, ventilated area to improve visibility and reduce risks. Ensure the surrounding area is free of debris or obstructions that might cause accidents. If working outdoors, be cautious of weather conditions and avoid wet environments.
Wear Protective Gear
Always wear insulated gloves to protect your hands from accidental contact with electrical components. Safety goggles should shield your eyes from debris or sparks during the process. Proper protective gear is a non-negotiable safety measure for this task.
Step-by-Step Guide to Replacing an AC Capacitor (https://www.premiercoolingandheating.com)
Step-by-Step Guide to Replacing an AC Capacitor
Step 1: Access the AC Unit Panel
Locate the service panel on the outdoor AC unit. Remove the screws securing the panel using a
screwdriver. Carefully set the screws aside to avoid losing them. Once open, identify the capacitor, a cylindrical or oval component typically attached to the motor with wires leading to its terminals. Take a picture or note the placement of the wires to ensure correct reassembly.
Step 2: Disconnect and Remove the Faulty Capacitor
Ensure the power is off and the capacitor has been discharged. Use insulated gloves and needle-nose pliers to carefully disconnect each wire from the capacitor capacitors. Label the wires if necessary to remember their positions. Remove the mounting bracket or clip holding the capacitor in place, and take out the old capacitor.
Step 3: Install the New Capacitor
Check that the new capacitor matches the old capacitance and voltage ratings. Place the new capacitor in the same position as the old one and secure it with the mounting bracket or clip. Reconnect the wires to their corresponding terminals per the labels or photographs taken earlier. Ensure all connections are tight and secure.
Step 4: Test the Installation
After securing the wires, a multimeter confirms proper installation by measuring the new capacitor’s voltage and capacitance. Double-check the wiring to ensure there are no loose connections. Once verified, turn the power back on at the breaker box and run the AC system to confirm it starts and operates as expected.
Step 5: Secure and Close the Panel
Turn the power off again and carefully replace the service panel. Tighten the screws to ensure the panel is securely closed, protecting the internal components. Clear the area of any tools or debris and confirm the system is functioning efficiently.
Troubleshooting Common Issues After Replacement
AC Unit Fails to Start
If the AC does not start after you replace the capacitor, recheck the wiring connections. Ensure that each wire is securely attached to the correct terminal as per the capacitor’s labelling or your reference image. Verify that the power is restored at the breaker box and that the thermostat is set correctly.
Unusual Noises or Vibrations
Humming, buzzing, or other unusual sounds may indicate an improperly installed or defective capacitor. A multimeter will test the new capacitor’s voltage and capacitance. If the readings do not match the specified ratings, consider replacing the capacitor again with a correctly rated unit.
AC Running Inefficiently
Check for loose or damaged wires if the system starts but does not cool effectively or struggles to maintain consistent airflow. Inspect the fan motor and compressor for signs of strain, as the initial capacitor failure may have affected these components.
Frequent Tripping of the Breaker
A breaker that trips repeatedly after capacitor replacement may indicate an electrical issue beyond the capacitor. Check for short circuits, damaged wiring, or mismatched capacitor specifications. If the problem persists, consult a professional HVAC technician for further diagnosis.
Overheating or Shutdowns
Overheating during operation can occur if the capacitor is installed in a location with poor
ventilation or high ambient temperatures. To prevent thermal stress on the components, ensure the AC unit is placed in a shaded, well-ventilated area.
Maintenance Tips to Extend the Life of Your AC Capacitor
Perform Regular Inspections
Inspect the AC capacitor and surrounding components periodically for signs of wear, corrosion, or swelling. Early detection of damage helps prevent failures and prolongs the capacitor’s lifespan.
Clean the Area Around the Unit
Ensure the area surrounding the outdoor AC unit is free from debris, leaves, and dirt. Blockages can restrict airflow, causing the system to overheat and placing additional strain on the capacitor.
Monitor Voltage Levels
Fluctuations in voltage can stress the capacitor and lead to premature failure. Use a surge protector or voltage regulator to safeguard the AC unit against power surges and electrical instability.
Maintain Proper Ventilation
Place the outdoor unit in a well-ventilated location, preferably shaded, to minimize exposure to excessive heat. High temperatures accelerate capacitor deterioration, so keeping the unit cool can significantly extend its service life.
Schedule Routine Professional Maintenance
Regular servicing by an HVAC professional ensures all components, including the capacitor, are functioning efficiently. Professionals can detect potential issues early and perform necessary adjustments or replacements as needed.
Conclusion
Replacing an AC capacitor is a manageable task that can significantly improve the performance and efficiency of your air conditioning system. By following the proper steps, using the right tools, and taking necessary safety precautions, you can successfully replace a faulty capacitor and restore your AC unit to full functionality.
Maintaining your AC system through regular inspections and proper care will help prevent capacitor failure and extend the lifespan of your unit. Should you encounter any difficulties or complications during the process, consulting a professional HVAC technician is always a wise option to ensure long-term reliability and safety.
FAQs
How do I know if my AC capacitor could be better?
Signs of a bad capacitor include the AC unit failing to start, making a humming or buzzing sound without cooling, or producing warm air instead of cold. You may also notice the system cycling on and off frequently or experiencing irregular cooling performance. A multimeter can be used to test the capacitor’s functionality, confirming if it needs replacement.
Can I replace an AC capacitor myself?
Replacing an AC capacitor is a doable DIY project if you have basic electrical knowledge and the proper tools. However, safety precautions must be followed strictly, including disconnecting the power, discharging the capacitor, and using insulated tools. If you are unsure or uncomfortable with electrical work, hiring a professional HVAC technician is recommended.
What happens if I install the wrong capacitor?
Installing the wrong capacitor can lead to several issues, such as system inefficiency, potential damage to the compressor or motor, and even complete failure of the AC unit. To ensure proper functioning, it is essential to match the new capacitor’s specifications, including voltage and capacitance, to those of the original one.
How often should I replace my AC capacitor?
AC capacitors typically last 10 to 20 years, depending on the usage and environmental factors. Regular inspections can help identify signs of wear or failure before a full replacement is necessary. However, it may need replacing sooner if your AC unit experiences frequent power surges, excessive heat, or shows signs of capacitor issues.
https://www.premiercoolingandheating.com/wp-content/uploads/2024/12/Our-services.jpg7681366Va Imdadhttps://www.premiercoolingandheating.com/wp-content/uploads/2023/05/Logo-300x81.jpgVa Imdad2024-12-08 04:51:282024-12-08 05:00:57How to Replace an AC Capacitor in 5 Easy Steps
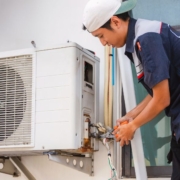
When the heat of summer hits Mission Hills, a functioning air conditioning system is essential for your comfort. At Mission Hills AC Repair, we understand the importance of keeping your AC unit in top condition, which is why we’re dedicated to providing efficient and reliable repair services to ensure your indoor comfort all year round.
Our Services
1. AC Repair: Our team of skilled technicians specializes in diagnosing and repairing a wide range of AC issues. Whether your AC unit is blowing warm air, leaking refrigerant, or experiencing electrical problems, we’ll promptly identify the issue and implement effective solutions to restore optimal cooling performance.
2. AC Maintenance: Regular maintenance is essential for preventing unexpected breakdowns and maximizing the lifespan of your AC system. Our comprehensive maintenance services include thorough inspections, cleaning of components, lubrication, and performance tuning. With our maintenance plans, you can enjoy peace of mind knowing that your AC is operating efficiently.
3. AC Installation: If it’s time for a new AC installation, we’ve got you covered. Our experts will assess your cooling needs, recommend the right system for your space, and handle the installation process with precision and care. Whether you need a central air system, ductless mini-split, or any other type of AC unit, we’ll ensure a seamless installation.
Why Choose Us?
1. Experienced Technicians: Our technicians are highly trained professionals with years of experience in the HVAC industry. They have the skills and expertise to tackle any AC repair or installation job efficiently and effectively.
2. Prompt Service: We understand the urgency of AC issues, especially during the hot summer months. That’s why we offer prompt and reliable service, with quick response times to address your AC emergencies.
3. Quality Workmanship: We take pride in our work and strive for excellence in everything we do. Whether it’s a minor repair or a major installation, you can trust us to deliver superior workmanship and long-lasting results.
4. Transparent Pricing: We believe in providing honest and transparent pricing for all our services. You can count on us for competitive rates and upfront pricing with no hidden fees or surprises.
Contact Us Today
Don’t let a malfunctioning AC system disrupt your comfort. Contact Mission Hills AC Repair today for reliable AC repair, maintenance, and installation services. Our friendly and knowledgeable team is ready to assist you and ensure your indoor comfort all year round.
FAQ:
Q1: What services do you offer? A1: We specialize in comprehensive AC repair, maintenance, and installation services. Our offerings include diagnostics, emergency repairs, regular maintenance plans, and new system installations.
Q2: Where are you located? A2: We are conveniently located in Mission Hills and serve the surrounding areas.
Q3: What brands do you service? A3: We service all major AC brands, including but not limited to Carrier, Trane, Lennox, Goodman, and Rheem.
Q4: What are your business hours? A4: We are open Monday through Friday from 8 AM to 6 PM, and Saturday from 9 AM to 3 PM. We also offer 24/7 emergency services.
Q5: How can I schedule an appointment? A5: You can schedule an appointment by calling us directly at [Phone Number], booking online through our website, or visiting our office in Mission Hills.
https://www.premiercoolingandheating.com/wp-content/uploads/2024/07/Your-Premier-Destination-for-AC-Repair-in-Mission-Hills.jpg6831024Va Imdadhttps://www.premiercoolingandheating.com/wp-content/uploads/2023/05/Logo-300x81.jpgVa Imdad2024-07-15 12:14:172024-07-15 12:14:18Your Premier Destination for AC Repair in Mission Hills
When the temperatures soar in Lakeview Torrance, a functioning air conditioning system becomes indispensable for your comfort. At Lakeview Torrance AC Repair, we understand the importance of keeping your AC running smoothly, which is why we’re dedicated to providing top-quality repair services to ensure your indoor comfort all year round.
Our Services
1. AC Repair: Our team of skilled technicians specializes in diagnosing and repairing a wide range of AC issues. Whether your AC unit is blowing warm air, leaking refrigerant, or experiencing electrical problems, we’ll promptly identify the issue and implement effective solutions to restore optimal cooling performance.
2. AC Maintenance: Regular maintenance is essential for preventing unexpected breakdowns and extending the lifespan of your AC system. Our comprehensive maintenance services include thorough inspections, cleaning of components, lubrication, and performance tuning. With our maintenance plans, you can enjoy peace of mind knowing that your AC is operating efficiently.
3. AC Installation: If it’s time for a new AC installation, we’ve got you covered. Our experts will assess your cooling needs, recommend the right system for your space, and handle the installation process with precision and care. Whether you need a central air system, ductless mini-split, or any other type of AC unit, we’ll ensure a seamless installation.
Why Choose Us?
1. Experienced Technicians: Our technicians are highly trained professionals with years of experience in the HVAC industry. They have the skills and expertise to tackle any AC repair or installation job efficiently and effectively.
2. Prompt Service: We understand the urgency of AC issues, especially during the hot summer months. That’s why we offer prompt and reliable service, with quick response times to address your AC emergencies.
3. Quality Workmanship: We take pride in our work and strive for excellence in everything we do. Whether it’s a minor repair or a major installation, you can trust us to deliver superior workmanship and long-lasting results.
4. Transparent Pricing: We believe in providing honest and transparent pricing for all our services. You can count on us for competitive rates and upfront pricing with no hidden fees or surprises.
Contact Us Today
Don’t let a malfunctioning AC system disrupt your comfort. Contact Lakeview Torrance AC Repair today for reliable AC repair, maintenance, and installation services. Our friendly and knowledgeable team is ready to assist you and ensure your indoor comfort all year round.
FAQ: Your Reliable Choice for AC Repair in Lakeview Torrance
1. What services do you offer for AC repair in Lakeview Torrance?
We offer a comprehensive range of AC repair services including diagnostics, repairs, maintenance, and replacements. Our team is equipped to handle all makes and models of air conditioning systems.
2. How quickly can you respond to an AC repair request?
We strive to respond to all AC repair requests within 24 hours. In emergency situations, we offer same-day service to ensure your comfort and safety.
3. Are your technicians certified?
Yes, all our technicians are fully certified and trained to handle a variety of AC systems. They undergo regular training to stay updated on the latest technologies and repair techniques.
4. Do you provide a warranty for your repair services?
Absolutely! We offer a 1-year warranty on all parts and labor for our AC repair services. This ensures peace of mind and guarantees the quality of our work.
5. What areas do you serve in Lakeview Torrance?
We proudly serve the entire Lakeview Torrance area, including surrounding neighborhoods and communities. Our goal is to provide prompt and reliable service to all our customers.
https://www.premiercoolingandheating.com/wp-content/uploads/2024/07/Your-Reliable-Choice-for-AC-Repair-in-Lakeview-Torrance.jpg525875Va Imdadhttps://www.premiercoolingandheating.com/wp-content/uploads/2023/05/Logo-300x81.jpgVa Imdad2024-07-08 16:43:232024-07-08 16:43:24Your Reliable Choice for AC Repair in Lakeview Torrance
Air conditioning service ensures your system operates efficiently, maintains indoor comfort, and prevents costly breakdowns. It involves inspecting, cleaning, and optimizing key components like filters, coils, and refrigerant levels. Regular servicing enhances energy efficiency, extends the unit’s lifespan, and improves air quality. This guide highlights the five essential aspects of air conditioning service, providing the insights you need to keep your AC running smoothly.
What Is an Air Conditioning Service?
Definition and Purpose
Air conditioning service refers to the routine maintenance performed on an AC unit to ensure it operates efficiently and reliably. The primary purpose is to keep the system clean, functional, and capable of maintaining desired indoor temperatures. This process prevents issues that could lead to breakdowns, higher energy costs, or reduced air quality.
Core Elements of Service
An air conditioning service involves a thorough inspection of the system’s components, cleaning parts like filters and coils, and performing diagnostic checks to identify any issues. Technicians focus on optimizing the unit’s performance by addressing wear and tear, checking refrigerant levels, and testing electrical components. This process ensures the system runs efficiently while minimizing the chances of malfunctions.
Why Is Regular AC Servicing Important?
Key Benefits
Regular AC servicing improves energy efficiency by ensuring components like filters and coils are clean and functioning properly. This reduces the strain on the system, leading to lower electricity bills. Maintenance also enhances indoor air quality by removing accumulated dust, pollen, and allergens, providing a healthier environment. Additionally, regular checks help identify minor issues before they escalate into costly repairs.
Longevity of Your Unit
Scheduled servicing extends the lifespan of an air conditioning system. By addressing issues like wear and tear, technicians prevent premature component failure. Proper lubrication of moving parts and regular cleaning reduce the system’s workload, ensuring it operates smoothly for years. Systems with consistent maintenance often last longer than those neglected, making it a cost-effective practice in the long term.
Key Components of an AC Service
Inspection and Cleaning
During servicing, technicians inspect filters, coils, and fins for dirt and debris. Filters are cleaned or replaced to improve airflow and maintain air quality. Coils and fins are checked for blockages that could reduce cooling efficiency and cleaned thoroughly to restore optimal performance.
Refrigerant Levels and Leak Detection
Refrigerant levels are measured to ensure they are within the recommended range. Low refrigerants can affect cooling and increase energy consumption. Technicians also inspect for leaks, which can harm the environment and reduce system efficiency, and repair them as needed.
Electrical Component Check
All electrical components, including thermostats, wiring, and connections, are tested for functionality. Faulty connections or worn-out wiring are repaired to prevent potential safety hazards. Proper calibration of the thermostat is also performed to ensure accurate temperature control.
Lubrication and Mechanical Adjustments
Moving parts like fans, motors, and belts are lubricated to minimize friction and wear. Mechanical adjustments, such as tightening loose parts and realigning components, are done to ensure smooth and efficient operation. These steps reduce the risk of breakdowns and improve overall performance.
Signs Your AC Needs Servicing
Common Symptoms
A drop in cooling efficiency is often the first sign that an AC needs servicing. If the system struggles to maintain the set temperature or blows warm air, it indicates potential issues like clogged filters or low refrigerant levels. Unusual noises, such as banging, hissing, or clicking, may signal loose components, leaks, or motor problems. Higher energy bills without increased usage suggest the system is overworking due to inefficiency.
Visual Indicators
Water pooling around the indoor unit can indicate clogged drainage lines, while ice buildup on coils points to restricted airflow or refrigerant problems. Dust and dirt accumulating around vents may indicate dirty filters or ductwork, which reduce air quality and system efficiency. These visible signs should prompt immediate attention to prevent further damage.
How Often Should You Service Your AC?
Standard Maintenance Schedule
Air conditioning systems should typically be serviced at least once a year. For residential units, an annual service before the summer season ensures the system is ready to handle peak usage. Commercial systems or units in heavy-use environments may require biannual maintenance to maintain optimal performance and address wear and tear.
Usage-Based Recommendations
In areas with extreme heat or prolonged cooling periods, more frequent servicing is recommended to ensure the system operates efficiently. Older units may also require additional maintenance to compensate for aging components. For moderate climates or units used occasionally, servicing once a year is usually sufficient to keep the system in good condition.
Conclusion:
Air conditioning service is essential for maintaining the efficiency, reliability, and lifespan of your system. Regular servicing ensures that all components, from filters to electrical parts, are clean, functional, and optimized for performance. By addressing potential issues early, servicing reduces the risk of costly repairs, improves energy efficiency, and enhances indoor air quality. For consistent comfort and long-term savings, professional maintenance is a crucial investment for any air conditioning system.
FAQs
Q: How often should I service my air conditioner?
A: Residential air conditioners should be serviced at least once a year, preferably before the start of the cooling season. Commercial units may require more frequent servicing due to heavier usage.
Q: Can I perform the air conditioning service myself?
A: While homeowners can perform some maintenance tasks, professional servicing is recommended for comprehensive inspections and repairs.
Q: What are the benefits of regular air conditioning service?
A: Regular servicing improves efficiency, extends the unit’s lifespan, and enhances indoor air quality by removing dust and allergens from the air.
Q: How do I know if my air conditioner needs servicing?
A: Signs that your air conditioner needs servicing include weak airflow, uneven cooling, and strange noises or odors from the unit.
Q: Is professional air conditioning service expensive?
A: The cost of professional air conditioning service varies depending on factors such as the type of unit and the extent of the service required. However, it is a worthwhile investment compared to repairs or premature unit replacement costs.
https://www.premiercoolingandheating.com/wp-content/uploads/2024/04/what-is-air-conditioning-service.jpg6001000Va Imdadhttps://www.premiercoolingandheating.com/wp-content/uploads/2023/05/Logo-300x81.jpgVa Imdad2024-04-23 18:40:542025-05-24 16:55:40What Is an Air Conditioning Service? 5 Key Things to Know