

Why Does My AC Compressor Shut Off After 2-3 Minutes
An air conditioner (AC) compressor is a key component that circulates refrigerant and enables the system to cool indoor air. If the compressor shuts off after just 2-3 minutes, it indicates a problem that can affect cooling efficiency, energy consumption, and system lifespan. Understanding the causes helps prevent further damage and ensures proper operation.
Common Causes of Short Cycling
Short cycling occurs when an AC turns on and off rapidly, usually within a few minutes. This issue can be caused by electrical, mechanical, or environmental factors. One common reason is an incorrect refrigerant charge. Low refrigerant levels reduce pressure in the system, causing the compressor to shut off to prevent damage. Overcharging can also create high pressure, triggering a similar response.
A malfunctioning thermostat can cause short cycling. If the thermostat inaccurately reads indoor temperature or has faulty wiring, it may signal the compressor to turn off prematurely. Incorrect thermostat placement near heat sources like sunlight or electronics can also lead to this problem.
Dirty or blocked air filters restrict airflow, forcing the compressor to overheat and shut down. Similarly, clogged evaporator coils reduce heat exchange, causing the system to strain. In some cases, electrical issues such as a faulty capacitor, relay, or contactor can prevent the compressor from running continuously. The capacitor provides the necessary starting and running power, and failure can lead to rapid shutdowns.
Compressor short cycling may also result from an oversized AC unit. A unit larger than the cooling requirements of the home reaches the set temperature too quickly and turns off repeatedly. Environmental factors, such as extreme heat, can exacerbate the issue by causing the system to overheat.
How to Identify the Problem
Observing the AC’s behavior helps identify the underlying cause. Check the duration of each cooling cycle and note temperature fluctuations. Inspect the air filter for dirt or blockage. Listen for unusual noises from the compressor, which may indicate mechanical or electrical issues. Checking refrigerant pressure requires specialized gauges and is usually performed by a licensed HVAC technician.
Regular maintenance records, including coil cleaning and refrigerant checks, provide insight into recurring problems. Identifying patterns helps determine whether the issue is electrical, mechanical, or related to airflow and sizing.
Preventive Measures
Maintaining proper refrigerant levels ensures the compressor operates within safe pressure ranges. Replace or clean air filters every 1-3 months depending on usage and indoor conditions. Clean evaporator and condenser coils to improve heat exchange and airflow. Installing a correctly sized AC unit for the home’s square footage prevents rapid temperature cycling. Ensure the thermostat is calibrated and located away from heat sources. Professional inspection of capacitors, relays, and wiring helps prevent electrical failures.
FAQ
What is short cycling in an AC?
Short cycling occurs when the AC compressor turns on and off rapidly, usually within a few minutes, reducing efficiency and increasing wear.
Can low refrigerant cause the compressor to shut off quickly?
Yes, insufficient refrigerant reduces system pressure, triggering the compressor to shut down to prevent damage.
Can a dirty air filter cause short cycling?
Yes. Restricted airflow from a clogged filter can cause the compressor to overheat and turn off prematurely.
Is an oversized AC unit a problem?
Yes. An oversized unit cools the space too quickly, leading to frequent on-off cycles that stress the compressor.
When should I call a professional?
If the compressor short cycles repeatedly, produces unusual noises, or refrigerant levels and electrical components need checking, contact a licensed HVAC technician.
Conclusion
An AC compressor shutting off after 2-3 minutes signals short cycling, which can stem from low or high refrigerant levels, thermostat issues, dirty filters, electrical faults, or incorrect unit sizing. Short cycling decreases cooling efficiency, increases energy use, and may damage the compressor over time. Regular maintenance, including coil cleaning, filter replacement, and refrigerant checks, helps prevent premature shutdowns. Accurate thermostat placement and correct AC sizing are essential for stable operation. Timely professional inspection ensures the system operates efficiently and extends its lifespan.
How to Clean AC Evaporator Coils Inside House
Evaporator coils are a critical part of a home air conditioning system. They absorb heat from indoor air, enabling the system to cool your home efficiently. Over time, these coils accumulate dust, dirt, and mold, which reduces performance, increases energy consumption, and may lead to system damage. Cleaning the AC evaporator coils ensures efficient cooling, lower energy costs, and improved air quality.
Importance of Cleaning Evaporator Coils
The evaporator coils are typically made of copper tubing with aluminum fins. When air passes over the coils, the refrigerant inside absorbs heat. Dirt and debris on the coils act as insulation, reducing heat transfer. This forces the system to work harder, consuming more electricity and causing premature wear. Accumulated mold and mildew can lead to unpleasant odors and trigger respiratory issues. Regular cleaning of the coils keeps the system running smoothly and extends its lifespan.
Steps to Clean AC Evaporator Coils
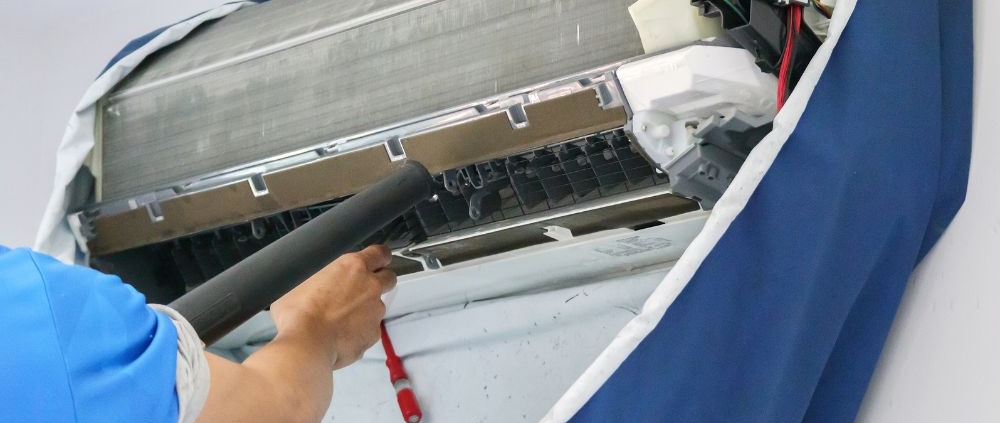
Cleaning indoor evaporator coils requires care because they are delicate and located inside the air handler or furnace. Start by turning off the HVAC system at the breaker to prevent electrical hazards. Remove the access panel to reach the coils. Use a flashlight to inspect the coils for dust, dirt, and mold.
Use a soft brush or a coil cleaning brush to gently remove loose debris from the fins. Avoid bending the aluminum fins, as this can reduce airflow. Next, apply a no-rinse foaming coil cleaner specifically designed for evaporator coils. These cleaners are available in spray cans or pump bottles and are formulated to break down dirt, grease, and biological growth without damaging the metal.
Allow the cleaner to sit for 5 to 10 minutes to dissolve the buildup. The cleaner will foam and carry dirt to the drain pan below. After the foam settles, inspect the coils again to ensure debris has loosened. Wipe any remaining dirt gently with a soft cloth. For heavily soiled coils, a professional cleaning may be necessary to prevent damage.
Ensure the drain pan and condensate drain line are clear. Clogged drains can cause water buildup, leading to leaks and mold growth. Reassemble the access panel and restore power to the system. Run the AC to check that it operates correctly and airflow is unobstructed.
Frequency of Cleaning
Evaporator coils should be inspected and cleaned at least once a year. Homes with pets, smokers, or high dust levels may require more frequent cleaning. Scheduling coil maintenance before peak cooling season ensures the system operates efficiently during hot months.
Tools and Materials Needed
Soft brush or coil cleaning brush
No-rinse foaming coil cleaner
Flashlight
Soft cloth or microfiber cloth
Screwdriver for access panel removal
Gloves and safety glasses for protection
Using proper tools and cleaners prevents damage to the delicate fins and ensures thorough cleaning.
FAQ
Can I use water to clean evaporator coils?
Water can be used, but excessive moisture may lead to mold growth. No-rinse coil cleaners are safer and more effective.
How do I know if the coils are dirty?
Reduced cooling, higher energy bills, and visible dust or mold on the coils indicate the need for cleaning.
Is professional cleaning necessary?
For heavily clogged or moldy coils, professional cleaning ensures safe and complete maintenance.
Can cleaning coils improve airflow?
Yes. Removing debris restores efficient heat transfer and allows proper airflow, reducing strain on the system.
How often should coils be inspected?
Once a year is standard, but homes with pets, smokers, or high dust may require inspections every six months.
Conclusion
Cleaning AC evaporator coils inside the house is vital for efficient cooling, energy savings, and better indoor air quality. Dirt, dust, and mold on the coils reduce heat transfer and increase strain on the system. Using a soft brush and no-rinse coil cleaner ensures safe and effective maintenance. Regular inspection, proper cleaning, and attention to the drain system keep the air conditioner running efficiently and extend its lifespan. Consistent maintenance reduces energy costs and improves overall comfort in the home.
How Often to Change AC Filter
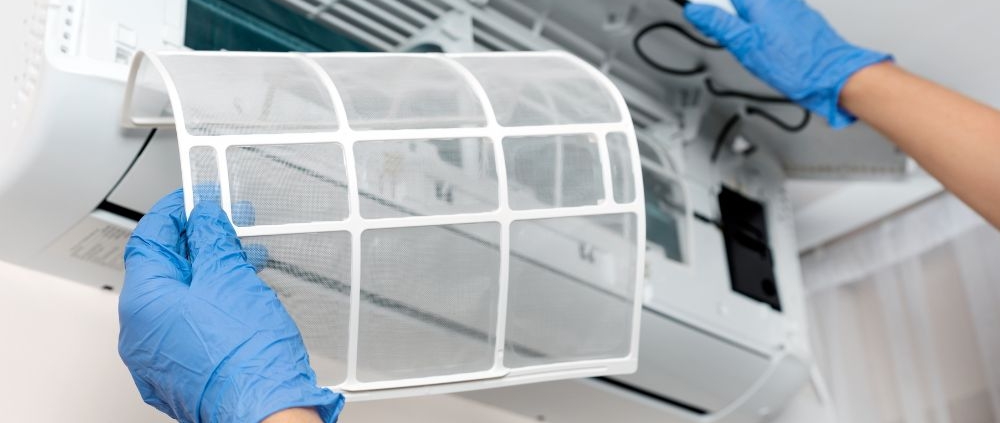
Air conditioning systems rely on clean filters to operate efficiently and maintain good indoor air quality. AC filters trap dust, pollen, pet dander, and other particles. Over time, these filters become clogged, reducing airflow, increasing energy consumption, and placing extra strain on the system. Knowing how often to change an AC filter is crucial for maintaining performance and longevity of the unit.
Importance of AC Filter Replacement
A clean AC filter allows air to flow freely through the system, helping the unit cool or heat the space efficiently. Dirty filters can cause the system to work harder, leading to higher electricity bills and potential component damage. They can also reduce indoor air quality, triggering allergies or respiratory issues. Most modern filters are designed to remove particles as small as 0.3 microns, including dust mites, pollen, and smoke, making timely replacement essential.
Recommended AC Filter Replacement Frequency
The frequency of changing an AC filter depends on the type of filter, system usage, household conditions, and environment. Standard recommendations are as follows:
Fiberglass Filters: These are the most basic type and typically need replacement every 30 days. They are less efficient at trapping smaller particles but are cost-effective for frequent replacement.
Pleated Filters: These have a larger surface area and higher efficiency. Replacement is usually every 60 to 90 days. Some high-efficiency pleated filters may last up to six months under moderate conditions.
High-Efficiency Filters: HEPA or electrostatic filters capture smaller particles and may last up to six months. However, in households with pets, smokers, or high dust levels, replacement every 60 to 90 days may be necessary.
Electronic Air Cleaners: These systems require periodic cleaning rather than full replacement. The recommended interval depends on the manufacturer’s instructions, generally every 3 to 6 months.
System usage affects filter life as well. Homes with AC running frequently, particularly during hot or cold seasons, may require more frequent replacement. In contrast, units used less often may maintain efficiency with less frequent changes.
Factors Influencing AC Filter Replacement
Several factors can shorten or lengthen the filter’s lifespan:
Pets: Homes with dogs, cats, or other animals generate more hair and dander, which clogs filters faster.
Air Quality: Areas with higher dust, pollen, or pollution levels may require more frequent changes.
Occupancy: Larger households produce more indoor particles and can necessitate more frequent replacement.
HVAC System Type: Central air systems, ductless mini-splits, and window units may have different filter types and capacities, influencing replacement frequency.
Signs a Filter Needs Replacement
Even if a filter has not reached the suggested replacement interval, certain signs indicate it may be time for a change:
Reduced airflow from vents
Unusual odors from the AC system
Increased dust accumulation on furniture
Frequent system cycling or longer cooling/heating times
Visible dirt or discoloration on the filter
Regular inspection every month can prevent the system from running with a clogged filter and maintain consistent performance.
FAQ
Can I clean an AC filter instead of replacing it?
Some reusable filters can be cleaned with water or a vacuum, but disposable filters must be replaced. Check the manufacturer’s guidelines.
Does changing the filter improve energy efficiency?
Yes. Clean filters reduce system strain, which can lower energy consumption by 5% to 15%.
Are all filters the same size?
No. Filters vary in dimensions and efficiency ratings. Always use the size recommended for the system.
Does one filter replacement schedule fit all homes?
No. Factors such as pets, occupancy, and environmental conditions require adjustments to the replacement schedule.
Can neglecting filter replacement damage the AC?
Yes. Clogged filters can cause coil freezing, compressor damage, and reduced system lifespan.
Conclusion
Replacing AC filters regularly is essential for maintaining system efficiency, reducing energy costs, and improving indoor air quality. Standard schedules range from 30 days for basic fiberglass filters to 90 days or more for pleated or high-efficiency filters, but environmental and household factors can require more frequent changes. Monitoring airflow, inspecting filters visually, and adhering to manufacturer recommendations ensures the air conditioning system operates effectively and lasts longer. Consistent maintenance not only protects the system but also supports a healthier indoor environment.
